How to Add Code Snippets in WordPress (100% Free)
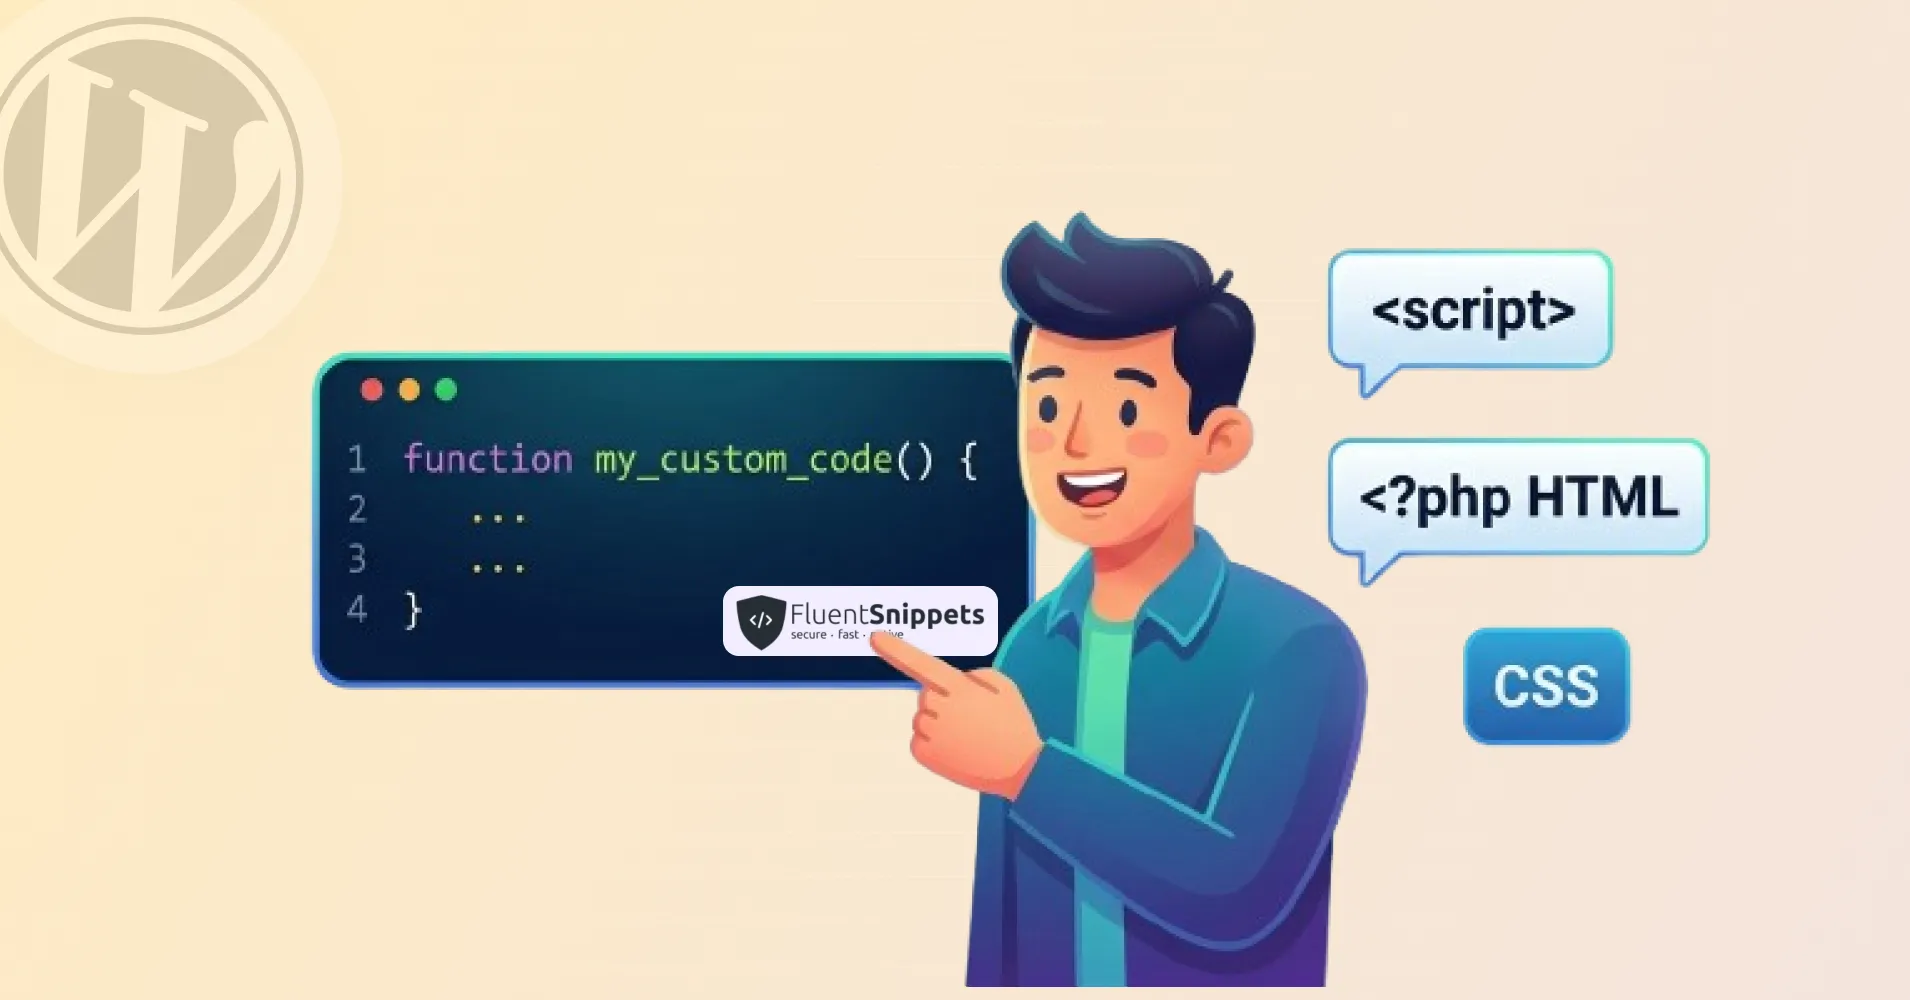
Want to add custom code to your WordPress site without breaking it? This guide covers two reliable methods, using the beginner-friendly FluentSnippets plugin and editing theme files via a child theme.
Whether you’re a beginner or a seasoned developer, you’ll find a safe, efficient approach that works for you.
- Custom code snippets extend WordPress functionality without bloating your site with unnecessary plugins — a smarter, leaner approach to adding features.
- FluentSnippets plugin is the easiest method for beginners and intermediates to safely add PHP, CSS, and JavaScript snippets directly from the WordPress dashboard.
- Always back up your site before adding any custom code — if something breaks, you can instantly restore the previous version without losing data.
- Child themes protect your customizations — any code added to a child theme’s
functions.phpstays intact even if the parent theme is updated or changed. - Advanced Conditional Logic in FluentSnippets lets you control exactly when and where snippets run, giving you precision without touching core files.
- Direct theme file editing remains an option for experienced users, but it carries higher risk — making the plugin-based approach the safer default for most scenarios.
Ways to Add Custom Codes
There are multiple ways you can add custom codes to your WordPress website. Before discussing that part, I want you to install a WordPress backup plugin so that your new codes don’t break anything in your site.
If it goes wrong, you can restore the previous version from the backup and take your site to the earlier stage. That being said, another aspect of adding code snippets is where to add them.
Usually, you can add codes to theme template files, such as index.php. There are other PHP files where you can paste your codes directly.
The most popular method, I guess, is adding snippets to functions.php. At least, that’s what you’ll see across most of the tutorials available out there.
But I’ll show the best method that will help you most when you change the theme or you want to stop the functionality at a time.
However, here are some of the methods you can use to add your custom code to your WordPress site.
How to Add Code Snippets in WordPress (FluentSnippets)
The first step is adding custom code with a plugin called FluentSnippets. By the way, this plugin was developed by us (your favorite WPManageNinja). If you’re already a Fluent user (using any Fluent products), you know how grand quality our plugins maintain.
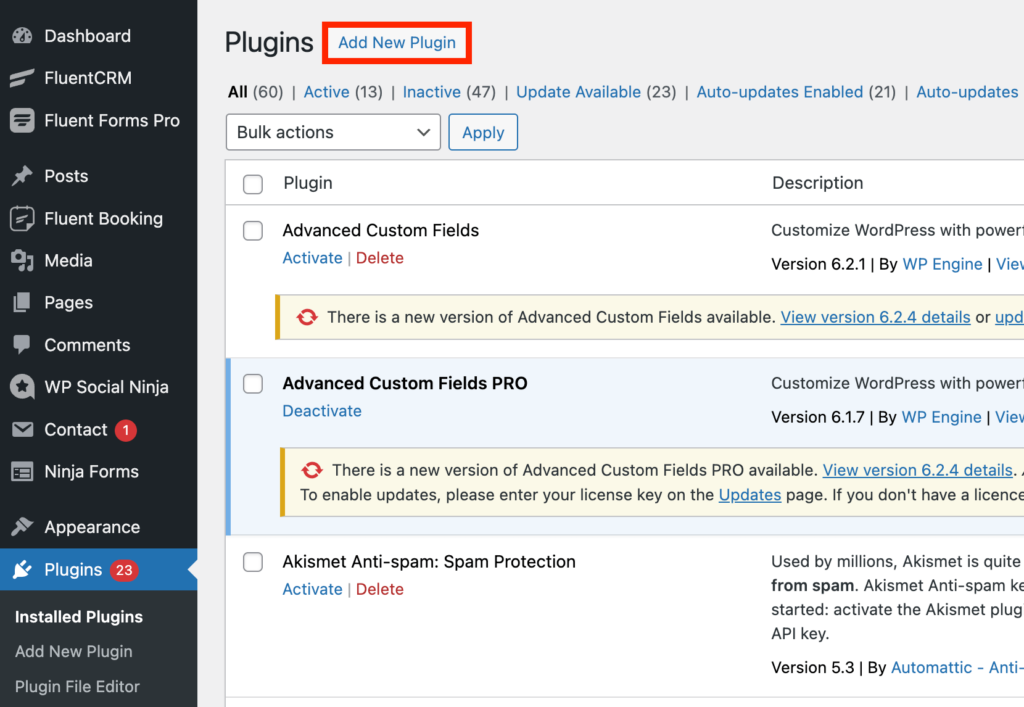
Step 1: Installing FluentSnippets for Free
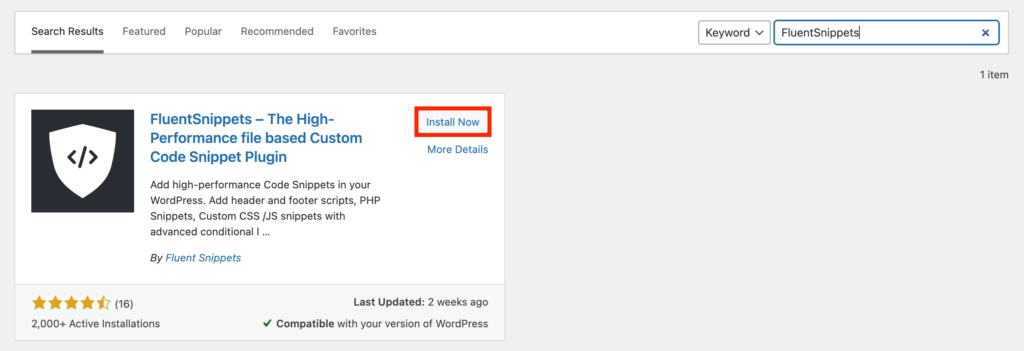
Go to Plugins > Add New Plugin and search for FluentSnippets.
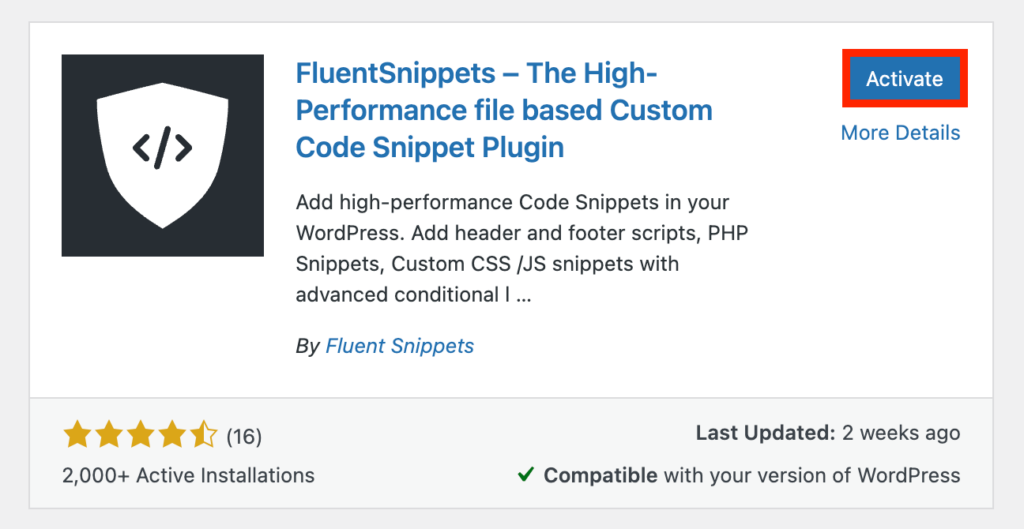
Click the Install Now button.
Now click the Activate button and your plugin will be activated.
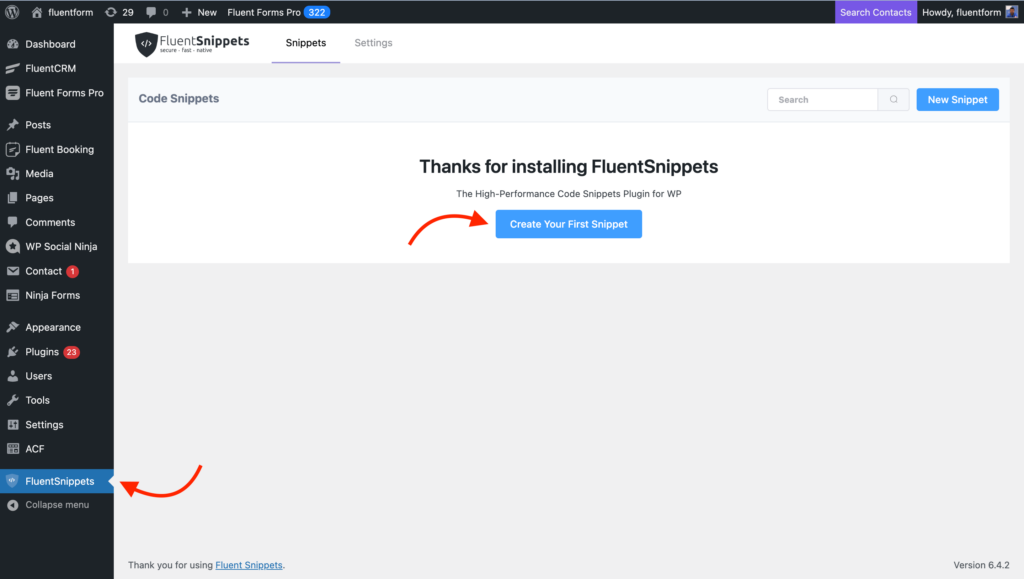
Go back to your WordPress dashboard and locate FluentSnippets from the left panel. You’ll see a button that says Create Your First Snippet.
Alternatively, you can always press the New Snippet button from the top right.
Step 2: Pasting Your Code Snippets
Now paste your snippet and give it a name. You can write some description if you want. After all, tell it where to run and click the Create Snippet button.
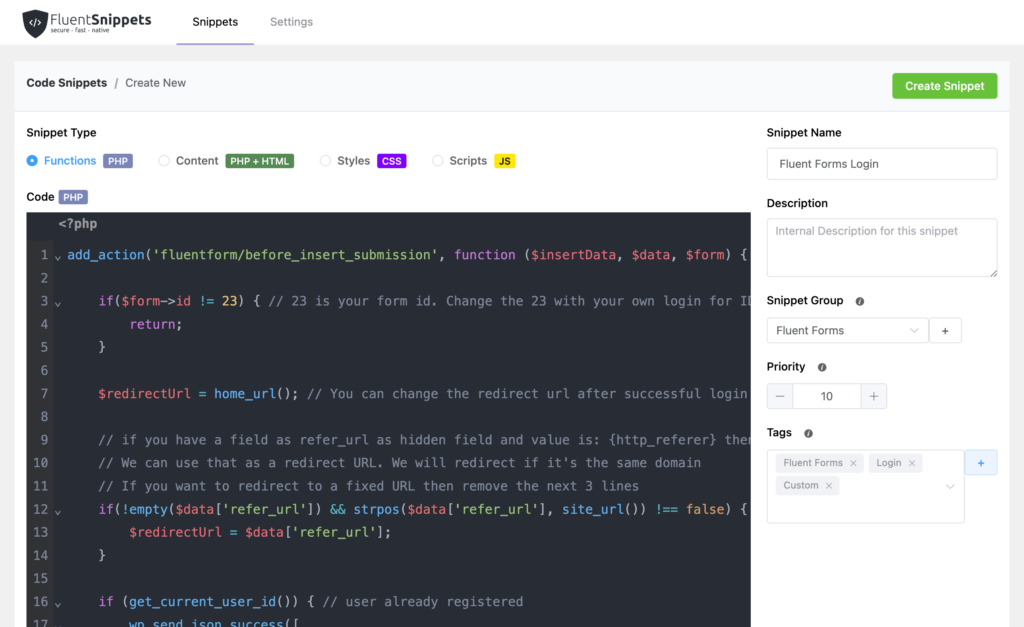
You can also set some priority with numbers, the lower the number the higher priority it will get.
When you have a number of snippets, you can organize them under groups. You can also assign some tags to find your snippets easily.
There’s an option called Advanced Conditional Logic. If you enable it, you can filter your snippets and let it run when they meet the condition.
By the way, you can write scripts for PHP, PHP + HTML, CSS, and JS.
The easiest way of copying and pasting code is done here. You can go and see the Settings although there’s not too much to do there.
Paste Code Inside Your Theme File
WordPress, by default, comes with a wealth of functionalities to apply to your site. The themes often have rich features and customization options. But when you need something exact, you might go for adding some codes written on your own.
Here comes the function.php file to save your back. Well, you can find the file inside every theme, but I want you to follow the safest way. That’s why I suggest you create a child theme.
Don’t get overwhelmed. A child theme resides under the main theme, and it works like the parents. And the benefit is, if anything goes wrong, only the brunches will affected rather than the tree (main theme).
Step 1: Create a Child Theme
To create a child theme, you have to access your site’s folders via an FTP client like FileZilla. You can also access by using the file manager from where the site hosted.
When you’ve successfully logged in, go to wp-content > themes. When you’re navigated there, you can see folders for all the themes installed on your website.
Now you need to create a folder for the child theme you want to create. Give the folder a name. I suggest you to write a descriptive name to avoid confusion in the future. Let’s say your theme name is tropica, you can name your child theme as tropica_childtheme.
Step 2: Add a css File
After creating the folder, add a style.css file inside it. On your text editor, paste the following code:
/*
Theme Name: My Child Theme
Theme URI: https: //mysite.com/
Description: This is a new child theme I have created for experimentation.
Author: Your Name
Author URI: https: //mysite.com/
Template: parenttheme
Version: 0.1
*/
Don’t forget to replace your information with the dummy content. Make sure you write the parent theme’s name correctly (here it’s tropica). Another important thing is, you need to call the parent theme’s CSS inside your child theme’s style.css file.
You can do that by simply adding the following code:
@import url("../parenttheme/style.css");Here the “parenttheme” is tropica. Right?
So, don’t forget to write your parent theme’s name properly. Once you’re done, save your file as style.css within the folder of your child theme.
Step 3: Create a Functions.php File
The next thing is you have to create a functions.php file for your child theme. Open your text editor and paste the following PHP tag:
<?php
//* Write your code here
Now save this file as functions.php and add it to the child theme’s folder. Also, drag this folder to your site’s themes directory using your FTP client.
Step 4: Activate your Theme
It’s time to activate your theme. To do this, go to Appearance > Themes from the left panel of your WordPress dashboard. You can see the child theme you’ve created there. Click on the Activate button and your child theme will start working.
Step 5: Add your Code Snippets
Here to do the main task. To add code snippets to the child theme, navigate to the Appearance > Theme File Editor. Now select functions.php or any other files you want to customize.
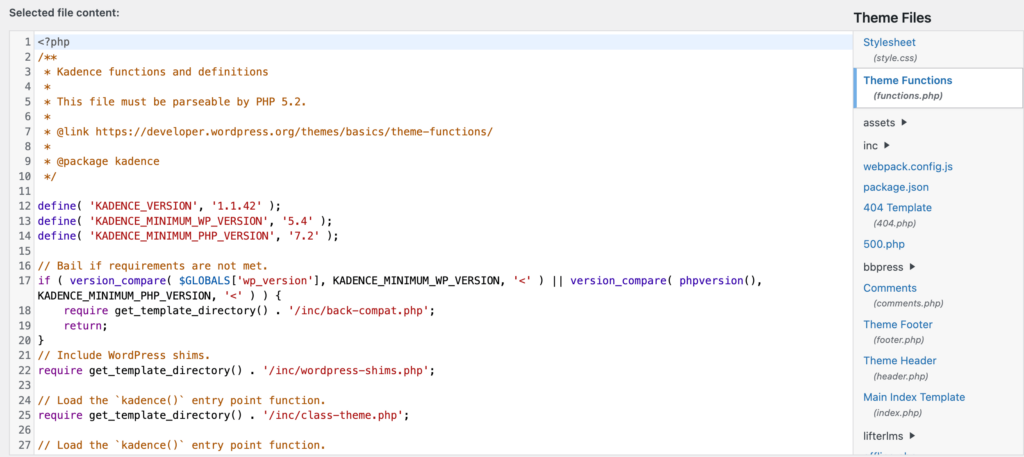
Here’s an example of a functions.php
When you’re done, click on Update File and your changes will be implemented on your website. Just reload the site and check yourself!
Reasons for adding code snippets to your WordPress site
First of all, WordPress is the most popular website builder because of its beginner-friendly settings and user-centric functionality.
However, adding some custom codes can extend the power of your WordPress without breaking your website.
Let’s say somehow you have some codes that can be implemented on your website. But where or how will you post them?
That’s where the pasting code option comes in. It’s a great way to empower your website with innovative things.
Another reason to use custom code is it’s an efficient way to extend the power of your WordPress.
Almost for every necessity, you’ll find a WordPress plugin. But is it wise to install plugins for all needs and make your site heavy?
If you can manage the problem with a small set of code, you should do that.
Having all that said, let’s check out the process of adding custom code to your WordPress website.
Conclusion
Now you know how to add custom code snippets to your WordPress sites. Let’s utilize the knowledge and make your site more powerful than ever with your custom codes. I hope it’s no longer a difficult task to add codes.

WordPress, automation, eCommerce and growth marketing specialist, a WordPress Core Contributor and Media Corps member blending storytelling with technology to craft strategies in SEO, email marketing, and beyond.
-
How to Manage Client Feedback in WordPress Without Losing Track
Learn how to manage client feedback in WordPress with simple -

Customer Satisfaction Survey: Types, Questions, and Steps to Create
Customer satisfaction survey is important to gather feedback of your -

21 Recent Innovative Marketing Examples Every Business Can Learn From
21 recent innovative marketing examples from Spotify, CeraVe, and more,
Leave a Reply
You must be logged in to post a comment.