

How to create a Comparison Table in WordPress Using Ninja Tables

Last week I had to create a comparison table using WordPress to present some data. Initially, I couldn’t find anything congenial within WordPress for creating an interactive table which is responsive. If I had to create a table, I would have had to code it entirely in HTML with numerous <TABLE>, <TR>, <TD> tags. As an example, the code behind a sample table would look like this:
The Table:
TABLE TITLE | |
|---|---|
| Column A | Column B |
| Data 1 | Data 2 |
The Code Behind The Table:
<TABLE BORDER=”5″ WIDTH=”50%” CELLPADDING=”4″ CELLSPACING=”3″>
<TR>
<TH COLSPAN=”2″><BR><H3>TABLE TITLE</H3>
</TH>
</TR>
<TR>
<TH>Column A</TH>
<TH>Column B</TH>
</TR>
<TR ALIGN=”CENTER”>
<TD>Data 1</TD>
<TD>Data 2</TD>
</TR>
</TABLE>
But this is not a practical approach. Every time I intend to create a table, it will take up so much of my time and effort, which is clearly an unnecessary hassle. And as I was dealing with a complex process of comparison table, I thought of handling it in a smarter way. So, I decided to take a look at different WordPress plugins regarding this issue.
I found several plugins which are able to solve the problem, but with one or two major limitations; except one. Before talking about that particular plugin, I would like to elaborate on the major problems that I found while studying different table plugins for WordPress.
The inconvenient setback that I have noticed in almost every plugin is, the tables created with these plugins are merely responsive in type and they are not compatible with all kinds of devices. Good thing is that I found the Ninja Tables plugin which truly was responsive and helped me make a beautiful, interactive table very quickly.
A comparison is one of the toughest activities users perform on the internet. In most of the cases, it’s an obvious step your visitors take every time before buying a product, signing up for a membership, or requesting a quote. And that’s where comparison tables jump in to make our life a bit easier by visually representing a large amount of data.
Two types of comparison tables can be created for business purpose. One is a static comparison table, and the other is dynamic. Dynamic comparison tables are more suitable and interactive, which is appropriate for a healthy business environment. It allows users to interact directly with the services they want.
On the other hand, static comparison tables serve no other purposes than just advertising the product as a whole. The user can not interact and can’t take instant action using this type of table. And this might seem like bad user experience to your website audience.
Creating a comparison table with Ninja Tables: A step by step guide
Inspired to make interactive comparison tables without wasting a lot of time? In this stage, I will take you through a step-by-step guide of how you can create a responsive and dynamic comparison table for your business. Let’s have a look.
For instance, I am giving a price list of a web hosting service provider company. This table will show you how the company interacts with its clients simply by displaying a pricing table given below.
Hosting Services
I have created the table simply using Ninja Tables plugin. Most importantly it is responsive in type. You can check the responsiveness by simply resizing your browser window to have a quick overlook if you are browsing from a desktop or laptop.
Now I will be showing you how, as a WordPress website administrator or editor, you can create such interactive tables in WordPress.
Step 1:
First of all, you need to download & install the Ninja Tables plugin. For detailed know-how about the installation process: [readme].
Step 2:
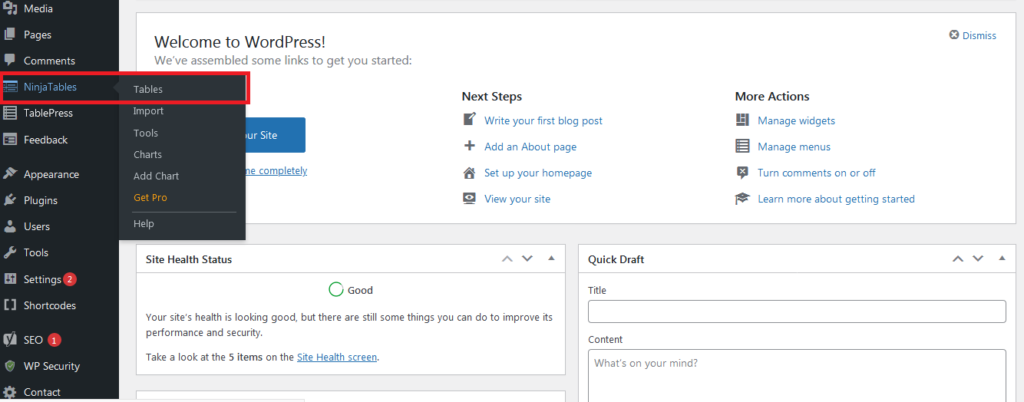
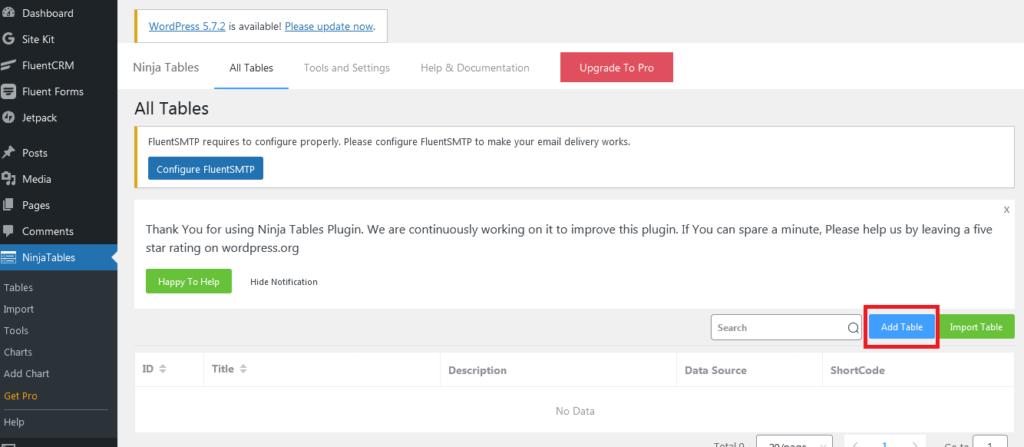
After activating Ninja Tables, just click on the “Ninja Tables” to start its operation. Then a page will appear with the “Add Table” button.
Step 3:
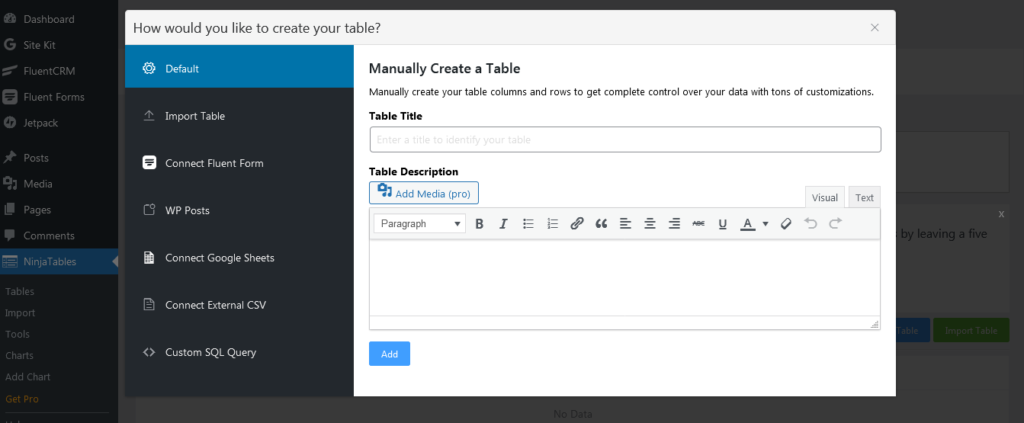
Clicking on the “Add Table” button will open a dialogue box containing the necessary information to fill up for creating a table. After filling the form, click on the “Add” button. Then, a table will be created with its column options.
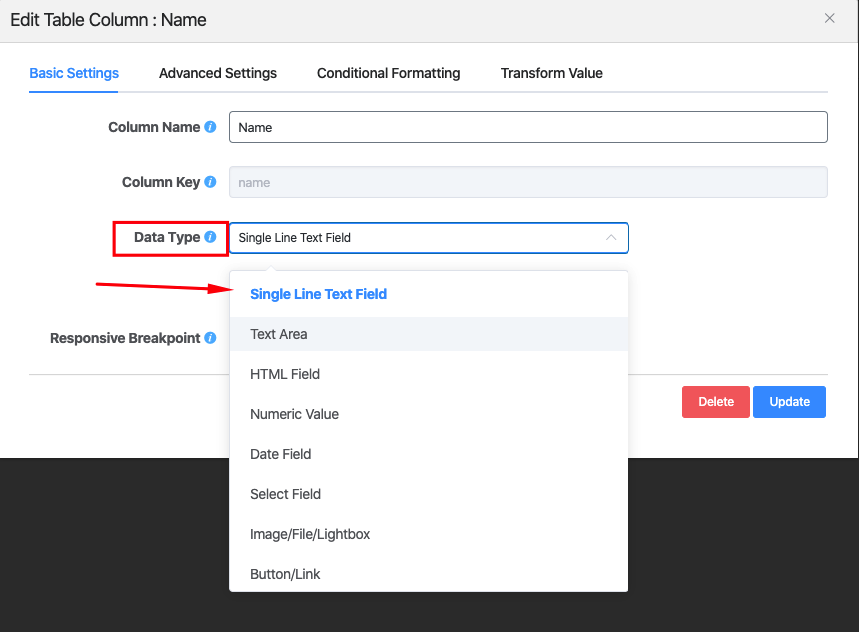
Step 4:
A page will open dynamically with a form to fill the necessary information about the columns under the respective table. Each form represents one column of that table. After filling out one form, click on to the “Add column” button to move on to the next column.

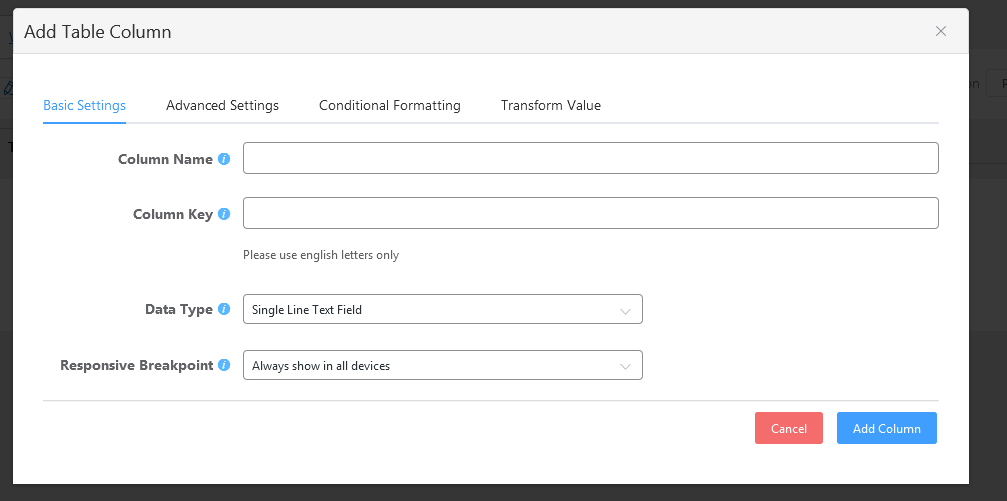
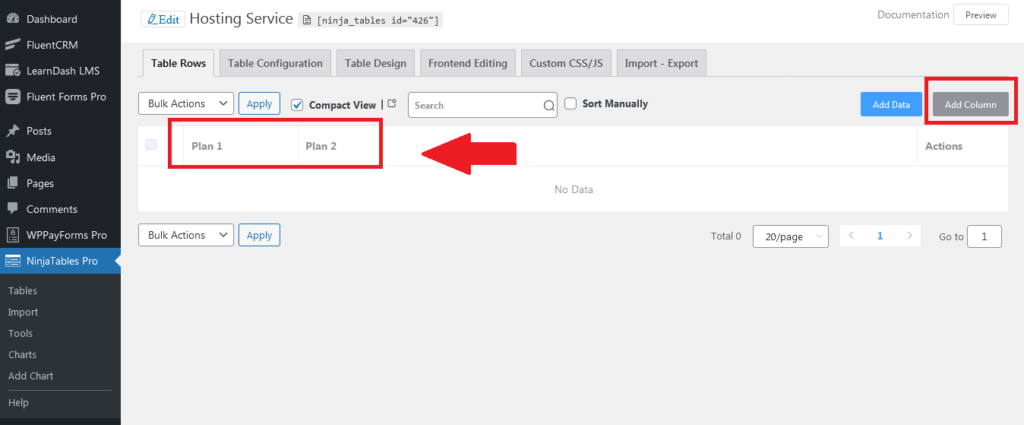
A column will be created with the name Plan 1 under the Hosting Service table. We can click the “Add Column” button to add more columns to the table.
Step 5:
This way, you can add more columns into the table. The interface will look like this if you add one more.
Step 6:
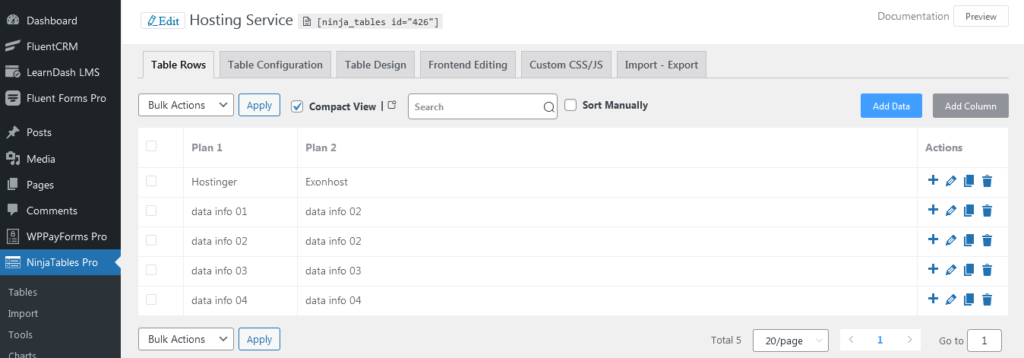
Now, you have to add data in the cells of that table. To do so, click on the “Table Rows” option, then you will have a page with an ‘Add Data” button. Click on that button to add specific data to the columns row by row.
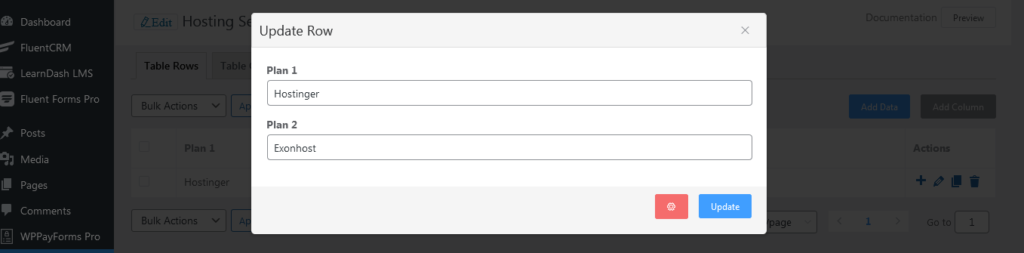
A dialogue box will appear to fill up the required information for the column.
There will be a dialogue box with an input form to fill up data into the table.
Step 7:
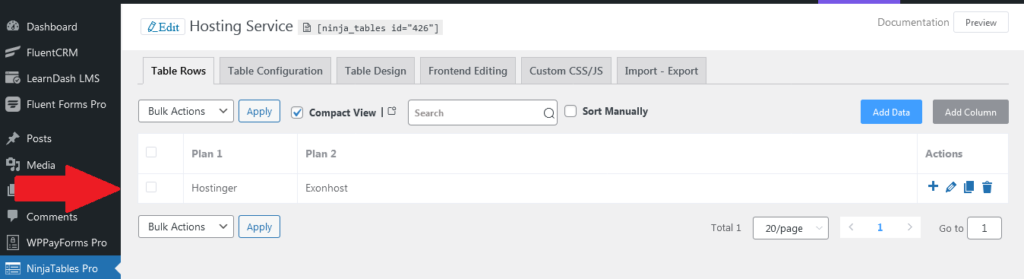
After filling up the form, just click on the “Add” button to include all the given data in a row. You can edit, delete, and add more data by clicking on the respective icon. In this way add more data, increasing row. The interface will be like so then.
Step 8:
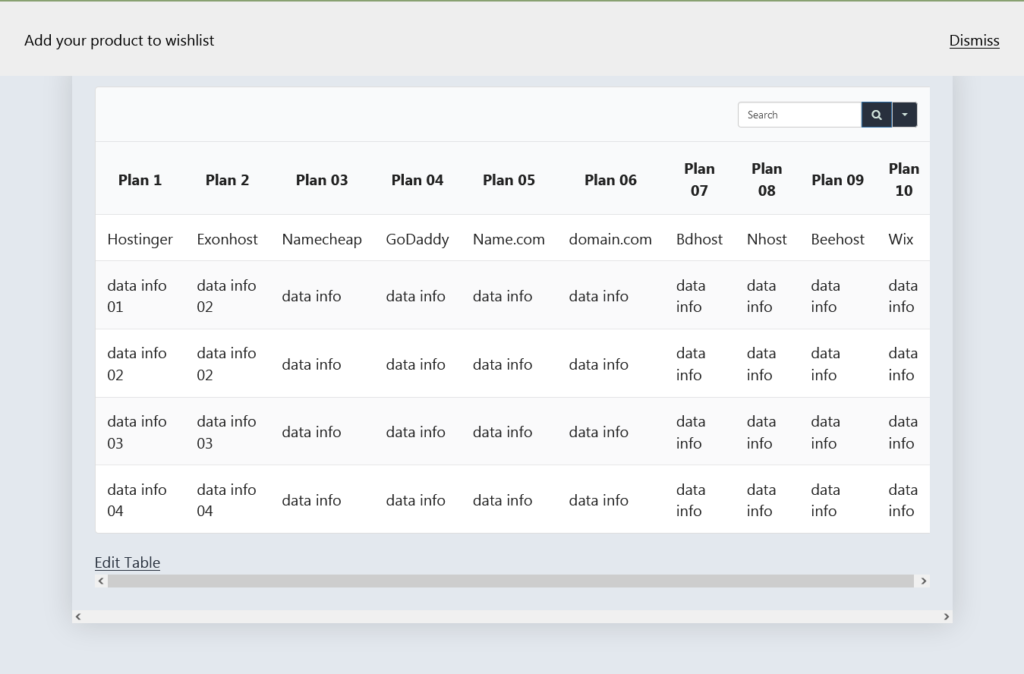
Now, in the same way, we will add ten more data columns into the table and we can edit our given data by clicking the update button. Shortcode can be used by clicking the text button to customize any specific item. We will change some data by using a different color schema. Then click on the “update” button.
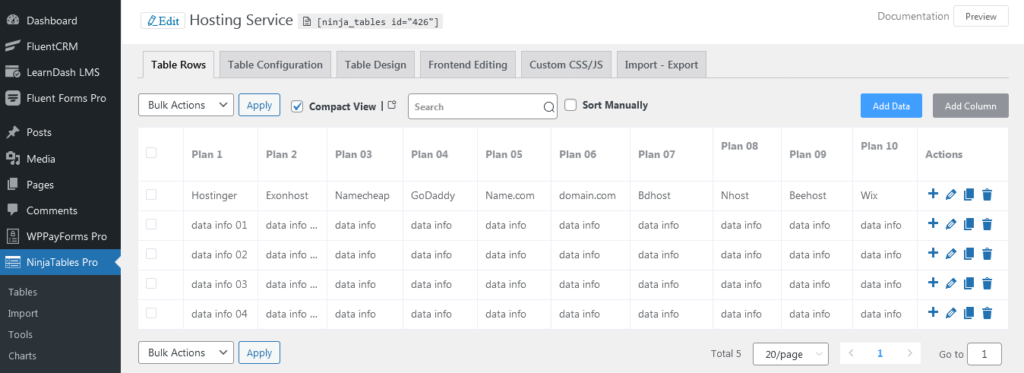
The preview of this interface will be like so. It seems pretty cool to look at. This is how we can create a basic table structure.
This is how I have created the comparison table as a whole. In this article, I wanted to make it clear that in WordPress, anyone can perform a heavy task very smoothly with the help of the right plugin.
In this piece of writing, I have shown how the Ninja Tables plugin makes things easy as an example. It made my task very smooth and comfortable. Most importantly, the good thing is that this plugin is fully responsive one in the market.
Learn details about comparison chart types for more effective data visualization.
[ninja_table_banner]
-

How to Add Code Snippets in WordPress: 100% Free Guide
Learn how to add code snippets in WordPress safely and -

FluentHub MCP: Run Your WordPress Business Right From Your AI Chat
Use FluentHub MCP to connect WPManageNinja products with AI agents -

How to Embed Social Media Feeds on WordPress Websites (No Code)
Learn how to embed Instagram, Facebook, TikTok, and YouTube feeds
Comments
-
[…] into different categories. I have written earlier about creating product showcase tables, comparison tables etc. Likewise, for making a table you can have a lot of table plugins in WordPress which might […]
Leave a Reply
You must be logged in to post a comment.