

Enable Auto-Enrollment on Payment Success with Tutor LMS
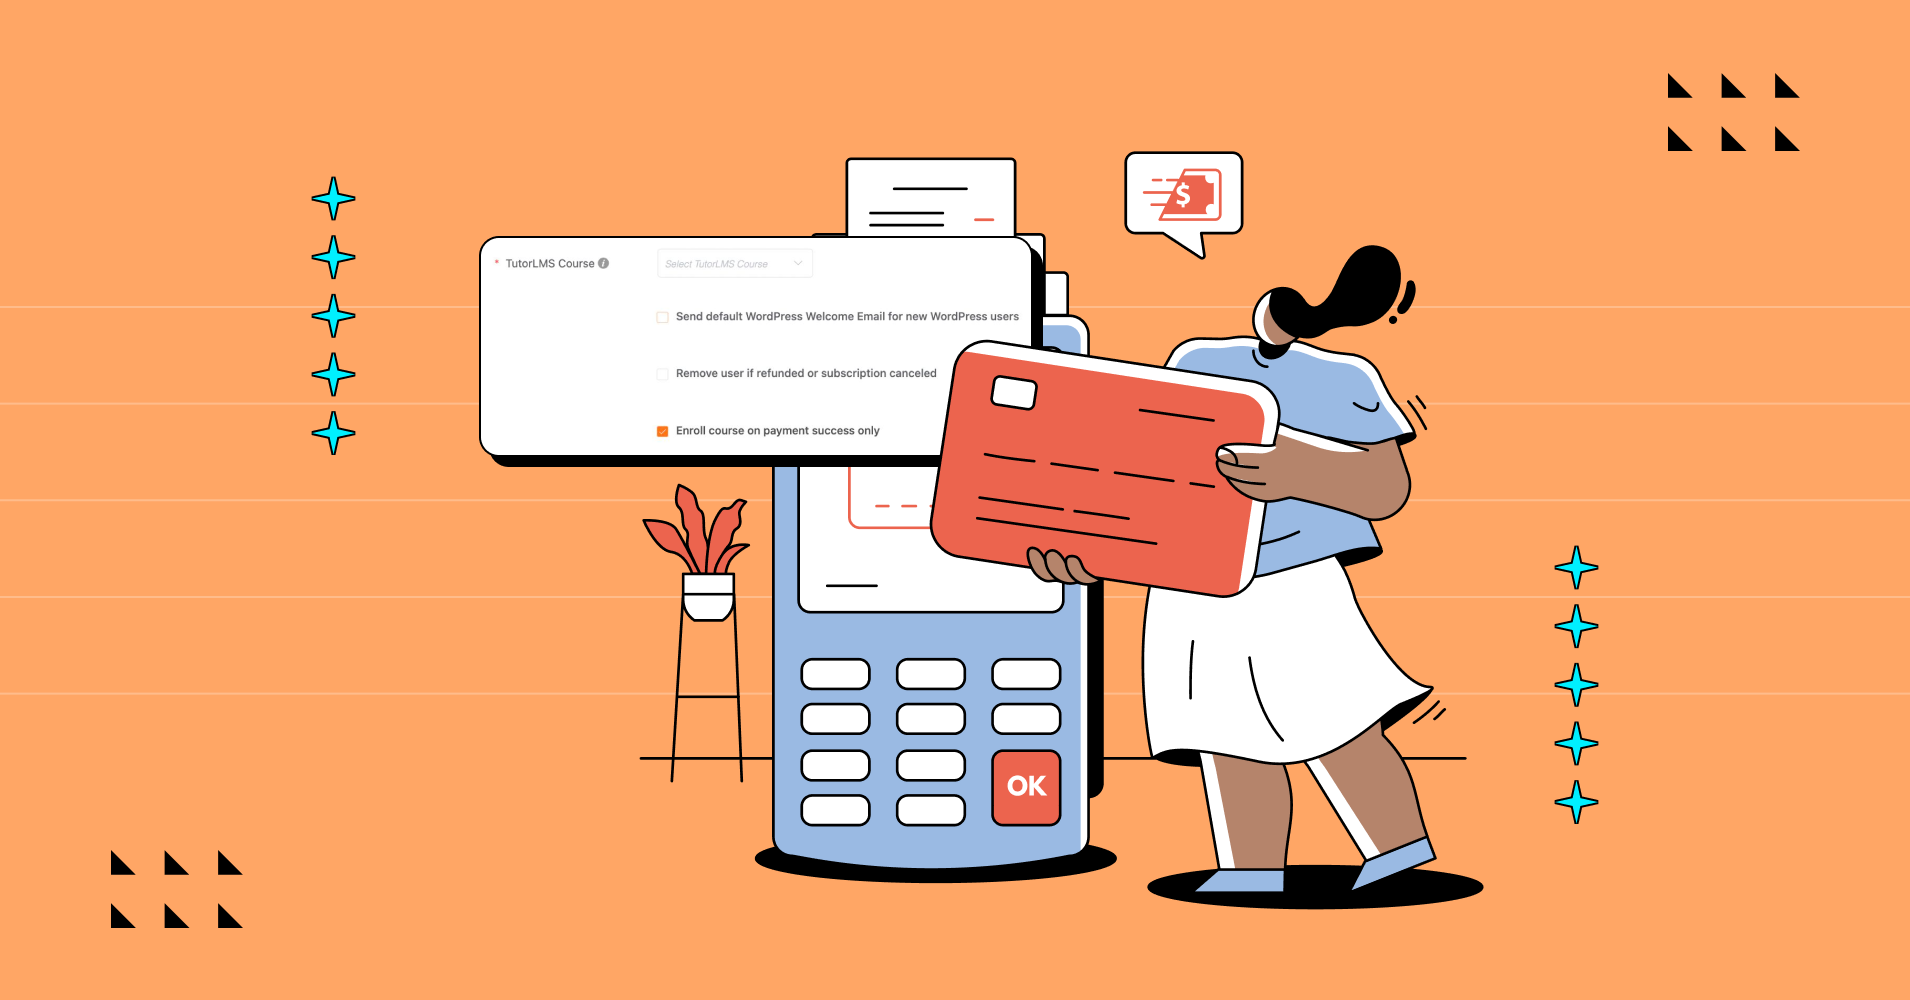
Are you tired of manually assigning courses to every student after they make the payment? The days of dealing with payment hassles are gone! Now, you can automatically enroll students in courses after the payment is successful.
Here’s how.
Today, in this blog, we will share with you how you can enable auto-enrollment on payment success with Tutor LMS.
So without further ado, let’s dive in.
Why should you enable auto-enrollment on payment success?
Let’s imagine, you ordered a product online but it’s not delivered to your door on time. It’s obvious you will think twice while ordering from the same business again.
Manually enrolling students for online courses just works like that. A manual late enrollment on courses after they make the payment will result in a poor customer experience. Besides, when the student is curious to learn something, waiting for the admin to manually assign the course is never a good user experience for them. The earlier a student gets access to online courses, the earlier they can start learning.
So, Tutor LMS brings the solution for you. It integrates with the revolutionary WordPress payment plugin Paymattic & students get enrolled in the courses instantly after the payment is successful.
How to enable auto-enrollment in Tutor LMS
You need to install & activate both the Tutor LMS & Paymattic WordPress plugins to enable automatic course enrollment on payment success. Follow the step-by-step guide to learn the process in detail.
Install and activate Tutor LMS
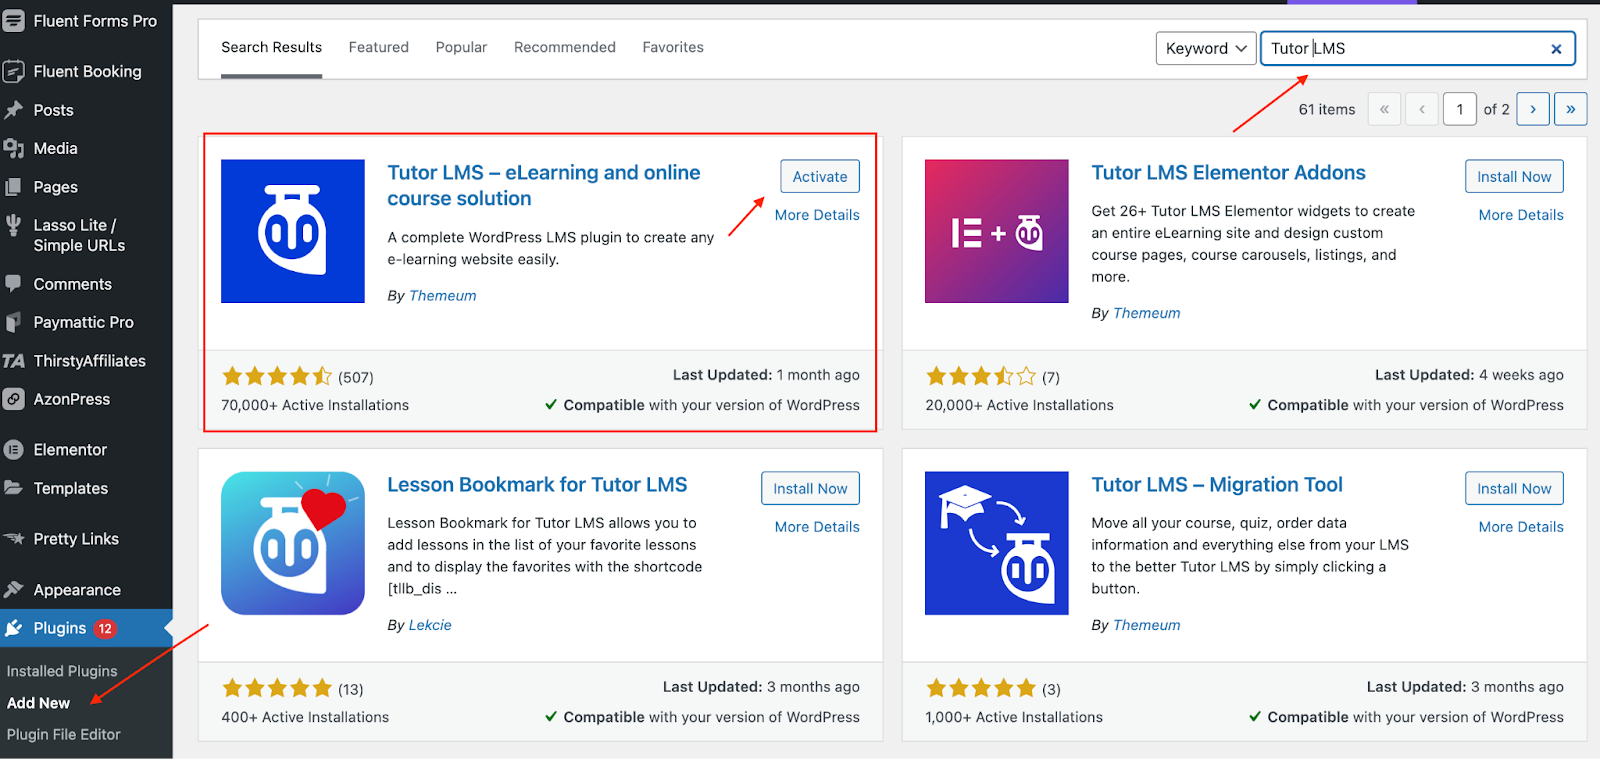
- Go to your WordPress admin dashboard. Then navigate to Plugins > Add New and search for Tutor LMS.
- Then hit the Install and Activate button to complete the installation.
- Now, you need to create a course in Tutor LMS. Creating a course with Tutor LMS is just a matter of a few clicks! To create your first course with Tutor LMS, go to your WordPress admin dashboard, and navigate to Tutor LMS > Courses. Then click on the Add New button to create your course.
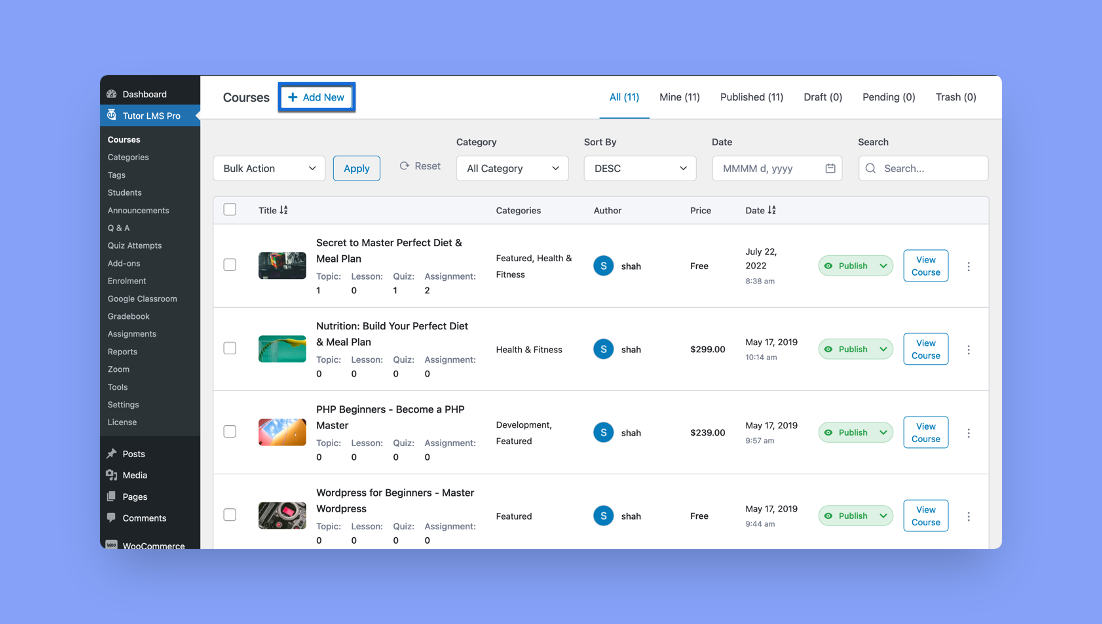
Image source – Themeum
Tutor LMS lets you freely customize almost every aspect of your course including Lessons, Quizzes, and Assignments.
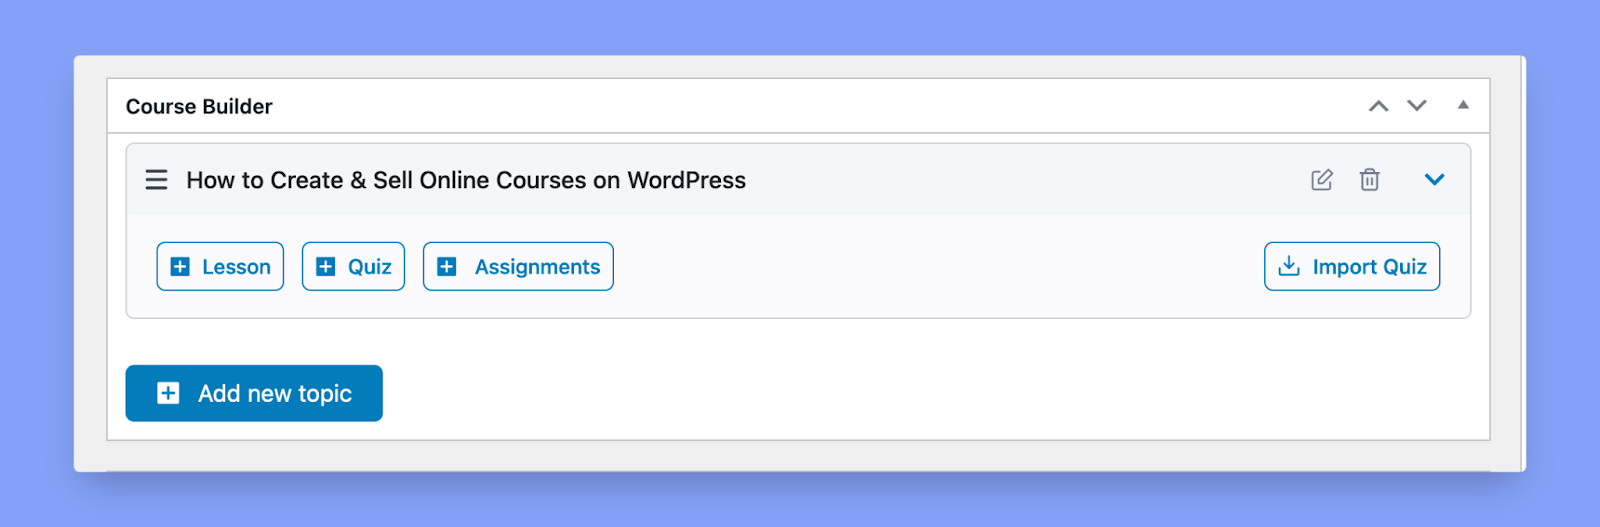
Image source – Themeum
There are other alternative ways to create courses from your LMS website front-end. For this, go to your page, and from the dashboard, click on the Create a New Course button to get started. Click here for more details.

Image source – Themeum
That’s it! Super easy, right? So you know how to create a course with Tutor LMS. Now it’s time to learn how to enable auto-enrollment on payment success.
At this point, you have to integrate Tutor LMS with the Paymattic payment plugin to collect payment for your online course. So, now let’s see, how you can integrate Tutor LMS with Paymattic.
Steps to enable Tutor LMS integration with Paymattic Pro
To begin with the integration, you have to install the Paymattic WordPress plugin along with Tutor LMS. Tutor LMS integration is a premium feature of Paymattic. So, you need to upgrade to the pro version to enable the integration.
Install and activate Paymattic Pro
- Go to your WordPress admin dashboard, and click on Plugins > Add New. Now search for Paymattic. Then install and activate the plugin in the same way as you did for Tutor LMS.
- Once you have activated the Paymattic plugin, go to Paymattic > Upgrade to Pro to activate the premium version.
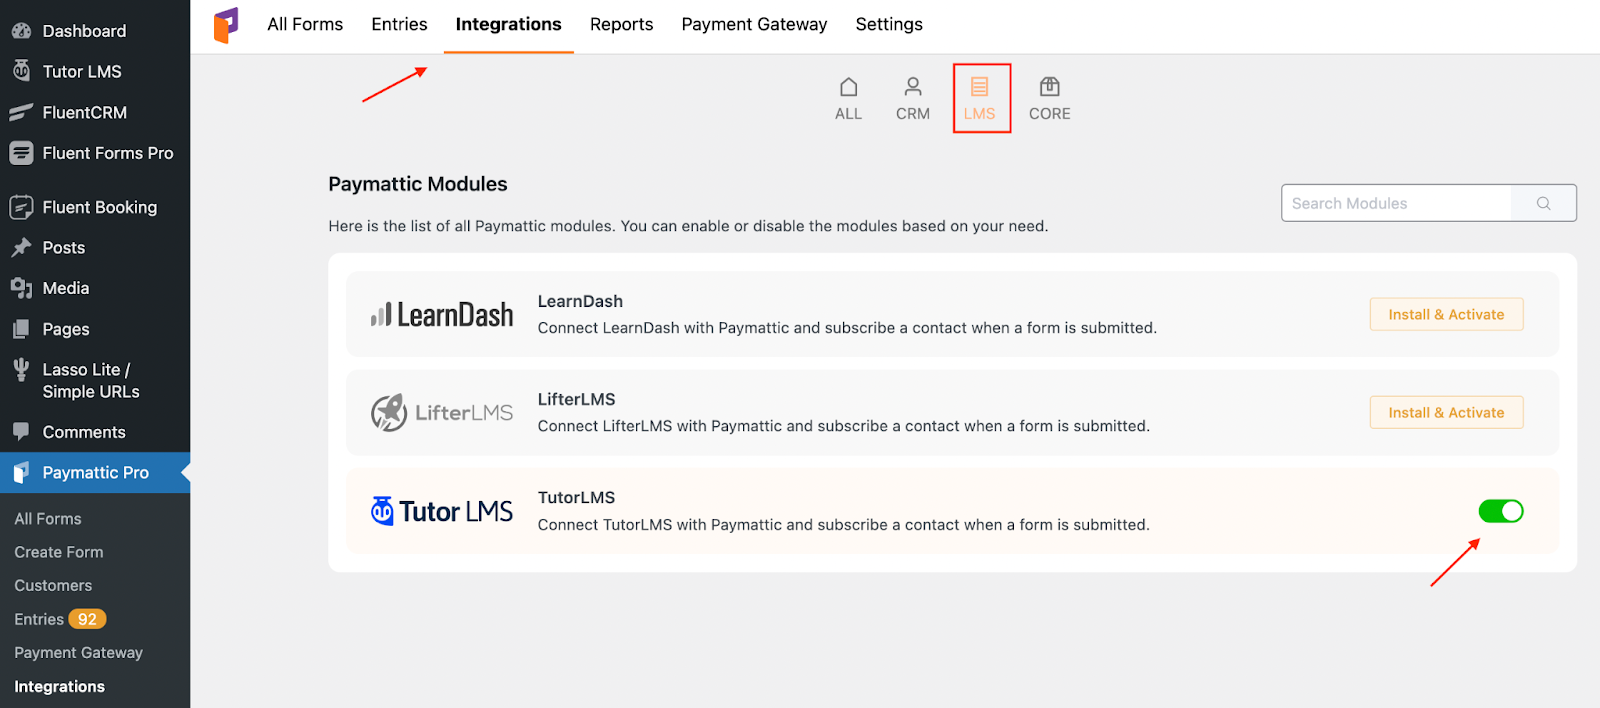
Enable Tutor LMS module in Paymattic Pro
Now it’s time to enable the Tutor LMS module before integration. To do so –
- Go to the WordPress dashboard. Click on Paymattic Pro > Integrations, select LMS, and switch on the Tutor LMS module.
Integrate Tutor LMS with your payment form
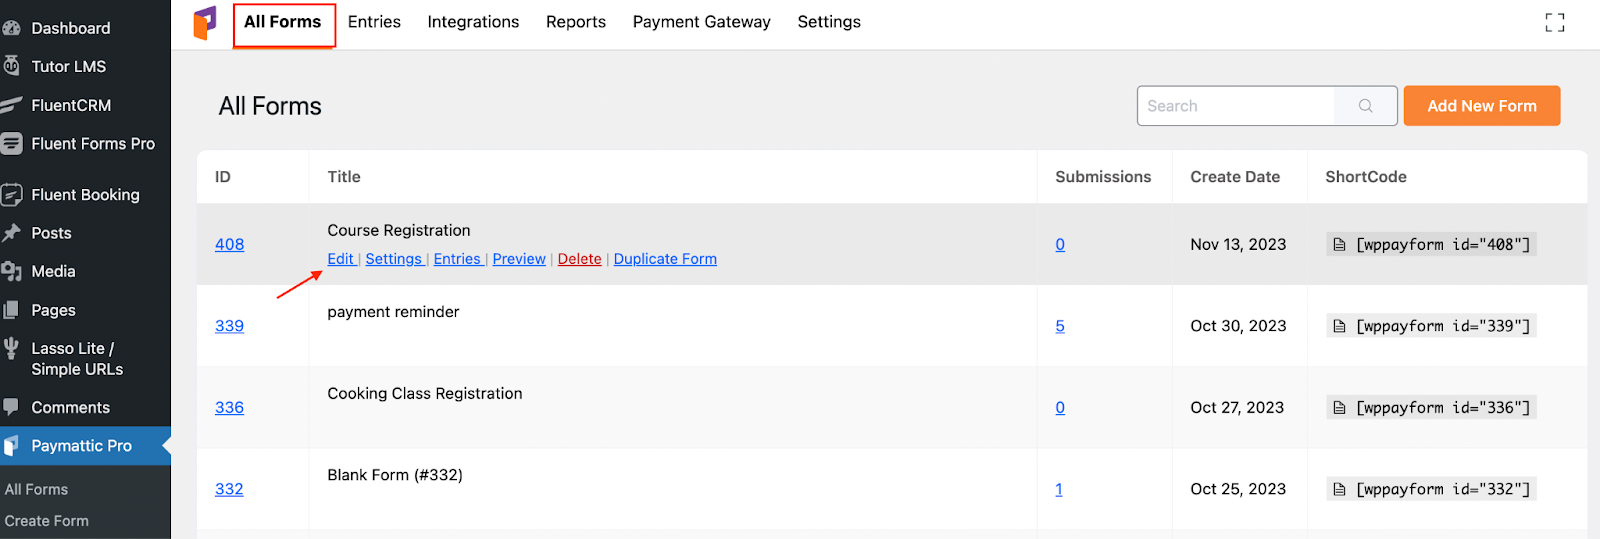
- Now, create a payment form with Paymattic that you will use to register & collect payments from the students. After that, go to All Forms and click on the Edit option below the form name.
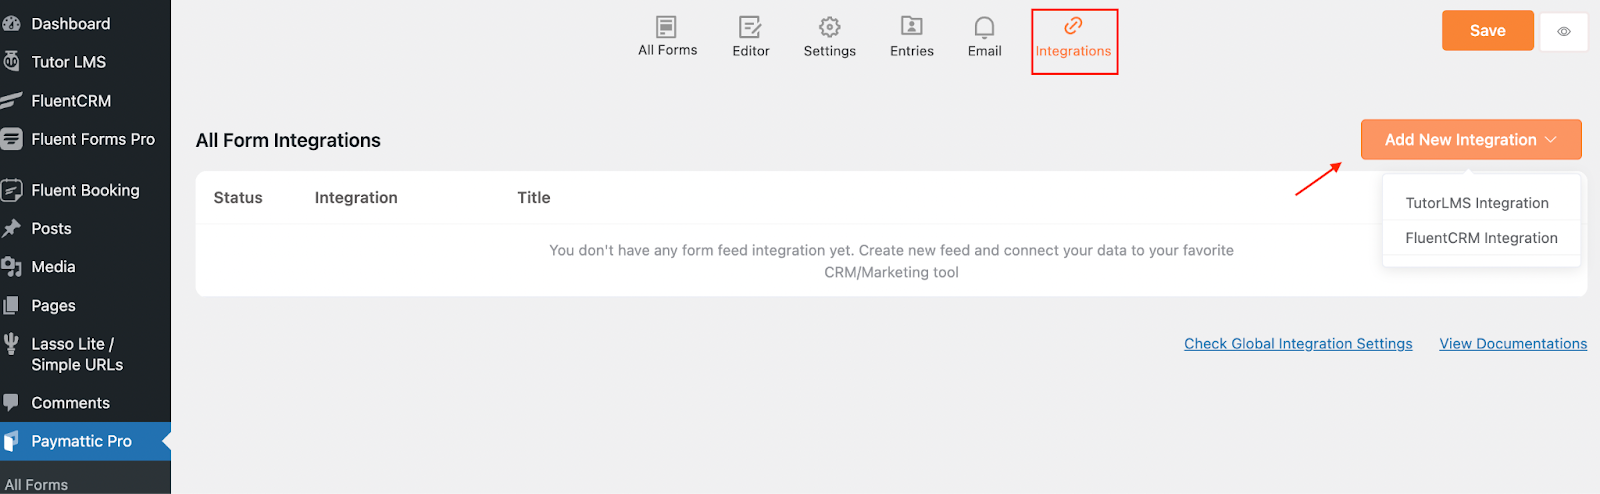
- Then, go to Form Integrations, click the Add New Integration button, and select Tutor LMS Integration.
- Now configure the integration feed with the required information.
- Provide a name for the Feed Name field.
- Select the course from the Tutor LMS Courses option that you want to assign with your form.
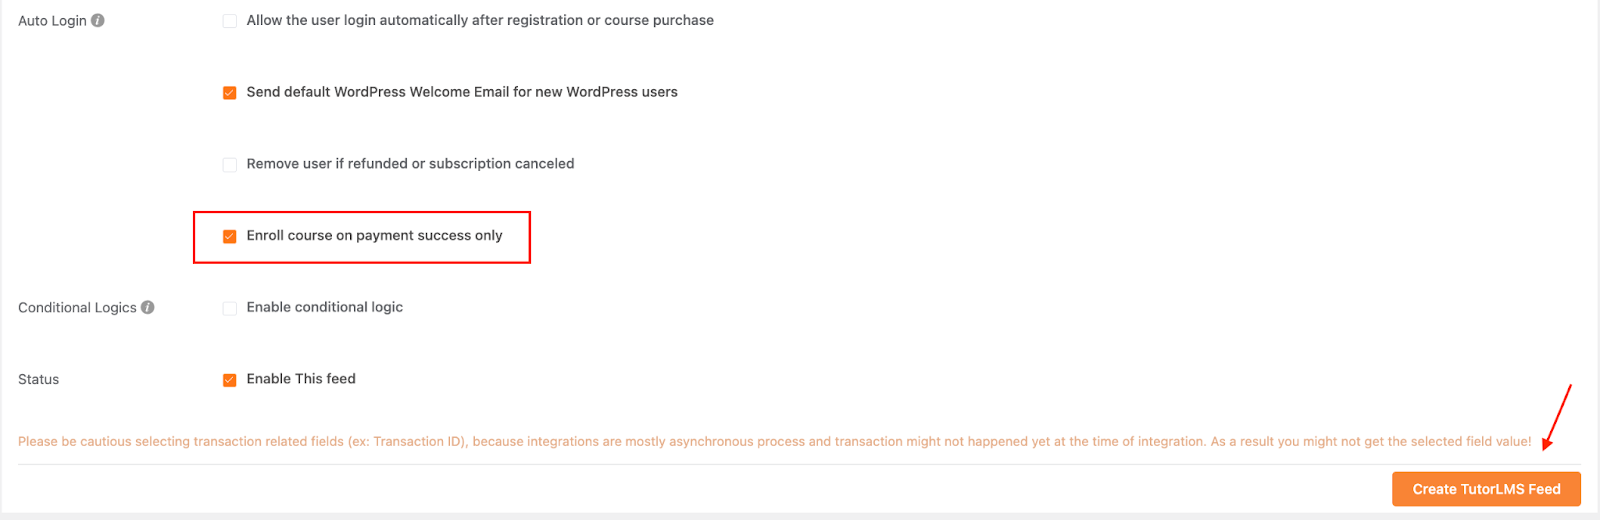
- In the conditional Logics option, you can set conditions if you want to activate the integration based on the input value.
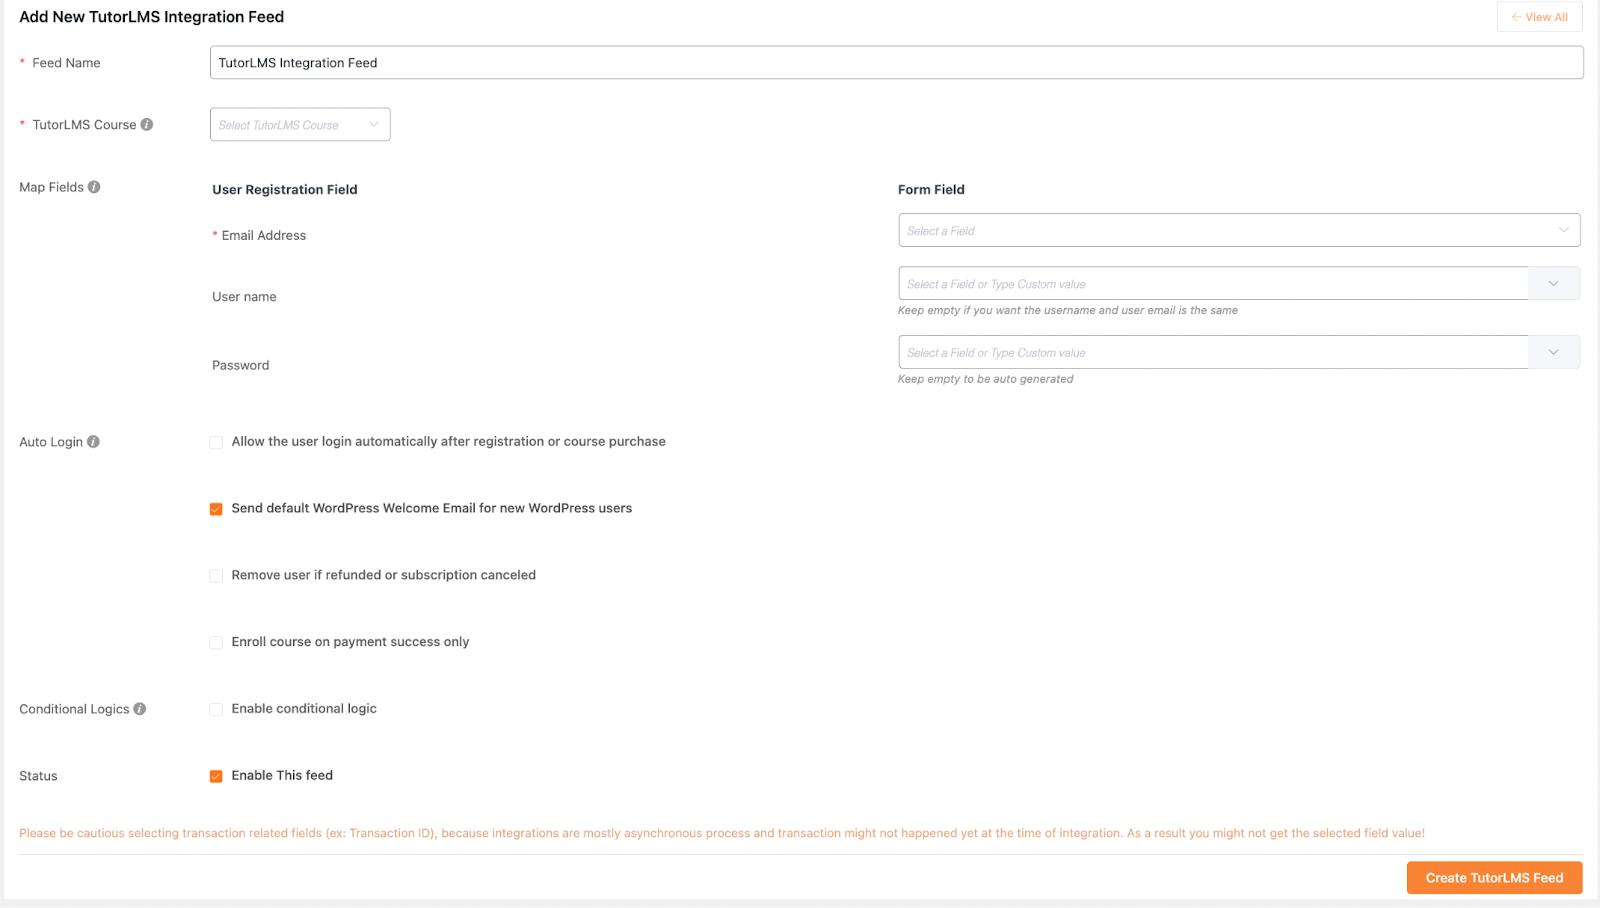
- Then after selecting a course from the Tutor LMS Course list, click on the Enroll course on payment success only. Finally, press the Create Tutor LMS Feed button to save the configuration.
After enabling Tutor LMS integration with Paymattic Pro, your users will be enrolled in the course automatically when they submit the payment form.
Final words
Tutor LMS & Paymattic together ensure a smooth & easy auto-enrollment process for the students. It’s a win-win both for the course instructors & students.
Use the power of Tutor LMS & Paymattic today and explore the synergy it creates for your LMS website.
Good luck!
-

6 GiveWP Alternatives: Get the Best WordPress Donation Plugin
Find out GiveWP Alternatives from the expert listed WordPress donation -
How to Integrate a Payment Gateway in WordPress (Stripe, PayPal + Local Options)
You search “how to add payments to WordPress,” and within… -

10 Tools To Run Proper Fundraising Campaigns Online
Fundraising for a noble cause is always welcoming to people….
Leave a Reply
You must be logged in to post a comment.