
Use WordPress Form Builder Plugin to Easily Create A Quiz

Online quiz has become a nifty source for not only marketing researchers but also for all categories of people. It is feasible because anyone can create a quiz and come to a verdict easily regarding any issue.
In the preceding time, it was quite a tough task to arrange a quiz as individuals had to consider myriads of things. However, for the boon of the internet, it has become the easiest work.
In this article, we will show you how to create a quiz by using WordPress form builder Fluent Forms. But for a better understanding, the article is divided into three segments. We will start by showing you how to create a simple quiz design. But if you want to skip to another section, use the quick links provided below.
Basic Quiz
To create a quiz, polls, survey, or other forms, first of all, you will have to install a WordPress form builder plugin in your WordPress. For this purpose, I have installed WP Fluent Form in my WordPress. It has a lot of features included even on the free version. Moreover, you can get a lot of documentation that can guide you to create any form.
You can create various types of quizzes. Amid all quiz styles, multiple-choice question-based quizzes are the most widely used.
Download WP Fluent Forms, if you haven’t already!
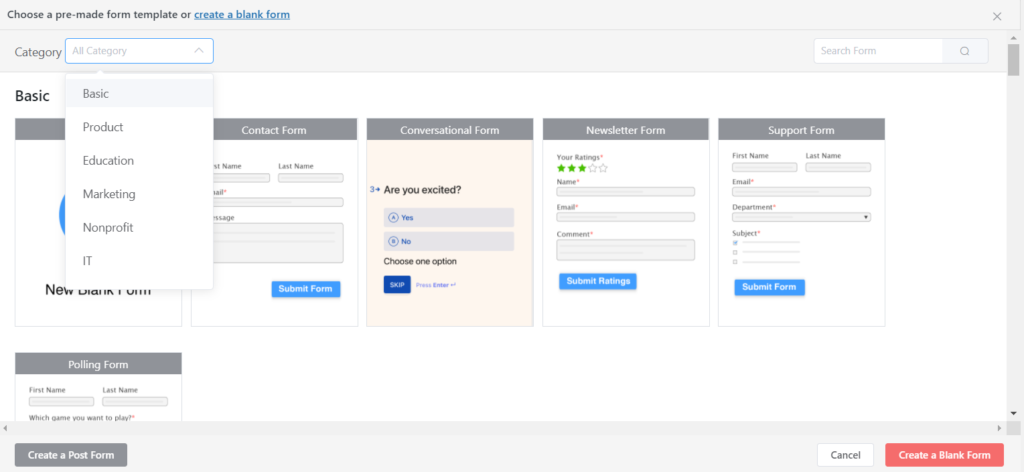
After installing the WP Fluent Form plugin on WordPress, go to the New Form section from the sidebar. A popup will appear with all the prebuilt form templates. However, we will be choosing a blank form for our purpose.
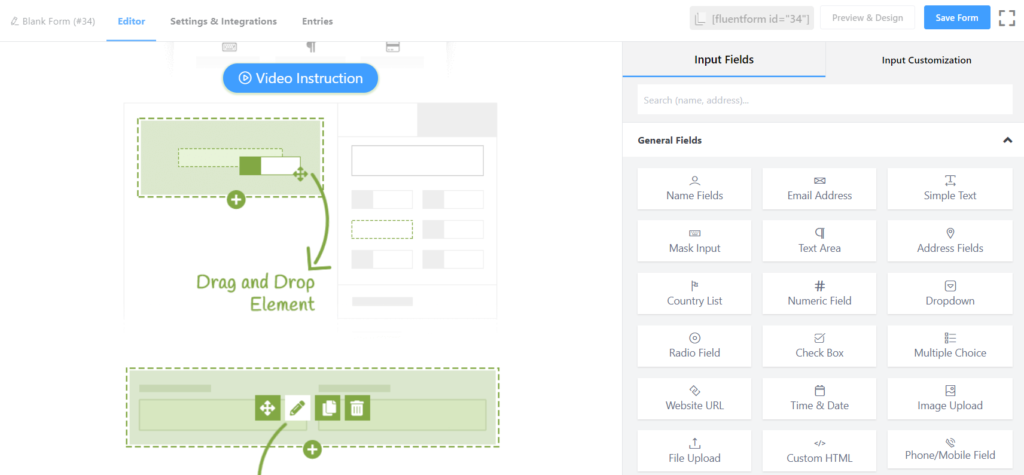
For creating a quiz, you may select several fields. For example, you can use the name field, email field, radio button, simple text area, dropdown field, checkbox, etc. for a basic quiz form. Moreover, you can also use advanced fields and containers for creating a complex form design.
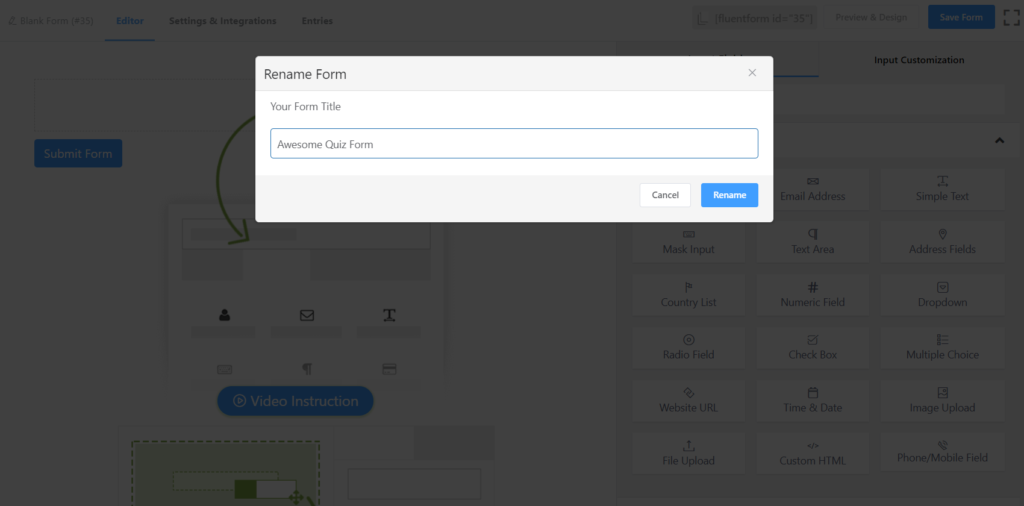
Next, set the name of the quiz from the New Blank Form box that is top of the left-hand side. This will help you single out the quiz form from other web forms you may have created.
Suppose, you want to create a quiz where you would like to put a set of multiple-choice and “Write the answer below” type questions. In that case, first, click on the radio button from the general field and it will reach the dashboard automatically.
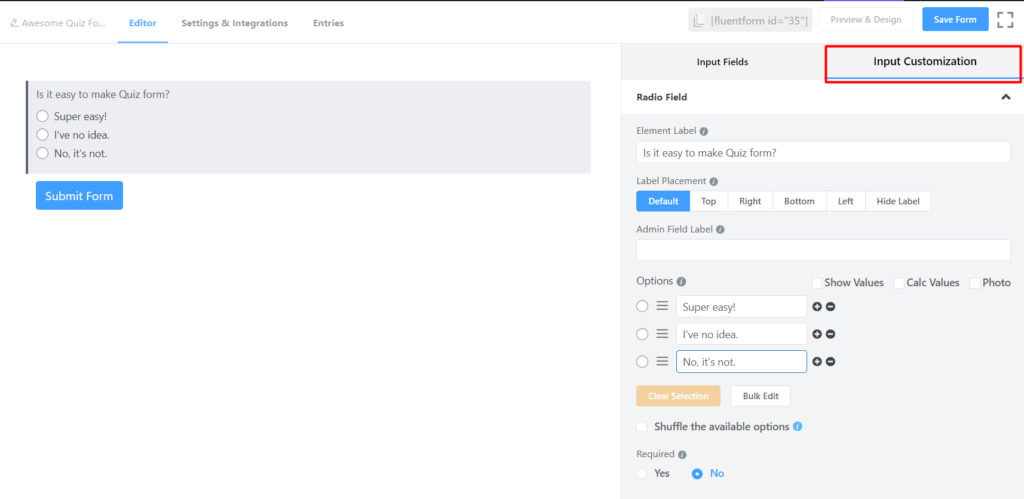
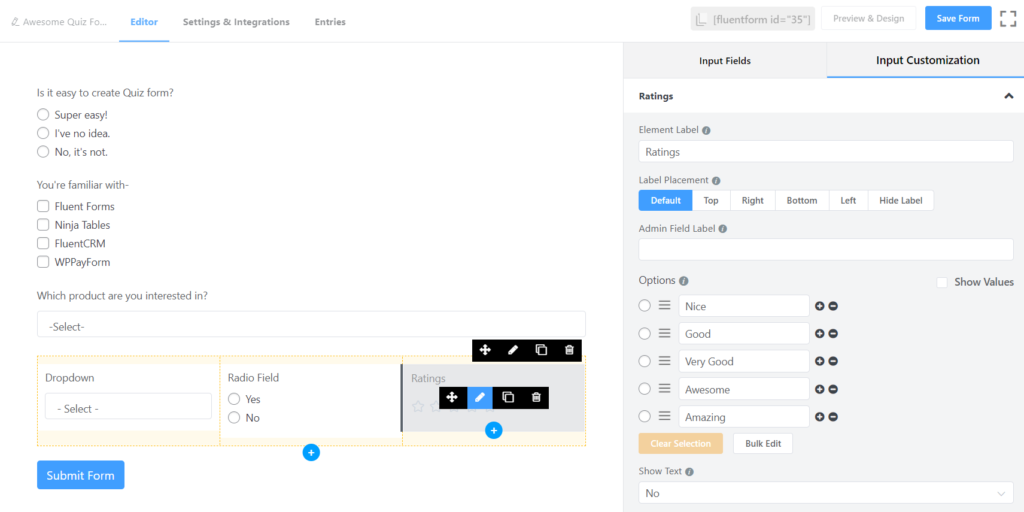
In the radio button field, you can see a lot of options available in the right panel of the dashboard. You can customize questions from the Input Customization.
Suppose, you want to know your audience’s blogging goals. Then type “My blogging goals include – ” in the element label. Let’s say you want to offer four options for the answer. In that case, put the answers in the Options panel.
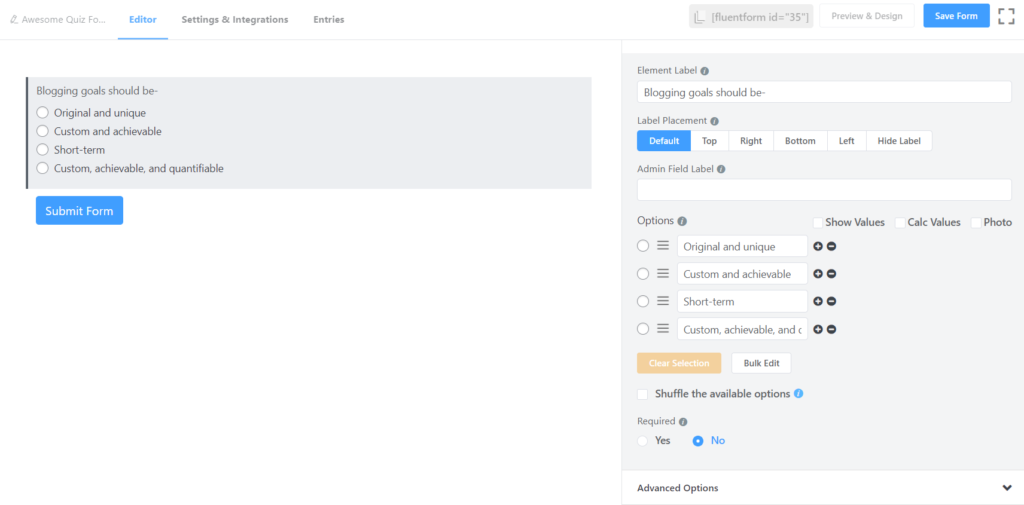
In this way, you can create a single line quiz form easily.
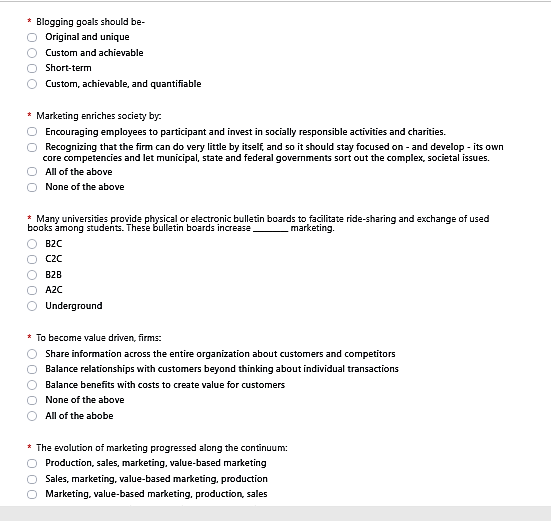
You can also use other fields for bringing some variations on the quiz. For example, someone may want to create a quiz where they want to set several multiple-choice and box type questions where participants will provide their own answers in the boxes.
After that, you can edit the field and write your required question on the element label.
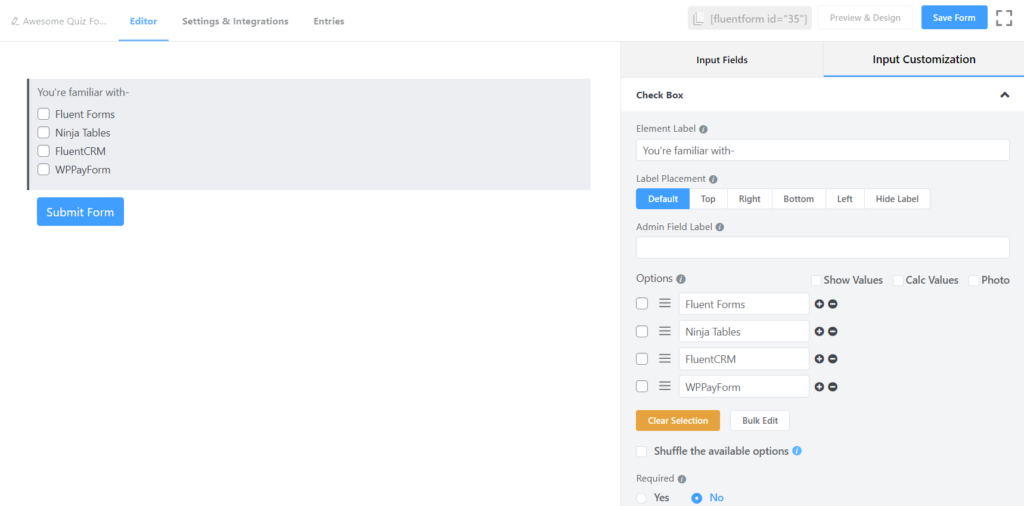
Moreover, you can make the quiz more engaging by using other fields from WP Fluent Form such as the checkbox or dropdown button. For example, you want to establish a question on the quiz where the right answer would be more than one. So, in that case, you can use the checkbox. In the same way, if you wish to set any question whose answers would be a simple “Yes” or “No”, you can deploy a dropdown field on the dashboard.

However, you can make the whole quiz by using any particular field, or you can make a custom quiz form where different fields might be used.
Multi-Column Based Quiz
Suppose, you want to create a quiz form where all questions will be exhibited in two columns. In that case, you can use a Container. You can even set questions in upto six columns using containers with WP Fluent Forms. Now, let’s see how to create a quiz form by using columns.
To create a multiple lines quiz form, click on the Two Column option from the Container. However, you can use upto six columns and even apply conditional logic on them. But, in this content, I will create a quiz using only two columns.
So, after clicking on the Two Column, it will go to the dashboard, and from there you can create a structure for the quiz. I will guide you step by step.
You can see two add button (+) signs in both the boxes. You can maintain the sequence by starting to create the question from the left side. In that case, I am going to write a question for a quiz from the left side, and I will maintain the numbering sequence from top to bottom.
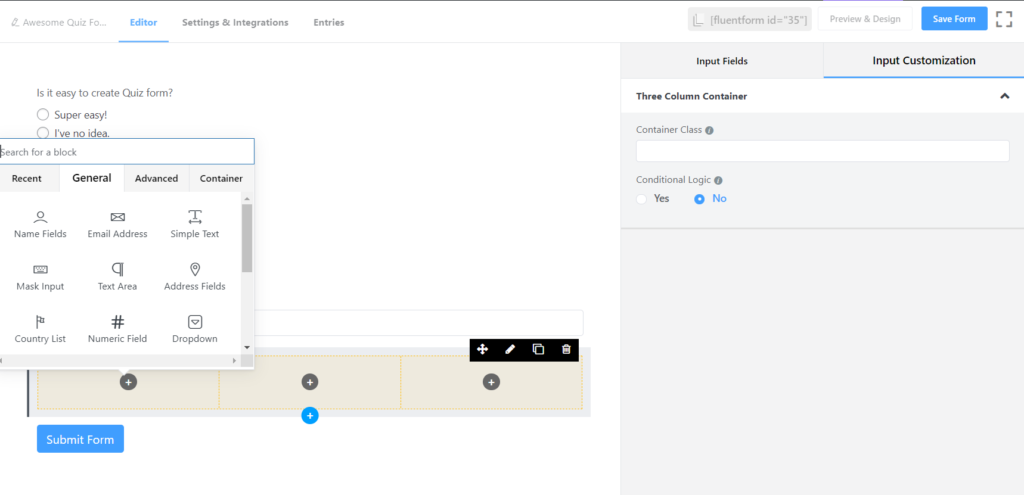
Now, click on the add (+) button and you will see another option will appear on the screen.
You can select your required fields from the box. Suppose, you want to use the dropdown button for the first question. In that case, click on the dropdown button, and it will set on the left column automatically. After that, you can customize the field as my shared screenshots.
You can create the whole quiz by using various fields. Moreover, you can write the next question just under the dropdown button. In that case, if you bring the cursor on the dropdown box and you can see an add (+) option will appear just below that box as the picture.
If you click on the red mark button, another box will appear on the screen from where you can select the required field for the next question.
By following this method, you can create a multi column-based quiz easily.
Conditional Logic
Now, let’s introduce conditional logic. Conditional logic is instrumental to create quiz. It is not only crucial for feedback survey form or the job application ones, but you may also feel its necessity in almost every kind of form.
Conditional logic can help you fetch authentic answers from the participants. Suppose, you want to ask a question on the quiz by using the dropdown button. But it is also crucial to know the actual logic behind the participants’ answers. In that case, you can use conditional logic easily.
To use the conditional logic, first of all, you have to create the main question where you want to add the condition. For example, I want to ask the previous question here again that “Which form of marketing do you think is best?” And I want to keep two answers “Online Marketing” and “Offline Marketing” on the dropdown field.
So, click on the dropdown
After that, again click on the simple text field and it will go just below the dropdown button. After that, you can customize it according to your requirement.
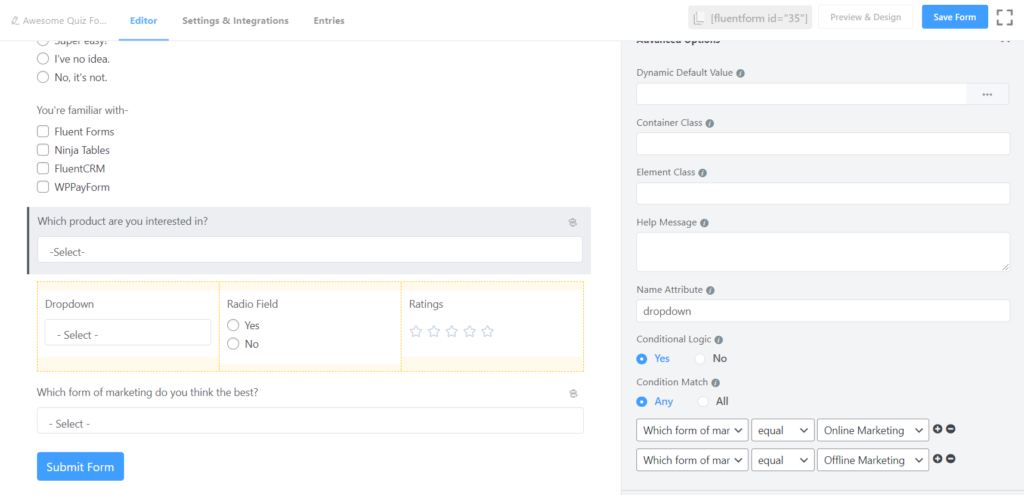
Now, if you click on the Advanced Option, some advanced level options will appear on the screen, and from there, you can select conditional logic for the quiz form.
And after that, you have to set the logic from the three boxes which are on the bottom edge of the panel. Suppose, you want to know the reasons separately for Online Marketing. In that case, first, select the option for the Online Marketing answer.
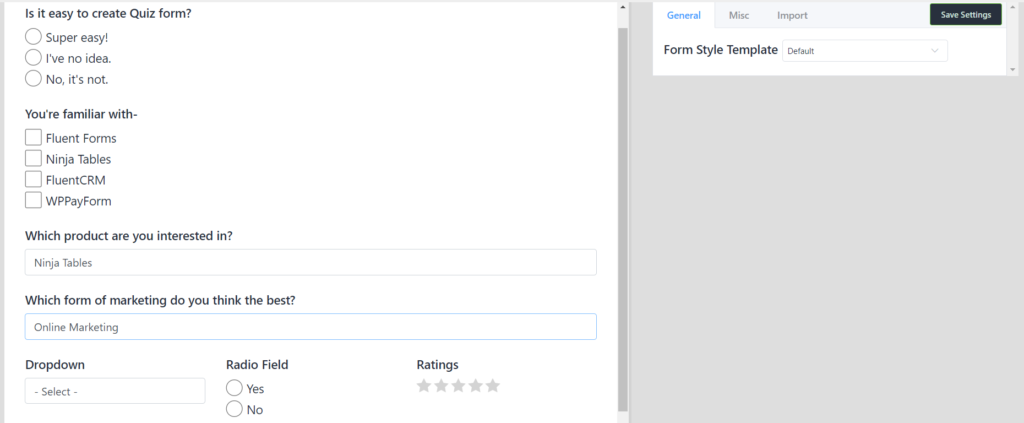
If you want another field for those who answered Offline Marketing, then follow the same procedure. After that, you can check by clicking on the Preview button either does it work as your requirement or not.
Form Step
Another nifty feature of Fluent Forms is you can make multiple pages quiz form using the Form Step functionality. If you need to create a long quiz form, then you can use it. People always avoid marketing tasks such as phone calls, text messages,
In that case, if you can make a customer engaging form, you may get a top-notch outcome. The process is quite simple too.
To use the Form Step field in the quiz, first of all, click on the Advanced Fields and then a new panel will appear on the screen. You can see there Form Step button as the image. Simply drag it from the Advanced panel and drop it on the preferred place from where you want to start a new page.

After that, you can check its output appearance by clicking on the preview button, and it will exhibit it like the picture. From there, you can realize how it looks.

This is the effective way to create a basic quiz form using Fluent Forms. However, Fluent Forms WordPress plugin offers a lot of verity fields in the free version. So, you can create outstanding design for the quiz by exhausting those fields.
Obviously, you can use other WordPress plugins for making an online quiz. But, Fluent Forms WordPress Plugin has seemed like a nifty form builder as it offers a lot of field in the free version. Whereas if other available form builder plugins usually do not provide as many fields in the free version to customize a form.
-

Contact Form 7 vs Fluent Forms: Which one should you go for?
Learn the comparison between Fluent Forms vs Contact Form 7. -

How to Create an Event Registration Form on WordPress in Minutes
Discover how you can easily Make An Event Registration Form. -

Contact Form Mistakes to Avoid in 2026: UX, Spam, and Conversion Fixes
Fixes for Contact form mistakes covering UX, SMTP delivery, spam,
Comments
-
Your site has superb web content. I bookmarked the website
-
Nice Article. I am using now a days Quiz and Survey Master plugin for my wordpress website. It s an amazing plugin. I am fully satisfied from this plugin.
Leave a Reply
You must be logged in to post a comment.