

How to Create Stackable Tables that Can be Shown in Different Devices
In this era of big data technology, readers can easily visualize any large data set using dynamic data tables. It’s easier to see the data in a stacked table format than an unstacked tabular presentation. But creating dynamic data tables in a stackable way on a spreadsheet is easy compared to making it on the web. To simplify the process of creating stackable tables, a solid WordPress table plugin can do a lot.
In this article, I will show you how you can make tables stackable in no time using a quality WordPress table plugin. Before going into the main discussion, let’s start with the basics.
What is a stackable table?
It’s a variant of the generic table kind. A standard table compares individual data points with each other. In a stackable table, parts of the data are adjacent or stacked/nested vertically or horizontally. Each of the tables displays a total amount, broken down into sub-amount.
How to create a stackable tables?
Creating a dynamic stackable table is pretty much simple if you use a quality WordPress table plugin. To demonstrate the whole process here, I’m using the Ninja Tables WordPress table plugin for serving this specific purpose.
Here are the 3 simple steps to make stackable tables in Ninja Tables.
Step 1: Set up Ninja Tables
To create a stackable data table, first, download and install the latest Ninja Tables plugin after purchasing it from the plugin’s official website. Once you’re done with the successful installation, you will find the plugin in the left sidebar of your dashboard.
Step 2: Creating a table
Once you’re done with the setup of Ninja Tables, you need to start creating a table that you want to make stackable. For demonstration purposes, I have created a general table earlier with Ninja Tables. Now I will show you how you can make this table stackable.
That’s pretty simple…..!
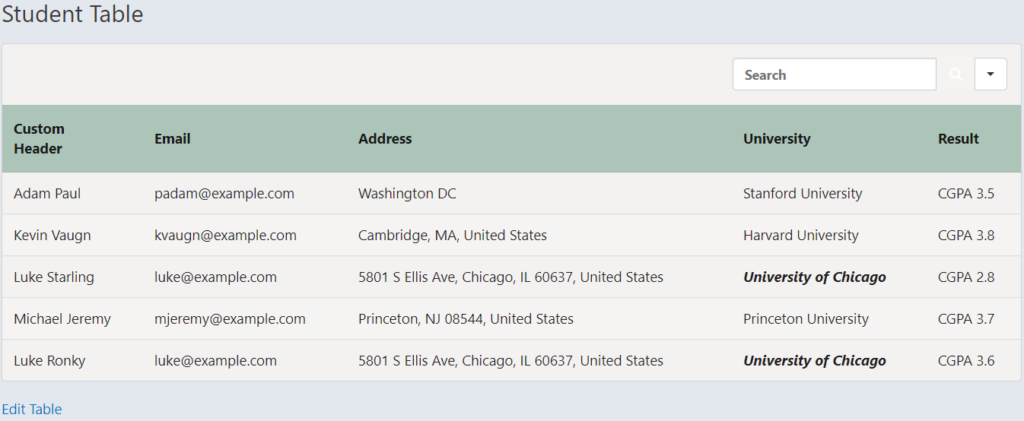
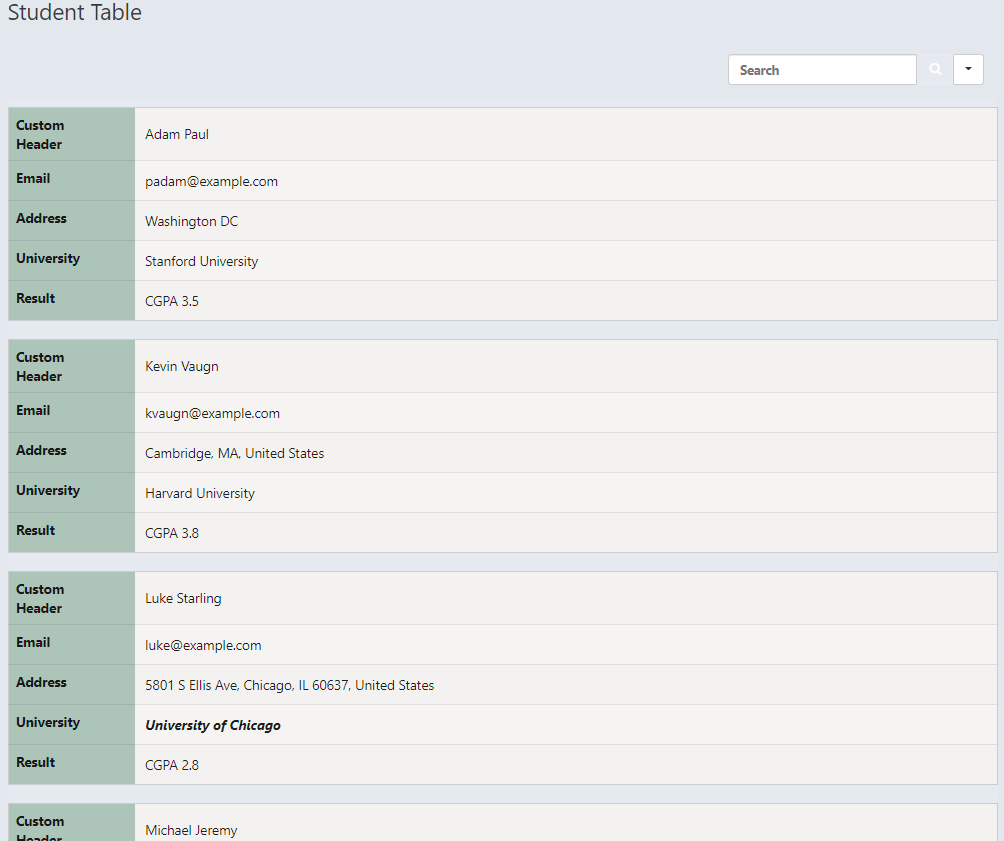
I have created a table named Student Table with 5 rows and put some data on it. Here is the current table preview-
Step 3: Making the table stackable
Now, you have a table, and to make this table stackable, click on the Table Design tab on top of the plugin’s interface/dashboard.
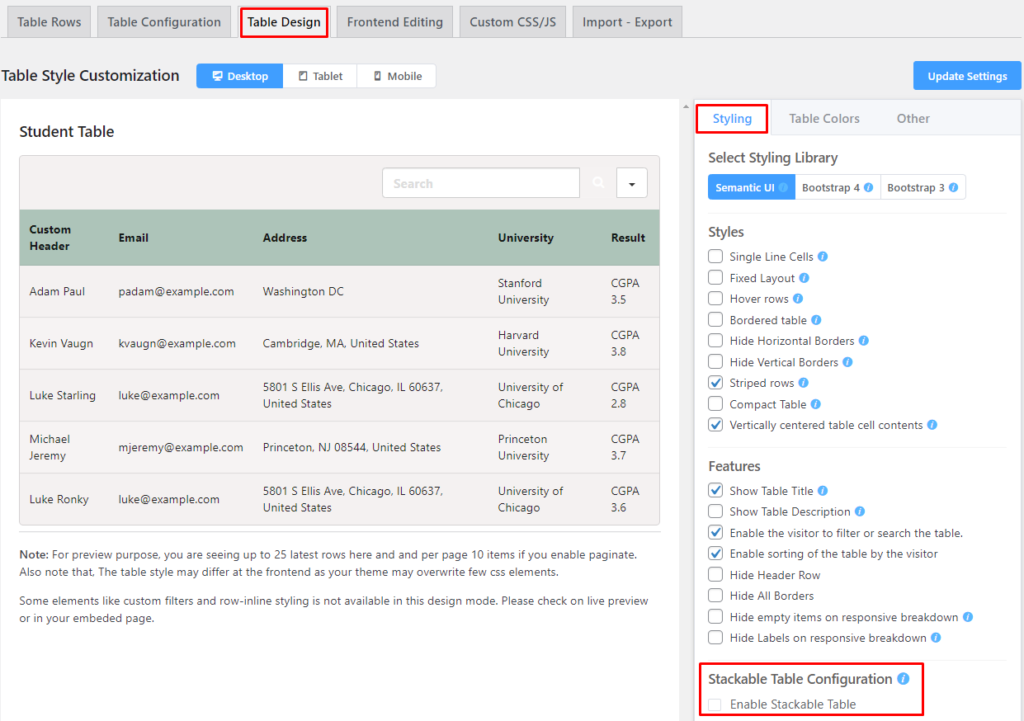
You will find the right sidebar panel; you will get the “Stackable Table Configuration” option. Right under this, you will get a checkbox to make any table checkable.
If you enable the option by checking it, you will see that 2 additional sub-sections will be available with multiple functionalities. Then click on the Update button to see the changes.
After enabling the “Stackable Table Configuration” option, the respective table changed into a stackable table. Let have a look at the preview for your better understanding.
This is super cool..! Now, you have made the table checkable without facing any hassle.
Showing tables in different devices
Ninja Tables plugin allows you to make your stackable table more personalized. Even if you want to customize the created stackable table, you also can make it happen with Ninja Tables. Moreover, this stackable table can be responsive by displaying it with the different targeted devices.
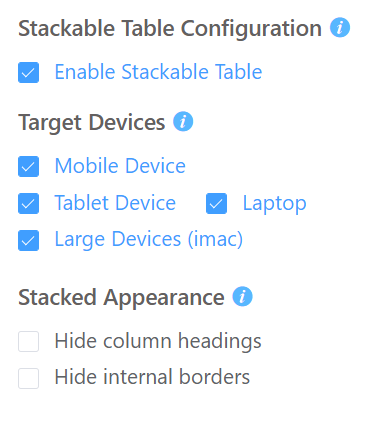
The table created above is based on desktop users. As you can see, the Large Devices option is checked under the Target Device section(above screenshot). If you want to make the table responsive on all the devices, ensure that you have checked all the options under the Target Device section.
For instance, you will get a chance to make the table responsive according to the mobile, tablet, laptop, desktop devices using the sub-option of Target Devices. Now, your table would is responsible for all devices.
You can also change the appearance of the stackable table using the Stacked Appearance option. Under this option, you can hide column headings, hide internal borders of the respective stackable table.
Additional customization
Even if you want to customize/modify any information provided in the table, you can do it easily using the other options like Table Colors, Others in the same section. Moreover, you can also have advanced options like Table Configuration, Frontend Editing, Custom CSS, and Import-Export in the plugin. To learn more about the Ninja Table usage, you can head over to the plugin’s user guide from the official website of the plugin.
Hopefully, this article helped you know how to create stackable tables using a quality WordPress plugin. Let us hear any queries you have.
-

How to Add Code Snippets in WordPress: 100% Free Guide
Learn how to add code snippets in WordPress safely and -

FluentHub MCP: Run Your WordPress Business Right From Your AI Chat
Use FluentHub MCP to connect WPManageNinja products with AI agents -

How to Embed Social Media Feeds on WordPress Websites (No Code)
Learn how to embed Instagram, Facebook, TikTok, and YouTube feeds
Leave a Reply
You must be logged in to post a comment.