
Ninja Charts has incredible features that will let you build unlimited online charts and graphs on your website. The default feature of Ninja Tables is one of the cool features of Ninja Charts. You can build charts using data from the Ninja Tables plugin with this WordPress chart plugin.
Take a look at the simple steps below to create charts from Ninja Tables:
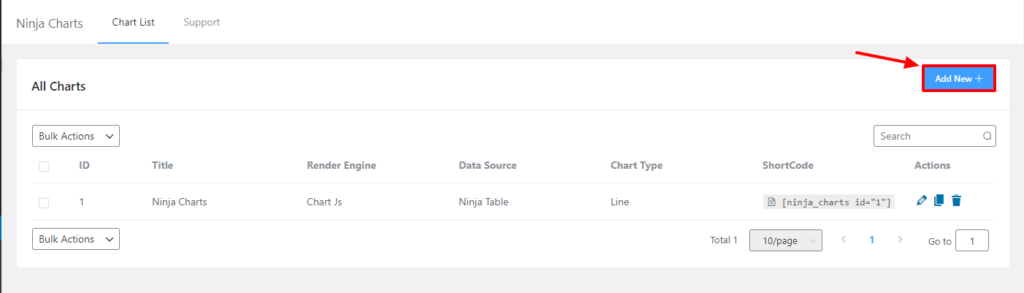
- Step 1: Click the Add New button after installing Ninja Charts.
- Step-2: Put your chart name in the title ➟ choose a chart to render engine ➟ select your preferred chart type from the dashboard ➟ then click on the Next button.

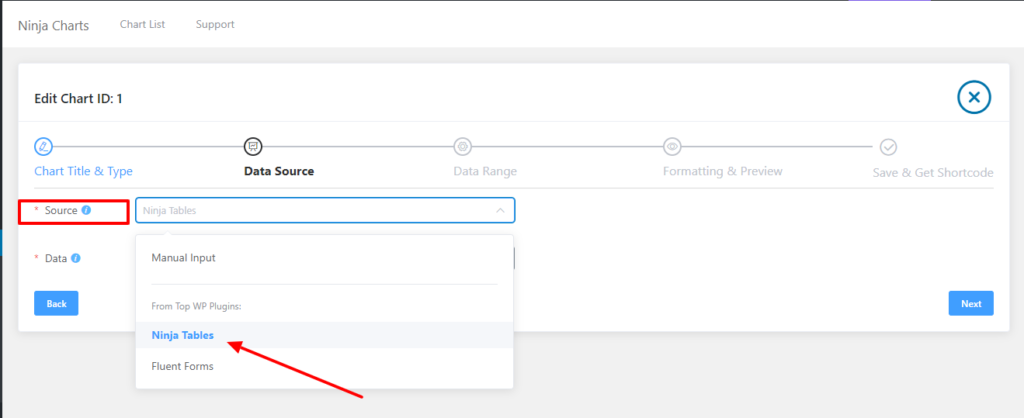
- Step-3: From the Data Source select Ninja Tables ➟ Click on the Next button [In this step, you will also have an option for manual chart creation.]
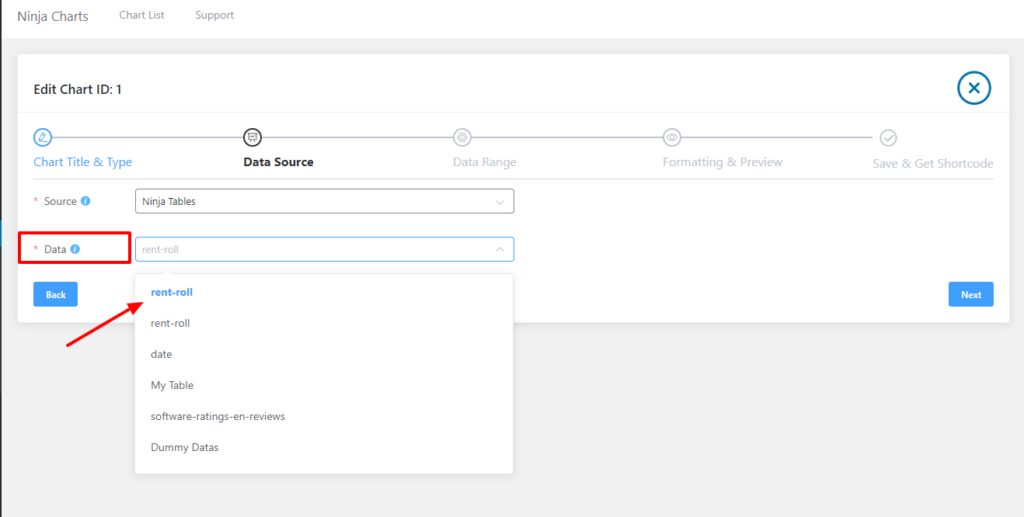
- Step 4: Now, choose the preferred table that you want to create a chart with.
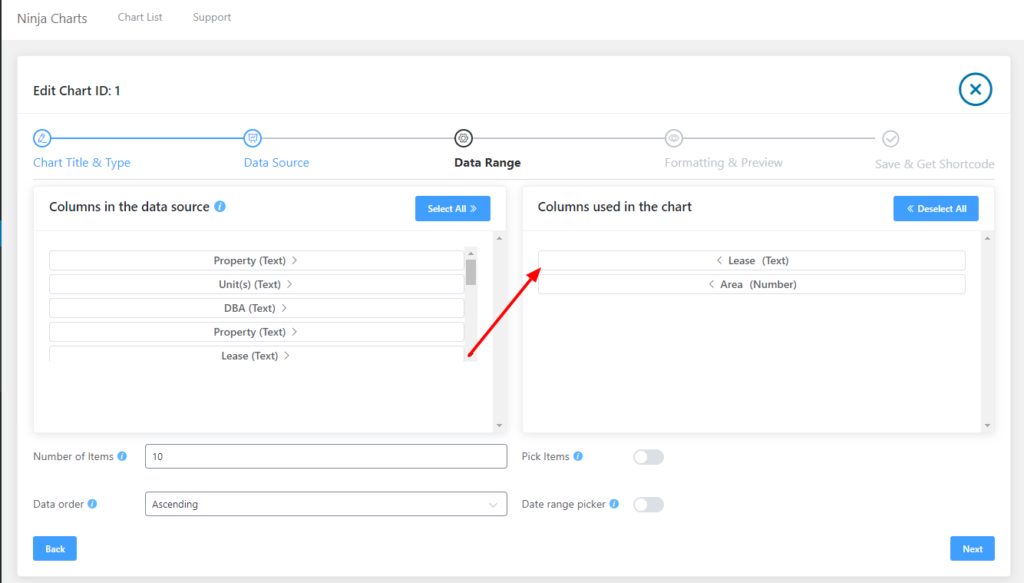
- Step-5: Then, you’ll get the option to drag & drop the desired columns and click on the Next button.
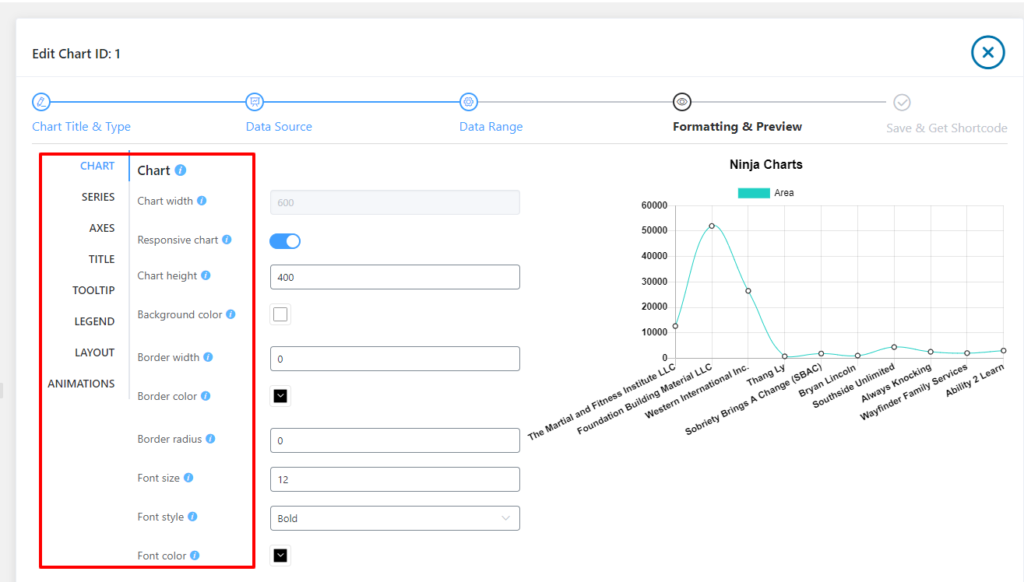
- Step-6: Next, here you will get the prepared chart with customization options in the Formating & preview. Once you’re done with the necessary customization, click on the Next button.
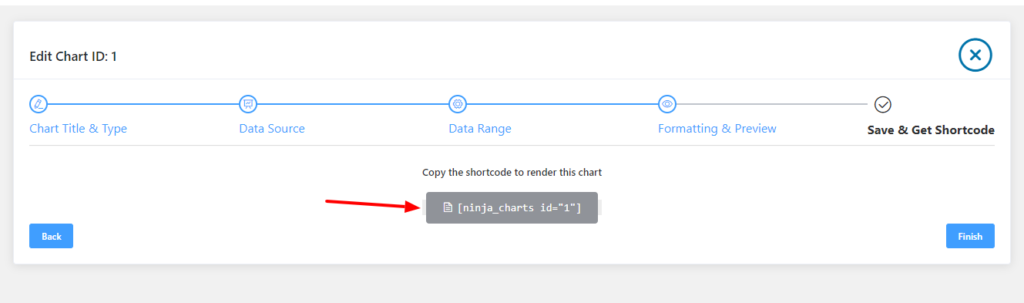
- Step-7: Once you click on the Next button, you are done with the process and you will see a shortcode-based chart has been created.
These steps are easy-going and less time-consuming. So, you won’t find it daunting to create complex or even large charts/graphs with the help of Ninja Charts.