
Ninja Charts is a WordPress chart plugin that makes the process of creating online charts as simple as possible. This plugin is a powerful chart generator for WordPress that allows you to generate and use a variety of charts.
Just follow this simple guide to learn how to use Data-Range Picker with Ninja Charts.
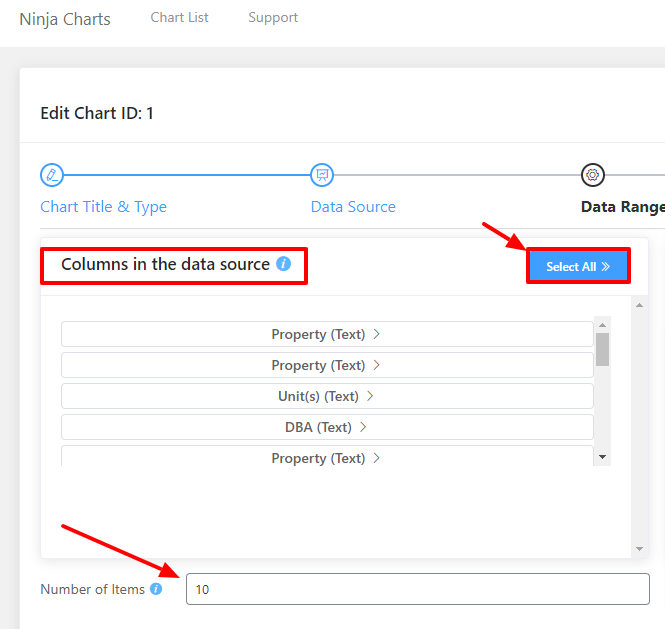
At first, you need to ensure that you have completed the two other previous steps. In this step, you can select the Columns in the data source. By choosing columns that you want to use in the chart. Click on the Select All button if you need to. You can enter the number of items in the Number of Items option. By default, the last 10 items are selected, for all items just put 0.
Using the Data Order option, you can select in what order you want to display the data; choose either Ascending or Descending.
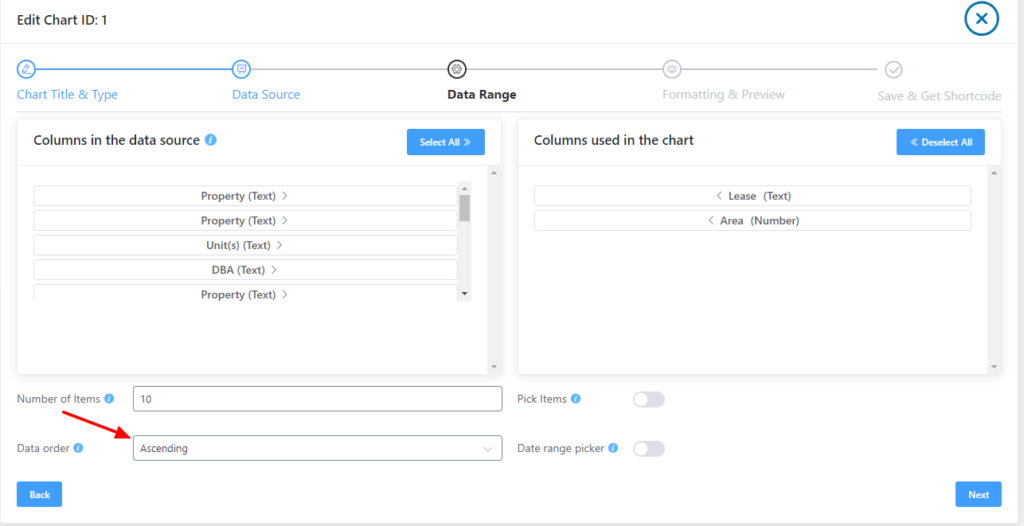
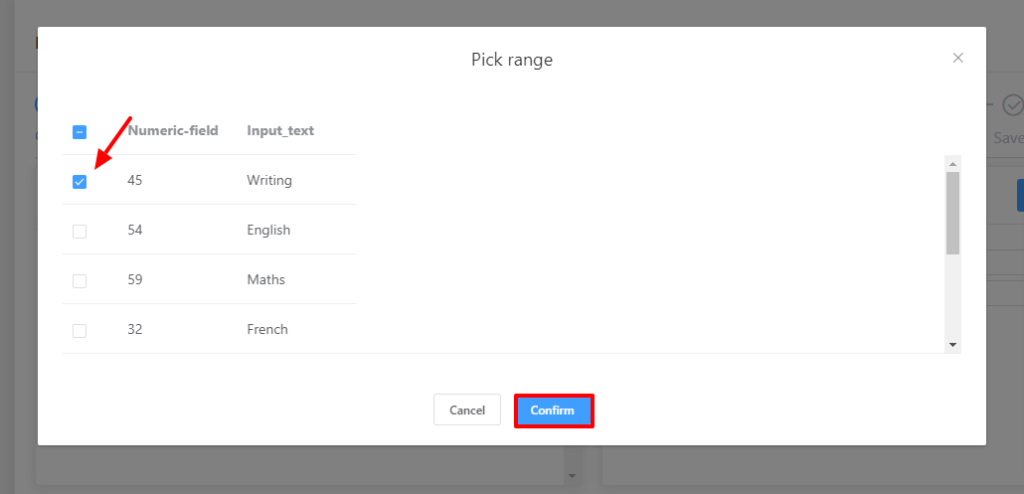
Choose the items manually if you don’t want all the items to be displayed in the chart, using Pick Items. When the pop-up window appears, just choose your preferred items and click Confirm.
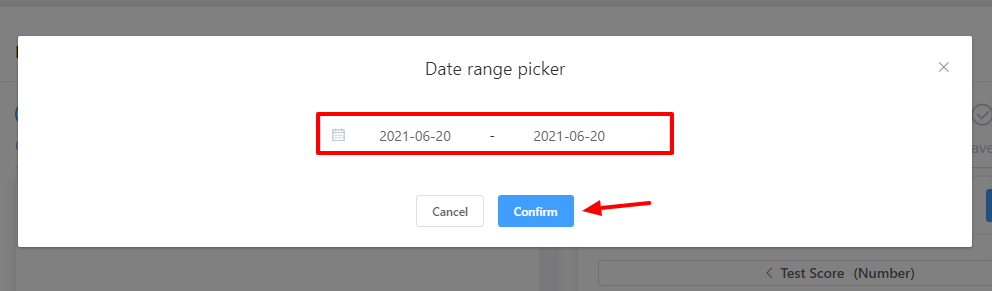
You can select the date range if you want to generate the chart by date range. A pop-up window will appear after turning on the Date range picker. So, here you need to enter the Start Date and End Date, then click Confirm.
Once you’re done, don’t forget to click the Next button to go to the next step.