

The Real Setup Behind a Working Affiliate Marketing Website
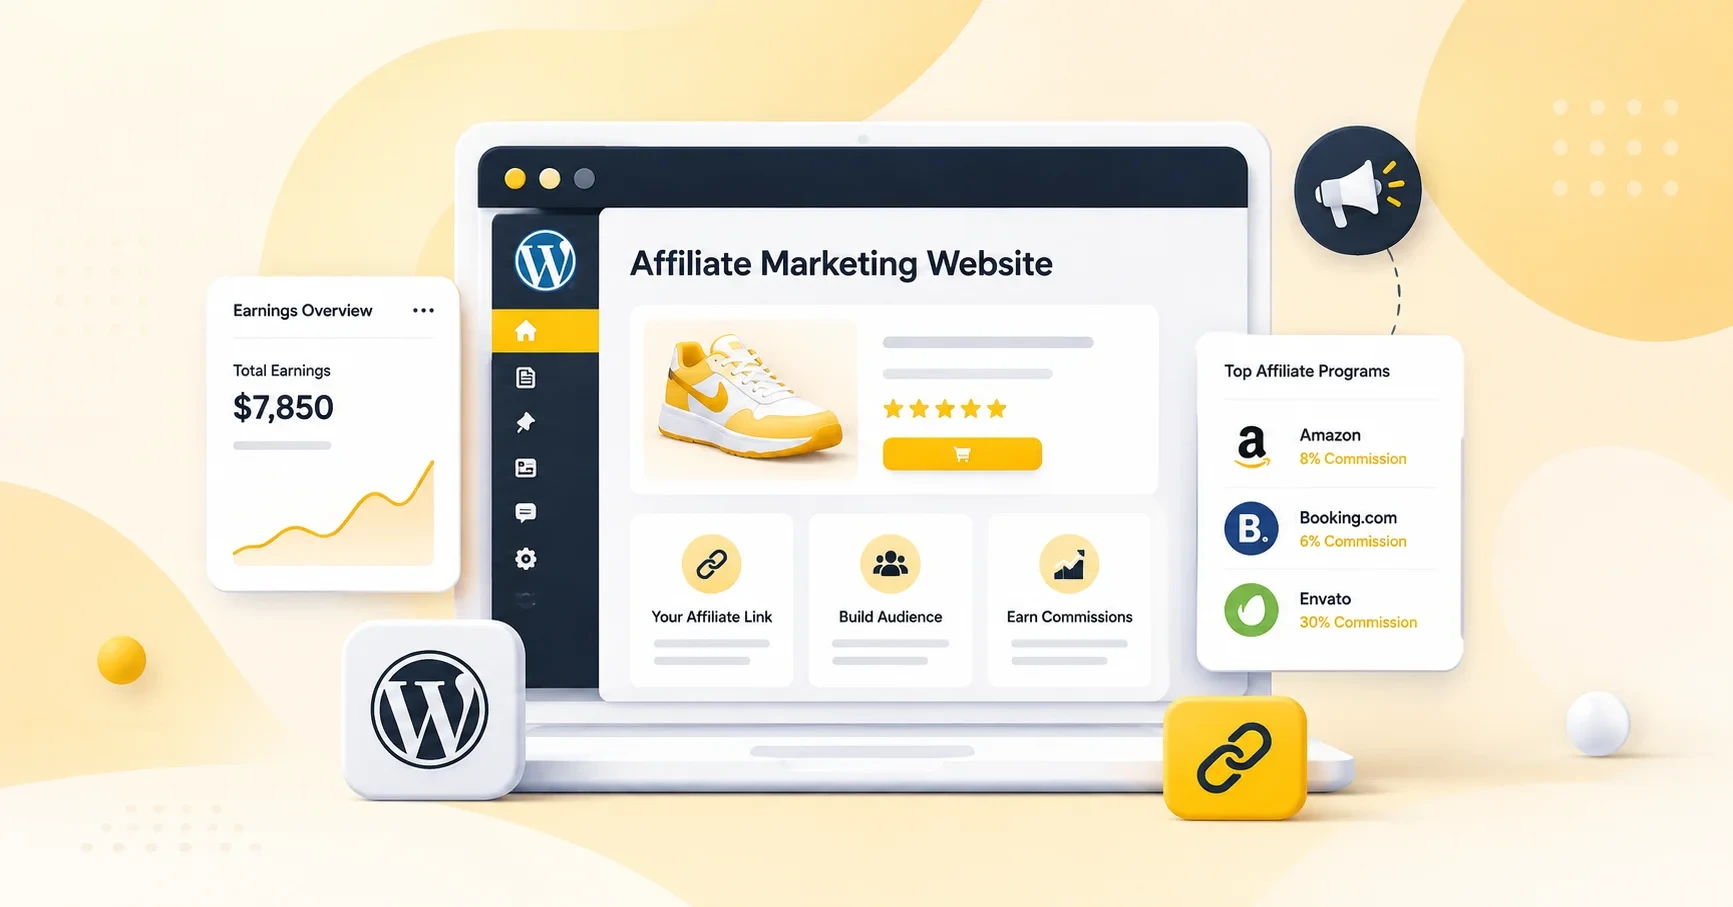
Over the years, affiliate marketing has become one of the easiest ways to make money online. Some people have turned it into a full replacement for their 9-to-5 job, using nothing more than a website and a few product links.
The process itself is simple: someone clicks a product link on your site, buys something on Amazon or another marketplace, and you earn a commission without lifting a finger. That is the promise of affiliate marketing, and it is real. But it’s possible with an affiliate marketing website built to do the job.
This guide walks through the entire setup, step by step, from picking a niche to launching an affiliate marketing website ready to earn its first commission.
Key takeaways
- Building an affiliate site isn’t complicated, but it does have a real sequence.
- Your niche only works if people are actually spending money in it, not just searching for it.
- Domain and hosting choices matter less for the name itself and more for speed, since slow pages lose clicks before anyone reads your recommendation.
- A handful of pages (disclosure, privacy, about) need to exist before you publish a single review, not after.
- Manually managing affiliate links stops working past a handful of posts, which is the actual problem AzonPress solves.
- Reviews and social proof convert better than your own opinion alone; that’s the job WP Social Ninja does.
- An email list is the one audience you keep even when search rankings shift, which is where Fluent Forms and FluentCRM come in.
- Traffic takes months to build, so promotion and patience matter as much as the setup itself.
- A site isn’t done until it’s actually tested: links, forms, speed, and disclosures all checked before launch.
Inside an affiliate marketing website
An affiliate marketing website recommends products or services and earns a commission on the sales it generates.
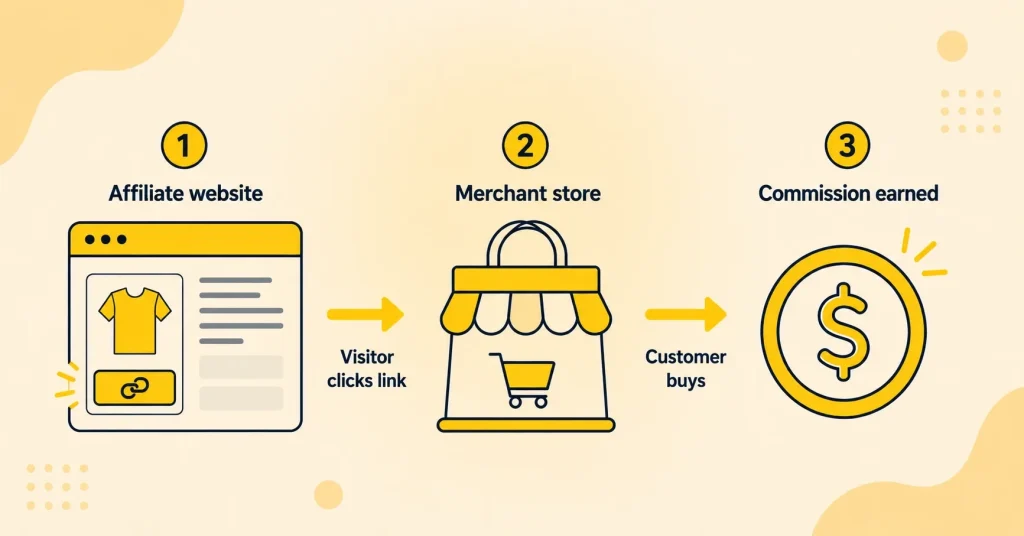
It starts with your affiliate marketing website. A visitor lands on a review or comparison post and clicks a product link, except this one is tagged with your affiliate ID. That click sends them straight to the merchant store, most commonly Amazon, where they browse and complete the purchase on the retailer’s own site, not yours. You never touch payment, shipping, or customer support at any point in this chain.
Once that purchase goes through, the merchant credits you a percentage of the sale. That’s the affiliate commission, and it lands in your account without you doing anything beyond writing the review that sent the visitor there in the first place.
Tutorial: Steps to set up an affiliate marketing website
You already know how affiliate marketing works and what the website’s actual job is. So let’s skip the theory and get into the part that matters.
Here’s the real sequence for building an affiliate marketing website, step by step. Each one builds on the last, so skipping ahead usually just means circling back later to fix something you should have handled early.
Let’s get into it.
Step 1: Pick a niche you can own
Your niche is the specific slice of a market your site will serve, and it is the decision everything else depends on. Go too broad, like “kitchen gadgets,” and you are competing with sites that have been publishing for a decade. Go too narrow, like “left-handed can openers,” and there is no real audience or product range to build around. The niche that works sits between those two extremes.
Check three things before you commit to a niche:
- You can sustain it: You will be writing about this topic for months or years, so genuine interest matters. A niche you actually care about is easier to write from experience, and readers can tell the difference between authentic recommendations and filler content.
- Real demand exists: Search interest, active blogs, YouTube channels, or forum communities around the topic all signal a healthy, searchable market rather than a niche nobody is looking for.
- Has earning potential: The niche has products people actually spend money on, with enough variety across price points that you have real angles to review, compare, and recommend beyond the first ten posts.
Narrowing a broad topic usually gets you there faster than trying to own the whole category:
- Instead of “fitness,” try “home gym equipment for small apartments” or “recovery gear for runners.”
- Instead of “home office,” try “standing desk setups for small spaces” or “budget audio gear for remote calls.”
- Instead of “outdoor gear,” try “car camping essentials” or “trail running gear for beginners.”
Look for a niche you can credibly become the go-to recommendation source for, not just another site listing the same ten products everyone else covers.
Step 2: Select your affiliate program
Your affiliate program determines what you can promote and how you get paid, so this decision shapes everything that follows.
Amazon Associates is the natural starting point for most new affiliate sites. It covers nearly every product category, carries the trust of the Amazon brand, and gives visitors a checkout experience they already know. Commission rates are modest compared to niche networks, but the sheer range of products and Amazon’s conversion rate make up for it.
Other networks worth knowing about as your site grows include ClickBank, which focuses on digital products with higher commission rates, and direct brand affiliate programs in your niche, which can offer better rates once you have traffic to negotiate with. Most affiliate sites start with Amazon Associates and add other programs later.
Step 3: Register a domain name
Your domain name is the first trust signal a visitor sees, often before they even land on the page. It also has to work for years.
There are two common approaches. A brandable domain (something like “GearScout” or “TrailReady”) reads as a real business and gives you room to expand into new product categories later without the name feeling out of place. An exact-match domain built around a keyword (something like “besthomegymgear.com”) can carry a small SEO advantage and tells visitors exactly what the site covers. Still, it locks you into that specific angle and can look dated if the niche shifts.
A few practical checks before you register:
- Search availability across registrars like Namecheap or GoDaddy, and confirm it is not trademarked in your niche.
- Check matching social handles so your branding stays consistent across platforms.
- Choose .com when available. It is still the most trusted and recognized extension.
- Keep it short and easy to say out loud.
- Turn on WHOIS privacy to keep your contact details off public domain lookups.
Avoid registering a domain tied to a single product or brand name you do not control. If Amazon discontinues that product or the brand changes direction, the domain no longer makes sense.
Step 4: Set up hosting
Hosting is the foundation your entire site runs on, and cutting corners here shows up fast in page speed, uptime, and how well your affiliate links actually convert. A slow host means visitors bounce before a product box even loads, and a host with weak uptime means lost traffic and lost commissions every time the site goes down.
For an affiliate site specifically, look for a host with strong WordPress-specific support, solid caching out of the box, and enough headroom in the plan to handle traffic spikes without a slowdown once a post starts ranking.
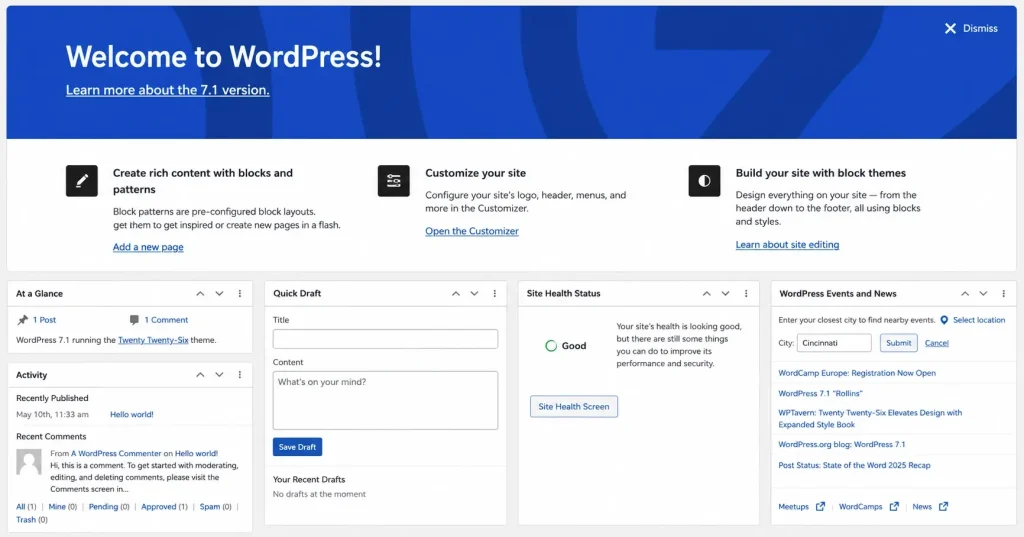
Step 5: Install WordPress
WordPress powers more than 40% of the web for good reason: it is free, flexible enough to handle everything from a five-post blog to a full affiliate catalog, and it has a plugin ecosystem built specifically for tasks like link management, forms, and email, which is exactly what this setup depends on.
Most hosts offer one-click WordPress installation from the account dashboard, so the platform itself takes minutes to get running. What matters more is what you configure right after install:
- Set a unique admin username, not “admin.”
- Delete the default sample content and plugins.
- Confirm SSL is active so your site loads with “https.”
- Set your permalink structure to post name for clean, readable URLs.
Step 6: Set up core pages
Once WordPress is running, resist the urge to jump straight into writing reviews. A few pages need to exist first, not because they’ll ever rank for a keyword, but because visitors, Amazon, and Google all expect to find them.
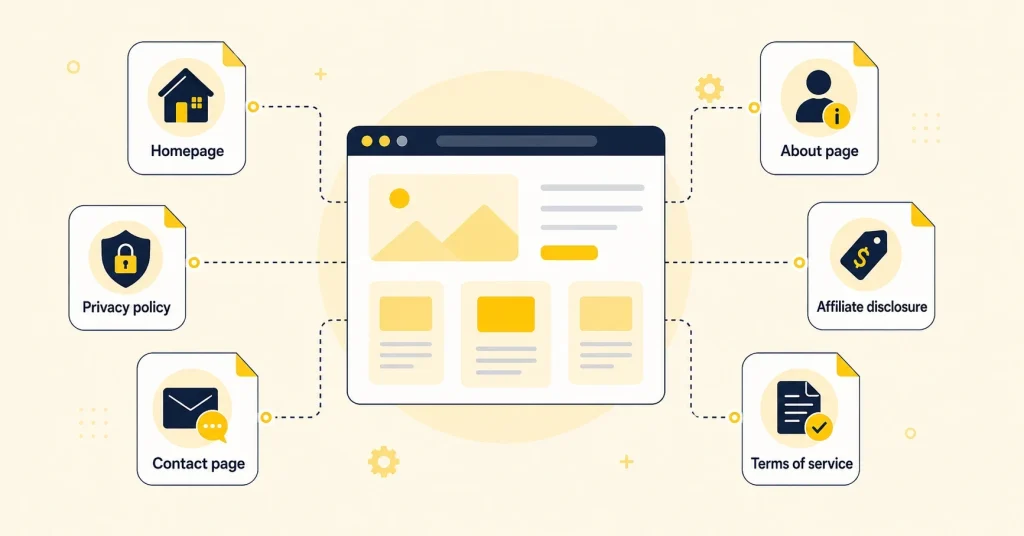
- Homepage: People land here with zero context, so it needs to say what your site is about almost immediately. Point them toward your best content or top categories instead of leaving them to guess where to click next.
- About page: This is where readers decide if you’re worth listening to. Say who you are and why you know this niche, since a stranger recommending products online means nothing without some reason to trust them.
- Affiliate disclosure: Amazon requires this one outright; there’s no getting around it. Beyond the requirement, being upfront about earning a commission actually makes readers trust your recommendations more, not less.
- Privacy policy: Anyone collecting emails through a form, which you will be, needs this. It’s dry to write, but standard practice, and most hosts or plugins have a generator that gets you 90 percent of the way there.
- Contact page: A working way to reach you tells visitors and potential brand partners that an actual person runs this site. Even a simple form is enough.
- Terms of service: Not the most exciting page to write, but it sets ground rules for how people can use your content and gives you some cover if someone tries to lift it wholesale.
Step 7: Find a WordPress theme
Your theme is the foundation for every product box, comparison table, and review layout your visitors will see. So it needs to be lightweight, fast on mobile, and built to render affiliate content cleanly without extra plugins fighting it for control.
A theme not designed with affiliate sites in mind ends up needing patchwork fixes just to display a simple comparison table.
Step 8: Install essential WordPress plugins
The right plugins turn a basic WordPress affiliate marketing website into a working affiliate business. Four cover the core of it: link management, form capture, email nurturing, and trust signals.
AzonPress for affiliate product display
AzonPress is a WordPress plugin built specifically to manage Amazon affiliate links at scale. You can search for products directly inside the WordPress editor and insert them without leaving the page.
Once the API is connected, AzonPress pulls live product data, including price, image, and availability, straight from Amazon. That data updates automatically, so a product box added in January still shows accurate pricing months later without you touching the post again.
A few features worth knowing beyond basic product insertion: you can display products in five different formats- grid, box, list, table, or widget- so a “best of” roundup and a single review don’t have to look the same.
Geo-targeting redirects visitors to their own country’s Amazon store instead of sending everyone to the US listing, which matters if you get traffic from outside the US. Link cloaking keeps your affiliate URLs clean and branded instead of showing raw Amazon tracking parameters, and a built-in reporting dashboard shows which products and locations are actually driving clicks.
The plugin also isn’t locked to Amazon. Its Zero API feature works by pulling data from a pasted product URL, which means you can promote listings from eBay or Etsy the same way, without adding a separate plugin for each marketplace.
WP Social Ninja for reviews and social proof
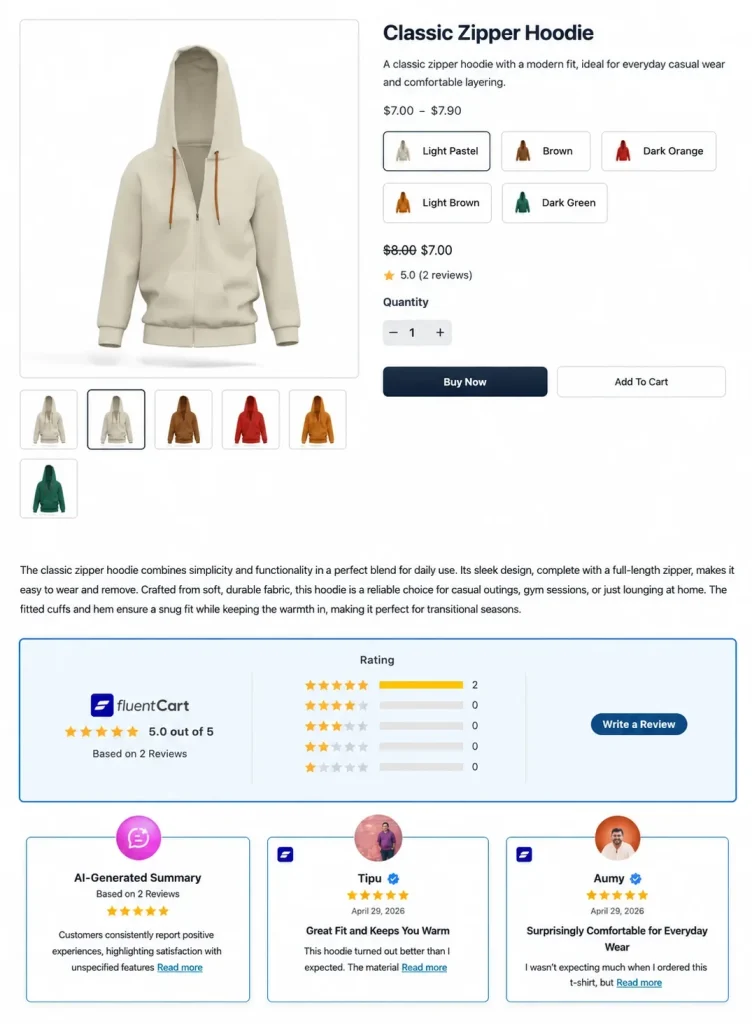
WP Social Ninja pulls reviews, social feeds, and chat widgets from over 30 platforms into one tool. Reviews matter most for an affiliate marketing website. The plugin pulls ratings from Google, Facebook, Yelp, or WooCommerce and shows them next to your own recommendation, so visitors get more than just your opinion before they click through.
An AI summarizer condenses long review lists into a quick, scannable summary, handy on comparison pages where nobody wants to scroll through dozens of quotes. The plugin also adds chat widgets like WhatsApp and Messenger, so visitors with pre-purchase questions can reach out directly instead of leaving the page.
Fluent Forms for capturing visitor emails
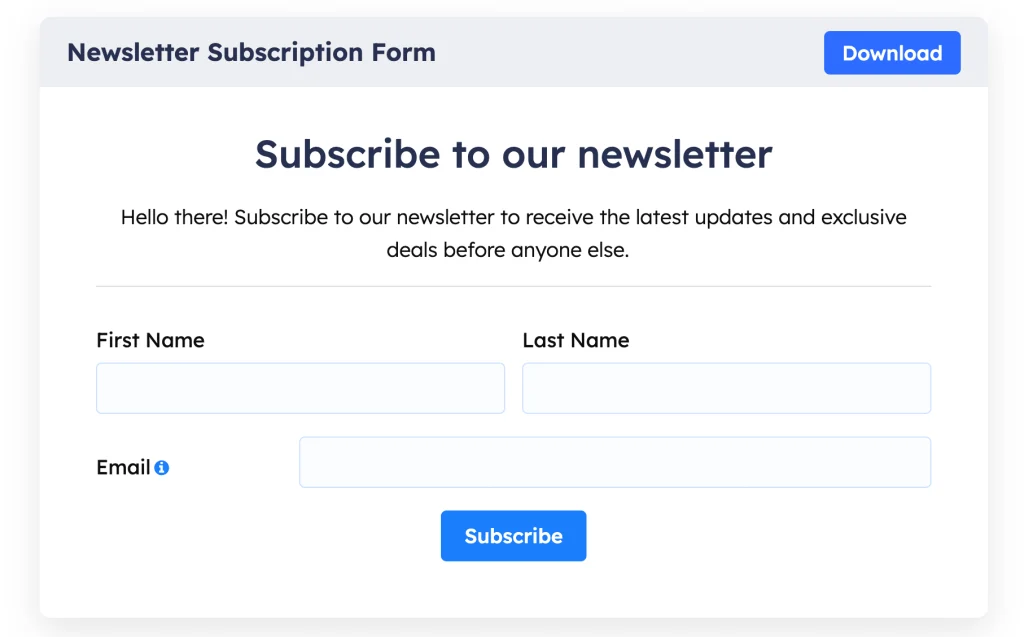
Fluent Forms is a drag-and-drop form builder best for capturing leads. For an affiliate site, the newsletter and lead-capture forms matter most. The plugin builds a simple opt-in with conditional logic so the form only asks for what it needs, then style it to match your site with the built-in form styler instead of it looking like a bolted-on plugin.
Fluent Forms also connects directly to CRMs, so a subscriber captured on a product review can flow straight into FluentCRM for follow-up without manual exporting, and every submission triggers an instant email notification so you know the moment someone opts in.
Placing a low-friction signup form at the end of high-traffic posts is usually enough to start building a list without hurting the reading experience.
FluentCRM for nurturing your subscriber list
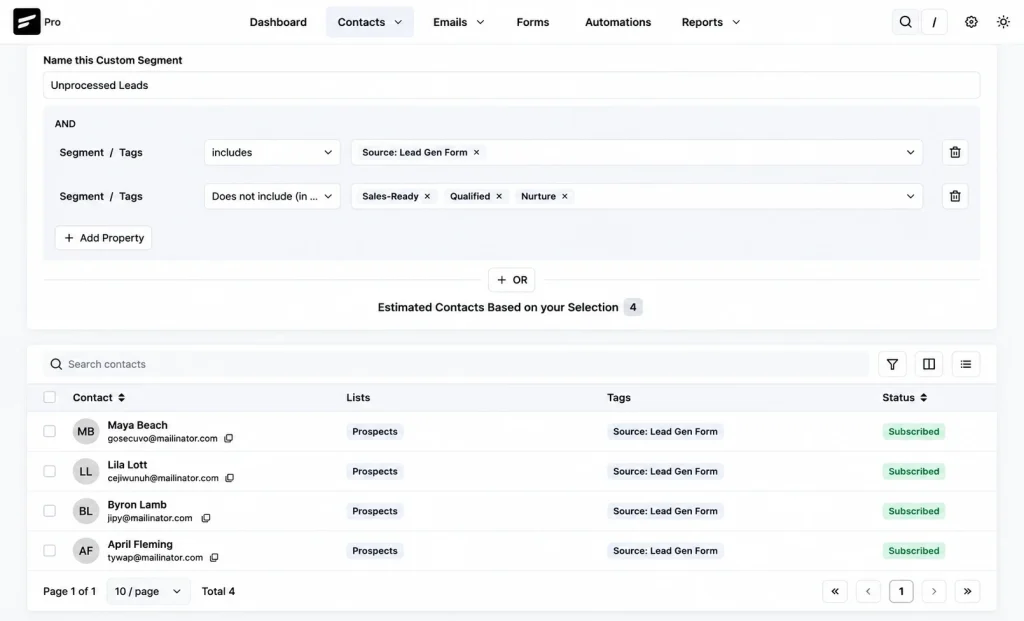
Once a visitor subscribes, FluentCRM takes over the follow-up: automated welcome sequences, product roundup emails, and segment-based campaigns based on what the subscriber clicked or read.
FluentCRM runs entirely inside WordPress, so contacts, tags, and campaign data stay on your own site instead of a third-party SaaS tool. Its visual automation builder lets you map out full subscriber journeys, triggered by a form submission, a tag, or a specific link click, and every campaign reports back open rates, click rates, and which links a subscriber actually followed, so you can see which product recommendations are landing.
Segmentation is what makes the nurturing feel relevant instead of generic: tag subscribers by the niche or post they came from, and send them roundups and restock alerts that match what they already showed interest in.
Together, these four plugins cover the full loop: attract a visitor, show them the right product, capture their interest, and keep them coming back.
Step 9: Create high-quality content
Product data and trust signals only work if the content around them earns a ranking in the first place. A few habits separate affiliate content that ranks from content that sits on page three:
- Answer the reader’s actual question in the first two or three sentences of a section, not after a long buildup.
- Use real comparison criteria, such as price, durability, and ease of use, instead of generic praise like “great value.”
- Update posts when prices or product availability change instead of leaving them to go stale.
- Write from direct use or detailed research. Reviews that read like a repackaged product description rarely rank or convert well.
- Structure posts around the questions readers are actually asking, not just the keyword itself.
The most common content formats for affiliate sites are single-product reviews, side-by-side comparison posts, and “best of” roundups. Each one pulls its weight differently: reviews build trust on high-consideration purchases, comparisons help undecided buyers, and roundups capture broad, early-stage searches.
Step 10: Insert affiliate links the right way
A five-post blog can get away with pasting raw Amazon links straight into the text. That approach breaks down fast once you are managing 50 or 100 posts. Prices shift, products go out of stock, listings get discontinued, and updating every old post by hand is not something most people keep up with. Six months in, half your links point to products that no longer exist or cost more than what you wrote.
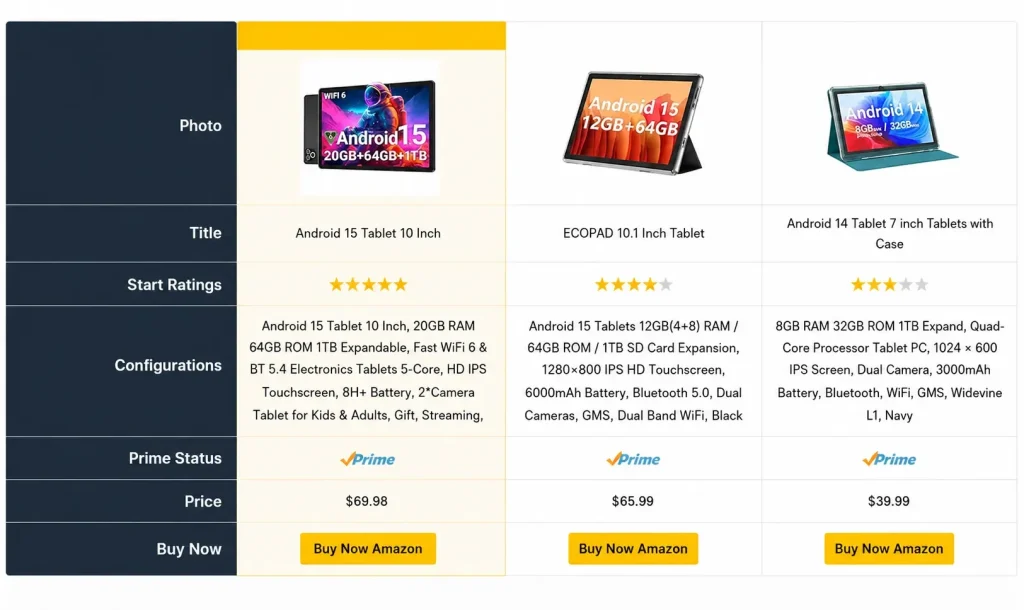
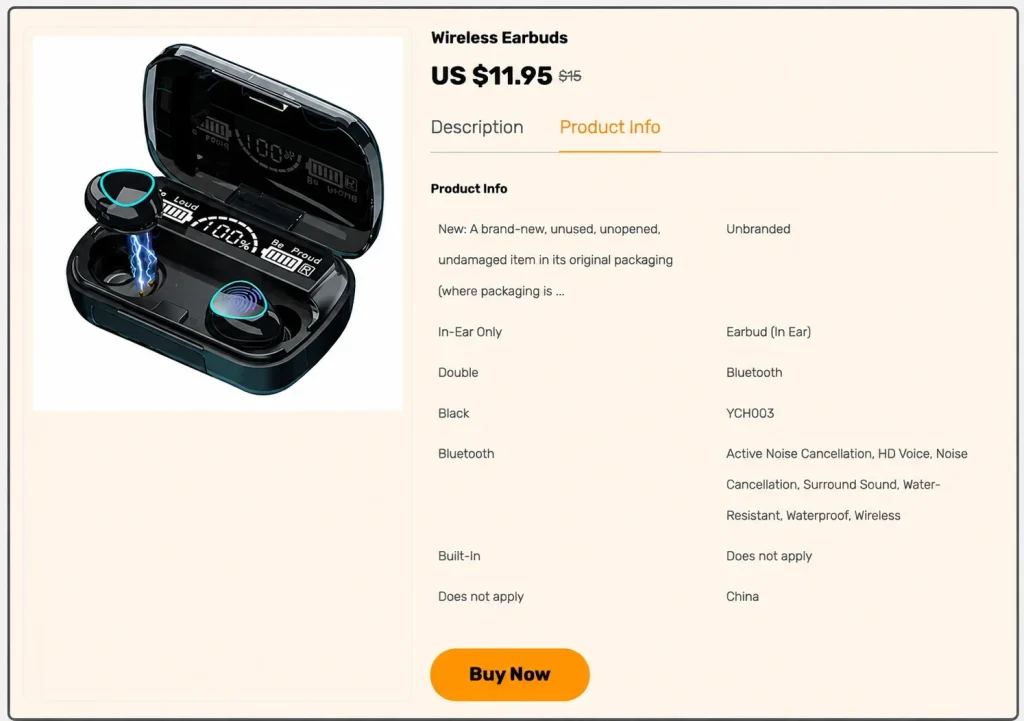
AzonPress solves this by pulling live product data instead of freezing it at the moment you hit publish. Beyond single product links, it builds comparison tables that show multiple products side by side with pricing, ratings, and a Buy on Amazon button, so readers can compare options at a glance instead of digging through paragraphs to find the details that matter. Tables like this tend to hold attention longer than a plain text link buried in a review.
A few placement habits matter as much as the tool itself:
- Place a product box or link near the top of a review, not just buried in the conclusion.
- Use a clear call-to-action instead of a plain text link, such as “Check Price on Amazon.”
- For roundup posts, add links or boxes for every product listed, not just the top pick.
- For comparison posts, add a summary table near the top so readers can scan it before reading the full breakdown.
No Amazon API access yet? Use zero API
Amazon only grants Creators API access after you generate a handful of qualifying sales, which leaves brand-new sites stuck with no way to pull live product data. AzonPress works around this with its Zero API feature: paste a product URL from Amazon, eBay, or Etsy, and it fetches the title, image, price, and ratings directly, no API credentials required.
This means a new site can start publishing fully functional product boxes and comparison tables from day one, instead of waiting on Amazon’s approval process. It also opens the door to promoting products from eBay and Etsy alongside Amazon, without juggling a separate plugin for each marketplace.
Step 11: Promote your website & be patient
A new site will not rank overnight, and Amazon’s cookie window is short, so traffic needs to be steady rather than a single spike.
Focus early effort on:
- Long-tail, low-competition keywords: A brand-new site has a better shot at ranking for “best budget espresso machine under $150” than for “best espresso machine.”
- Internal linking: Link new posts back to older, relevant reviews and comparison pages so visitors explore more than one page per visit.
- Pinterest and niche social platforms: For visual product categories, these can send meaningful early traffic before SEO rankings catch up.
- Guest posts and outreach: A handful of relevant backlinks from niche sites can meaningfully speed up how fast Google trusts a new domain.
- Your email list: Every FluentCRM sequence you send is a chance to re-surface older content to people who already trust your recommendations.
Traffic builds gradually here, so give it room to grow before judging whether the site is working.
Step 12: Test before your site goes live
A handful of checks before launch can save you from losing your first visitors to a broken form or a dead link. Work through these before you announce the site anywhere:
- Click every affiliate link: Confirm each one lands on the correct product page and carries your tracking ID.
- Submit every form: Test the newsletter signup and confirm the subscriber actually lands in FluentCRM with the right tag.
- Check page speed on mobile: Most affiliate traffic arrives on a phone, so a slow mobile load costs more clicks than a slow desktop load.
- Review on multiple browsers and screen sizes: Comparison tables and product boxes are the first things to break on smaller screens.
- Confirm SSL is active site-wide: A browser security warning will send visitors away before they read a word.
- Add your affiliate disclosure: Amazon Associates requires a visible disclosure, and it also builds trust with readers.
- Set up analytics: Connect Google Analytics or a similar tool before launch, so you have baseline traffic data from day one.
- Check your 404 page and broken links: A dead link inside a product review undermines the recommendation next to it.
Once these pass, the affiliate marketing website is ready for real traffic instead of just looking ready.
Common mistakes that affiliate marketing websites make
Most affiliate sites don’t fail from one big error. They fail from small habits that compound over months until growth quietly stalls.
- Chasing commission rate instead of genuine buyer interest.
- Publishing thin list posts with no real recommendation or reasoning behind them.
- Letting old posts sit unedited while pricing and availability go stale.
- Skipping email capture and relying only on search traffic.
- Turning every product mention into a link instead of only the ones worth recommending.
- Installing plugins you don’t actually need, which slows the whole site down.
Wrapping up
Well, well, well, that’s a long discussion, and by now you probably have most of your answers.
As you start your affiliate marketing journey, remember a good affiliate marketing website takes time to build traffic and sales. So be patient.
Get the platform right, be honest with your reviews, and keep showing up with content that actually helps someone decide what to buy. Do that long enough and it stops feeling like a side project.
That said, WPManageNinja’s products can take some of the heavy lifting off your hands: the link management, the trust signals, the email follow-up- so more of your time goes into the content itself. If you’re setting one of these up, the WPManageNinja community is worth joining. You’ll hear about new features first and see how other people are actually using these tools.
Good luck with your affiliate marketing journey.
Ciao.
Frequently asked questions
How long does it take to make money from an affiliate site?
Most sites see their first commissions around month three to four, with income becoming consistent closer to month eight or nine as content and rankings build up.
How many products should a single review post cover?
One in-depth review works best for expensive, high-consideration purchases. Cheaper, browsing-stage searches convert better with a roundup of five to ten options.
Do you need coding skills to build an affiliate marketing website?
No. WordPress plus plugins like AzonPress, Fluent Forms, and FluentCRM handle the technical work, so no coding is required. Most beginners only get stuck on theme setup, which is solvable without touching code.
Do you need a large audience before adding affiliate links?
No. Add links and product boxes from your first post using AzonPress’s Zero API feature, so they are already in place once traffic arrives.
Can you do affiliate marketing without a website?
Yes, through Instagram, YouTube, or email. But a website is an asset you own, one that keeps ranking for years without depending on a platform’s rules.

This is Madhobi, a Marketing Strategist at WPManageNinja with expertise in technical writing and email marketing. Outside of work, she likes traveling and exploring new places.
-
10 Best jQuery Table Plugins for Best Data Visualization in 2026
Discover the 10 best jQuery table plugins for 2026. Compare -

Black Friday Marketing Strategies for 2026: Core and Advance Move
Black Friday is the most celebrated shopping season worldwide. Discover -

How Much Can You Earn With Amazon Affiliate Marketing? Rates & Niches
How much can you earn with Amazon affiliate marketing? Dive



Leave a Reply
You must be logged in to post a comment.