
How to Build a Private Customer Community in WordPress
Your customers need more than product updates and support tickets. They need a private space where they can connect, learn, ask questions, and feel part of your brand. With WordPress and FluentCommunity, you can build that space on your own website.
Key Takeaways
- A private customer community helps improve retention, loyalty, and customer lifetime value.
- Building on WordPress gives you full ownership of your audience, content, data, and brand experience.
- FluentCommunity makes it easy to create a gated community without relying on Facebook Groups, Slack, Discord, or other rented platforms.
- You can organize members using Spaces, private access rules, courses, resources, and role-based visibility.
- A strong onboarding flow helps new members understand what to do first and keeps them engaged from day one.
- Features like pinned posts, private messaging, courses, leaderboards, and FluentCRM automation can make the community more active and useful.
- The best communities grow through consistent host presence, member recognition, recurring discussions, and helpful resources.
Why Does a Private Customer Community Matters for Your Business?
Before getting into the how, it’s worth understanding the why. Most businesses invest heavily in acquiring customers and very little in keeping them. A private community flips that equation.
When customers have a dedicated space to engage with your brand and each other, they stick around longer.
They get more value from your product because they learn how to use it better. They feel seen and heard, which builds the kind of trust that no amount of advertising can buy. Research consistently shows that customers who are part of a branded community have higher lifetime value and are significantly more likely to recommend the product to others.
A private community also gives you a direct feedback loop. You see what your customers are struggling with, what features they’re asking for, and what’s working well, all in real time, without running a formal survey. For coaches, course creators, and small business owners especially, this kind of insight is invaluable.
The keyword here is private. A gated, members-only space creates exclusivity. It signals to your customers that access is earned, either through a purchase, a membership, or an invite, which makes the community feel more valuable from day one.
Why is WordPress, and FluentCommunity the Right Choice?
There are plenty of platforms that let you build communities. Circle, Mighty Networks, Slack, even Discord. But all of them come with the same fundamental problem: your community lives on someone else’s server, under someone else’s rules, with their branding in the URL.
WordPress solves the ownership problem. And FluentCommunity solves the complexity problem that used to come with building a community on WordPress.
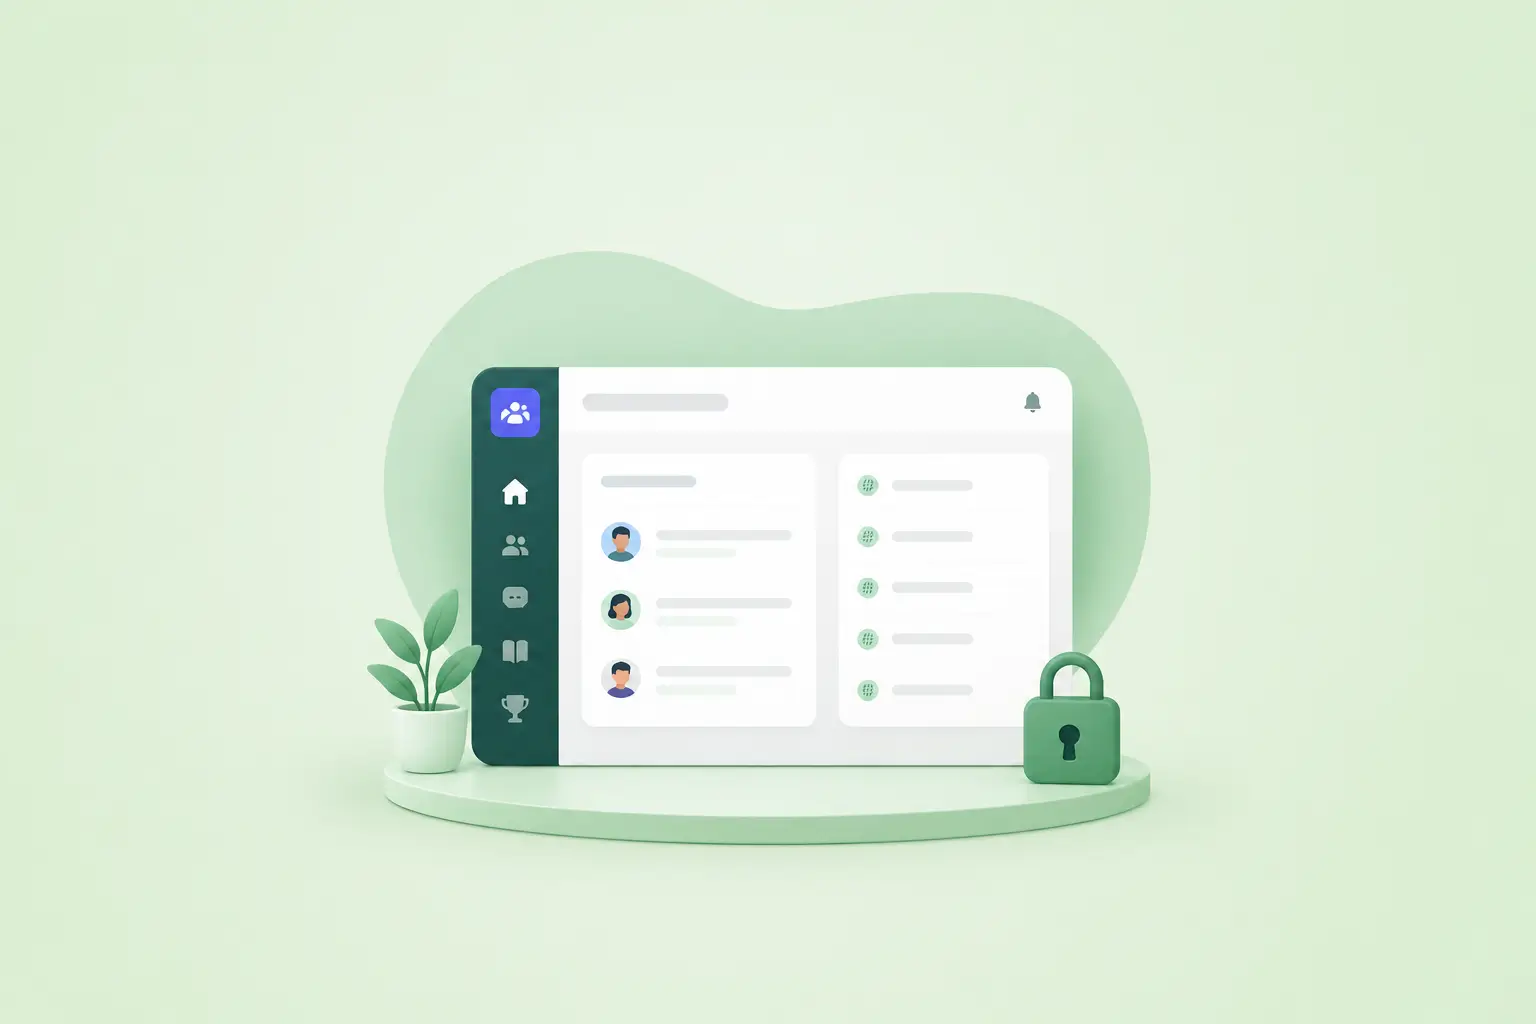
FluentCommunity is a lightweight, fast WordPress plugin that brings social community features, feeds, spaces, private messaging, courses, leaderboards, and more to your existing WordPress site.
Unlike older alternatives like BuddyBoss or BuddyPress, it’s built with modern performance standards. It doesn’t slow your site down, it doesn’t require a tangle of add-ons, and it doesn’t demand a steep learning curve.
For a private customer community specifically, FluentCommunity is well-suited because it lets you control exactly who gets access, how they get in, and what they can see once they’re inside.
Step 1: Install FluentCommunity on Your WordPress Site
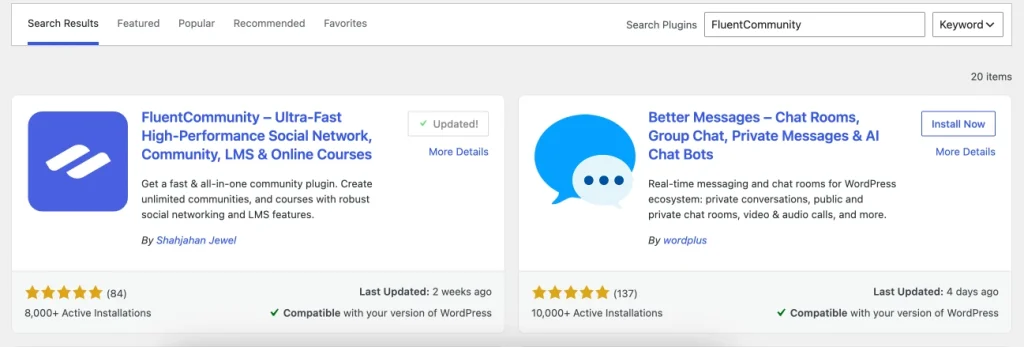
Getting started is straightforward. From your WordPress dashboard, navigate to Plugins, then look for the Add New button, and search for “FluentCommunity.” Install and activate the free version to get started, or go directly to fluentcommunity.co to grab a Pro license for access to the full feature set, including advanced course tools and priority support.
Once activated, FluentCommunity adds a dedicated portal to your site. A clean, modern interface that operates independently of your regular WordPress theme. This means your community has its own distinct environment without interfering with your website’s existing design.
Step 2: Configure Your Community’s Privacy Settings
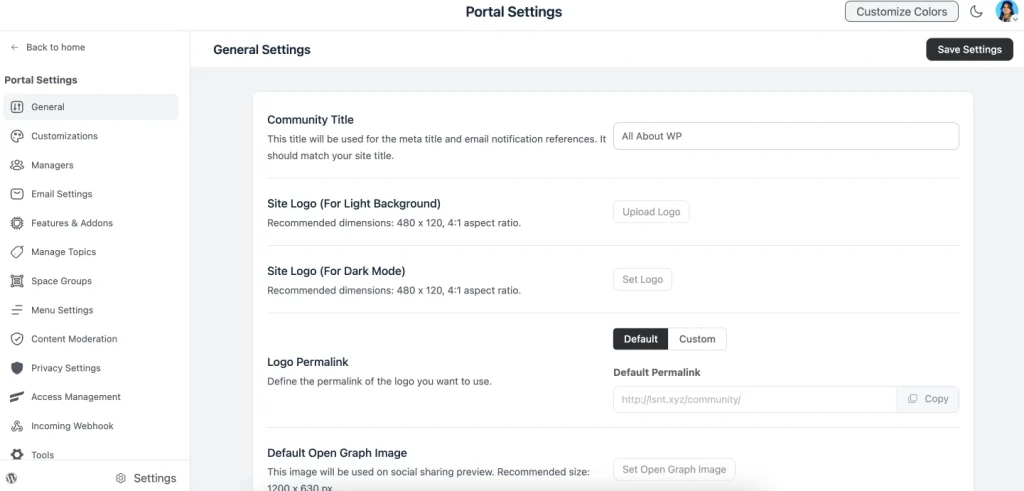
This is the most important step for a private community. FluentCommunity gives you control over who can access the portal and how.
From the FluentCommunity admin panel, go to Settings, General. Here you can set the community to require login before any content is visible. This ensures that visitors who land on your community URL without an account see nothing but a login screen, no content, no member list, nothing.
Next, decide your registration model. For a private customer community, you generally want one of two approaches. The first is invite-only access, where you manually add members or send invite links to customers after they purchase.
The second is purchase-gated access, where completing a purchase automatically grants community access. This can be set up using FluentCommunity alongside Paymattic or WooCommerce.
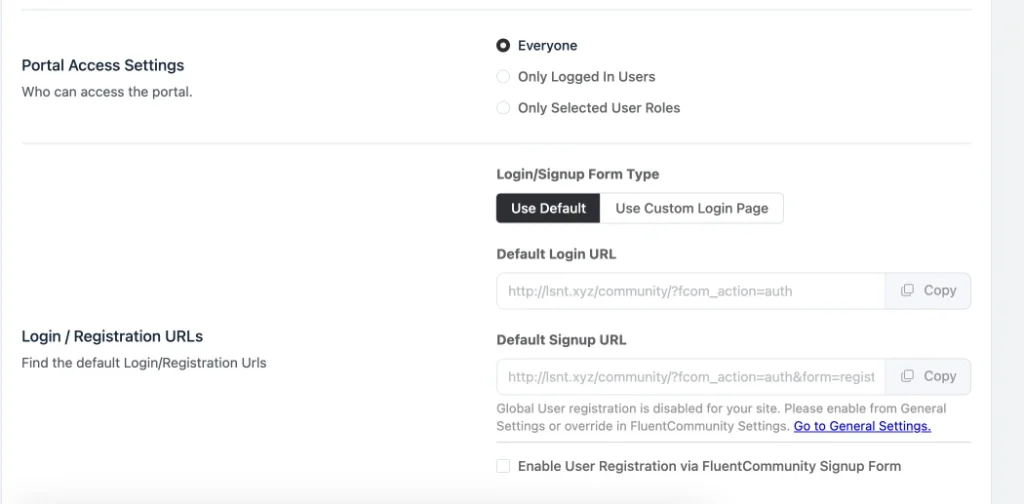
For most businesses, the purchase-gated approach is the cleaner option because it removes manual work. Every new customer gets access automatically, and former customers who don’t renew can be removed just as seamlessly.
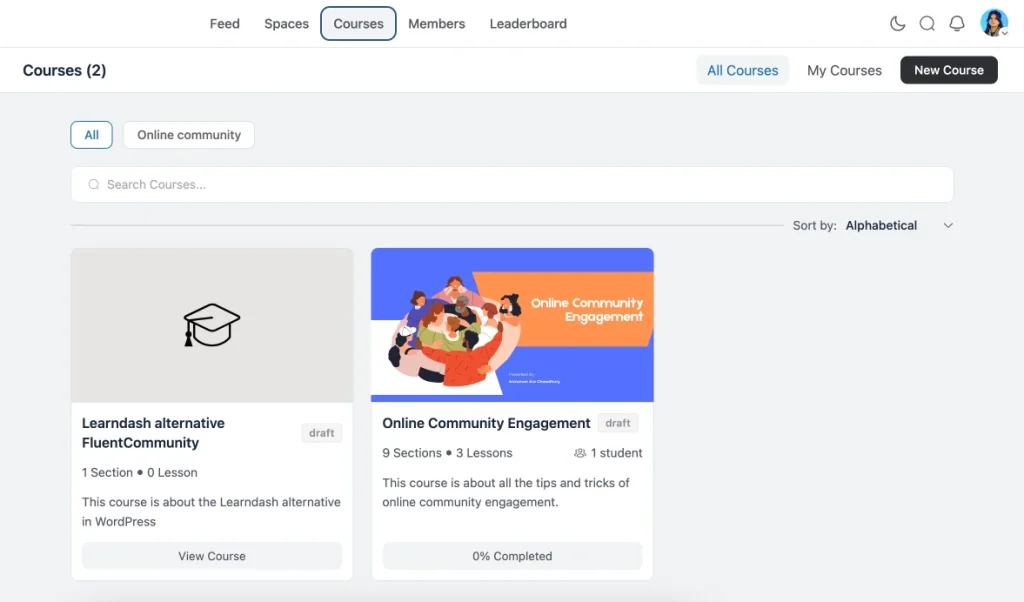
Step 3: Create Spaces for Different Topics and Segments
Spaces are FluentCommunity’s version of channels or groups, dedicated sections of your community organized around specific topics, products, or member segments. Think of them as rooms within your community building, each with its own purpose.
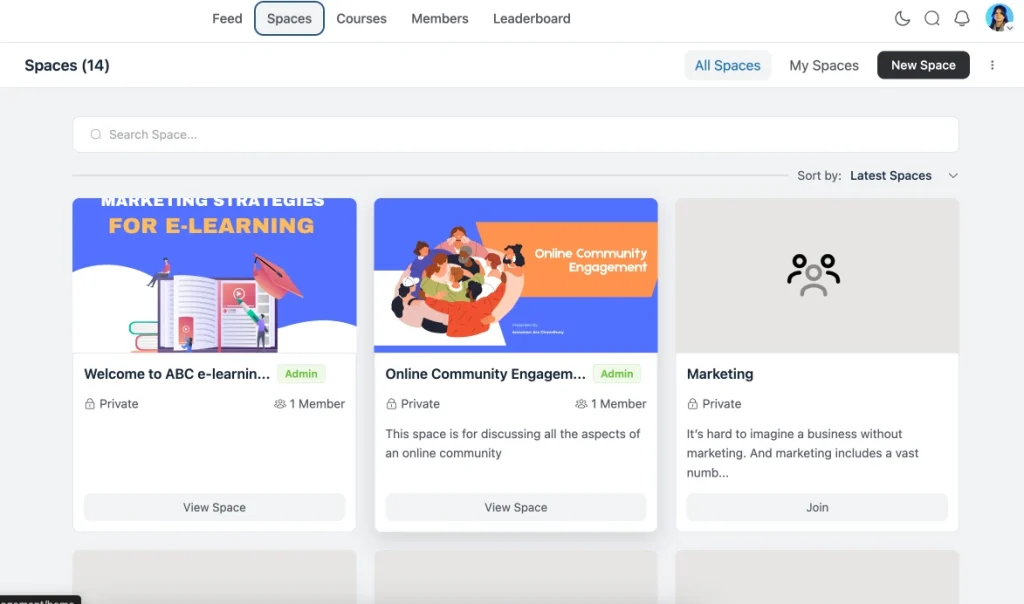
For a customer community, a practical starting structure might look like this: a Welcome Space where new members introduce themselves and find onboarding resources, a General Discussion space for open conversation, a Tips & Wins space where customers share results and use cases, a Product Feedback space for feature requests and bug reports, and a Resources space where you host guides, templates, and tutorials.
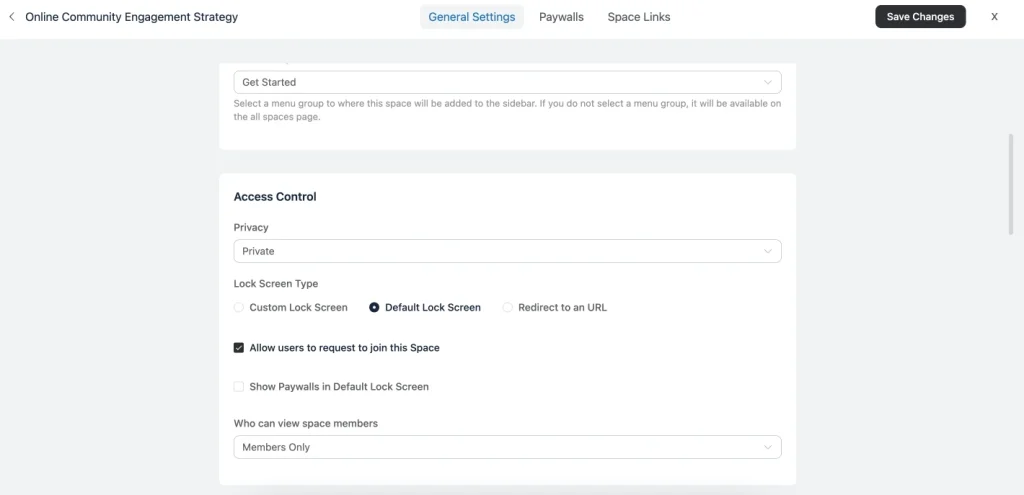
You can set each Space to be visible to all community members or restrict it to specific member roles. This is useful if you offer different tiers. For example, giving premium customers access to an exclusive space that standard members can’t see.
Step 4: Set Up Your Onboarding Flow
A community is only as strong as its onboarding. If new members join and don’t know what to do or where to go, they’ll log in once and never come back. Your onboarding flow is what converts a new sign-up into an engaged, long-term community member.
FluentCommunity lets you pin posts at the top of any Space. Use this in your Welcome Space to pin a “Start Here” post that tells new members exactly what to do first. Introduce themselves, explore the top Spaces, complete a profile, or take a quick course. Keep it short and action-oriented.
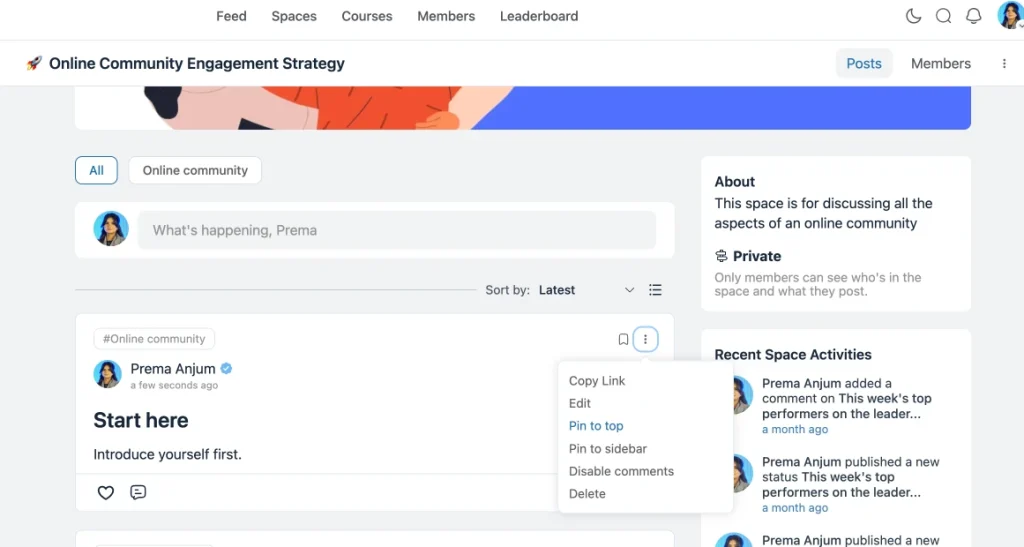
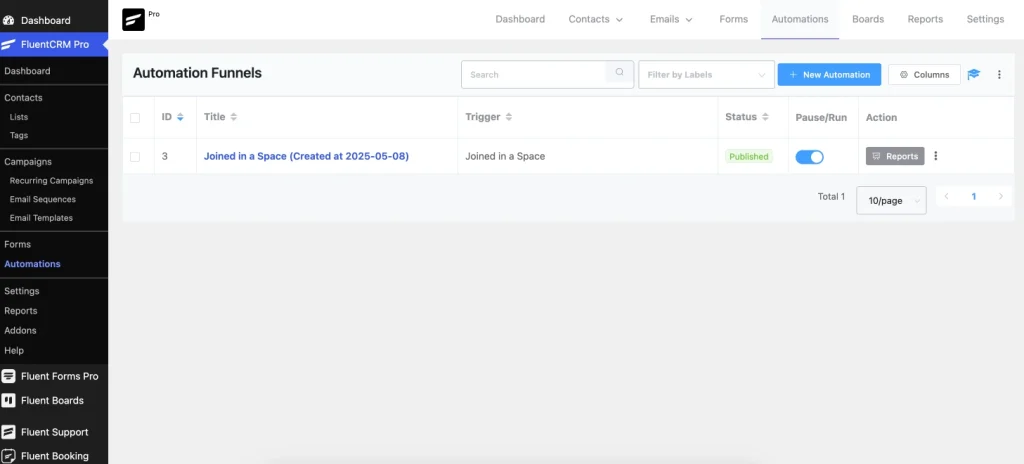
If you have FluentCRM connected, you can trigger a welcome email sequence the moment someone joins the community. A three-email sequence over the first week, welcoming them, highlighting the best resources, and sharing a community success story can dramatically improve early engagement.
Step 5: Add a Course or Resource Library
One of FluentCommunity’s strongest features is its built-in course functionality, which makes it easy to offer structured content alongside the community experience. This is particularly valuable for customer communities because it lets you teach customers how to get more from your product.
You can create courses directly inside FluentCommunity without needing a separate LMS plugin. Each course can have multiple lessons, and members can track their progress. You might create an onboarding course that walks new customers through the basics of your product, or a series of advanced tutorials for power users.
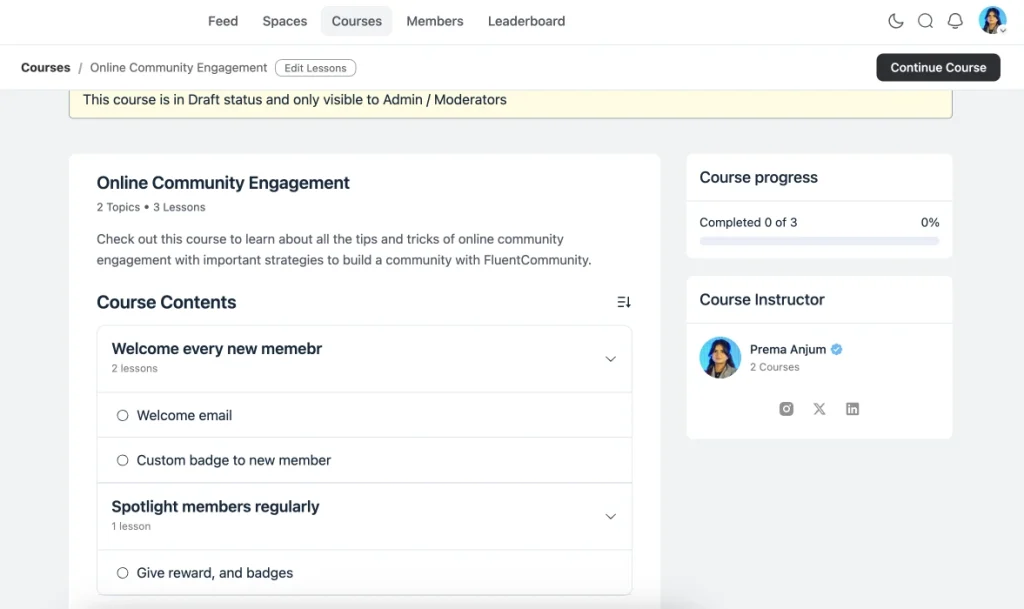
Pairing community discussion with structured learning creates a much richer experience than either one alone. Members can ask questions directly in lesson discussions, share their progress in the community feed, and get peer support in real time.
Step 6: Keep Engagement Alive Over Time
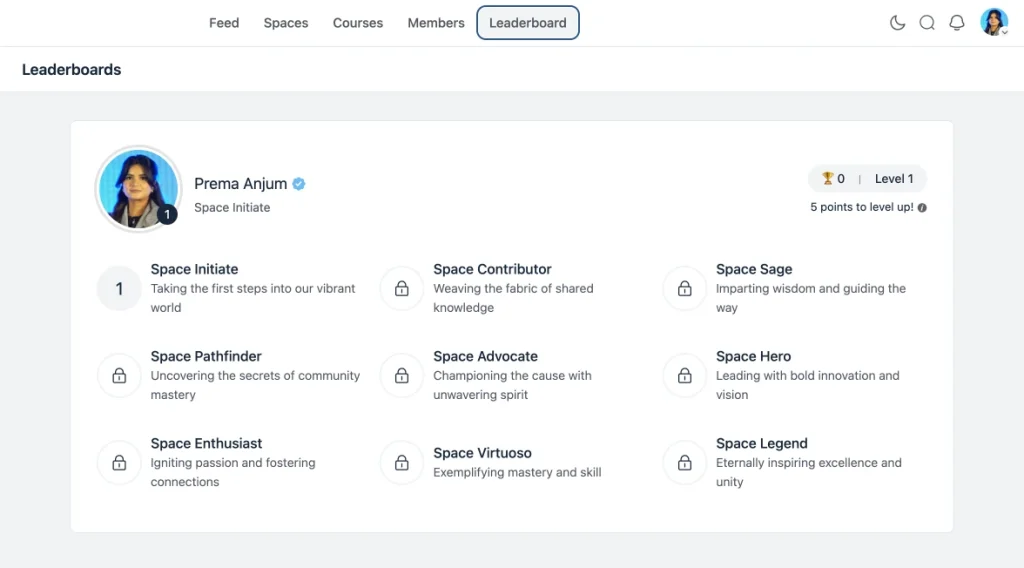
Building the community is the easy part. Keeping people coming back is where most community builders struggle. FluentCommunity’s leaderboard feature is one of the best tools for sustained engagement. Members earn points for posting, commenting, reacting, and completing courses, and the leaderboard makes that progress visible. Healthy competition and public recognition go a long way in keeping members active.
Beyond gamification, the single most important factor in a thriving community is consistent presence from the host. Show up regularly. Post conversation starters. Reply to member posts. Celebrate wins publicly. Highlight member contributions in a weekly roundup post pinned at the top of your feed.
You should also schedule recurring community events, monthly Q&A calls, live workshops, or “office hours” sessions that give members a reason to stay engaged even during quieter periods.
The Bottom Line
A private customer community built on WordPress with FluentCommunity gives you something no third-party platform can: full ownership of your audience, your content, and your brand experience. Your customers get a home that feels exclusive and curated. You get a direct line to the people who matter most to your business.
The setup takes less than a day. The payoff in retention, loyalty, and word-of-mouth growth lasts as long as you show up for it. Start with the steps above, keep it focused, and let the community do the rest.

My full name is Anzuman Ara Chowdhury. But people know me as Prema Anjum. I’m a Digital Marketer by profession, a WordPress community contributor, and a travel enthusiast by heart.
-

How to Build an Affiliate Program for Retailers: WordPress Guide
Build an affiliate program for retailers step by step. Margin-safe -
Complete Guide on How to Build A Church Website with WordPress
Learn how to build a church website with WordPress, from -
Kanban vs Scrum vs Agile vs Waterfall: What’s the Difference?
Get a clear, no-jargon breakdown of Kanban vs Scrum vs
Leave a Reply
You must be logged in to post a comment.