
How to Build a Booking System in WordPress: A Simple Step-by-Step Guide
Managing bookings through emails or calls gets messy fast. Double bookings, missed appointments, and delayed payments cost you time and revenue.
You can fix this with a simple setup in WordPress. Learn how to build a booking system that automates scheduling, payments, and reminders step by step.
- Install a booking plugin on your WordPress site
- Connect your calendar to manage availability and avoid double bookings
- Create booking types (e.g., consultation, paid session)
- Integrate a payment gateway like Stripe or PayPal
- Set up automated email (or SMS) reminders
- Embed your booking calendar on a page
- Test the full booking flow before going live
Once set up, your booking system can automatically handle scheduling, payments, confirmations, and reminders without manual work.
What You Need Before Starting
Before you begin, make sure you have the basics ready:
- A self-hosted WordPress website
- A booking plugin that supports payments and reminders
- A payment gateway like Stripe or PayPal
- A calendar (Google, Outlook, or Apple) for syncing availability
- Optional: Zoom or Google Meet for virtual meetings
For example, tools like FluentBooking can handle all of these in one place.
A Step-by-Step Guide to Building a Booking System in WordPress
Now, it’s time to follow this step-by-step process to create a fully functional booking system in WordPress. By the end, you’ll have a system that handles scheduling, payments, and reminders automatically. Here’s how:
Install Your Booking Plugin
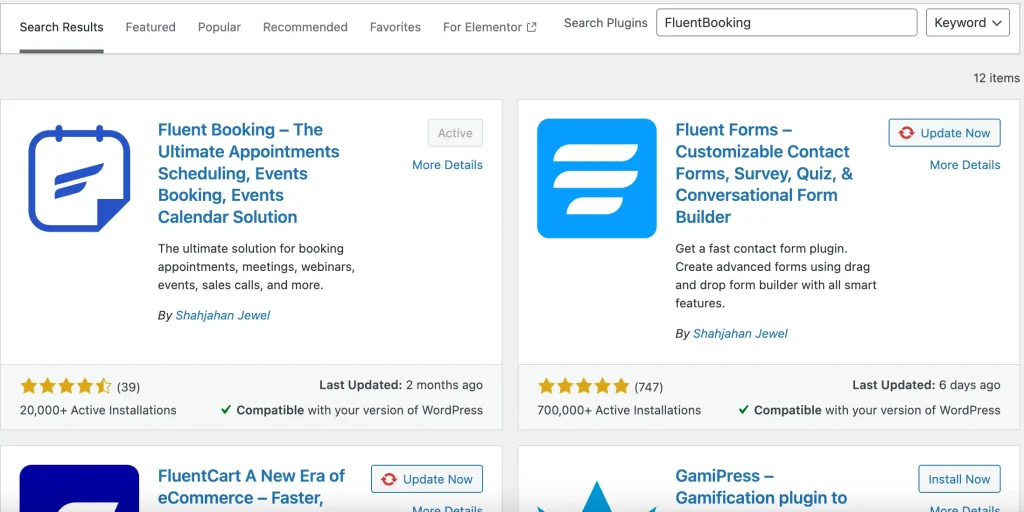
- Go to your WordPress dashboard → Plugins → Add New.
- Search for a booking plugin that supports scheduling, payments, and reminders. Install and activate it.
For example, you can use a plugin like FluentBooking or any similar tool that fits your needs.
Create a Booking Calendar
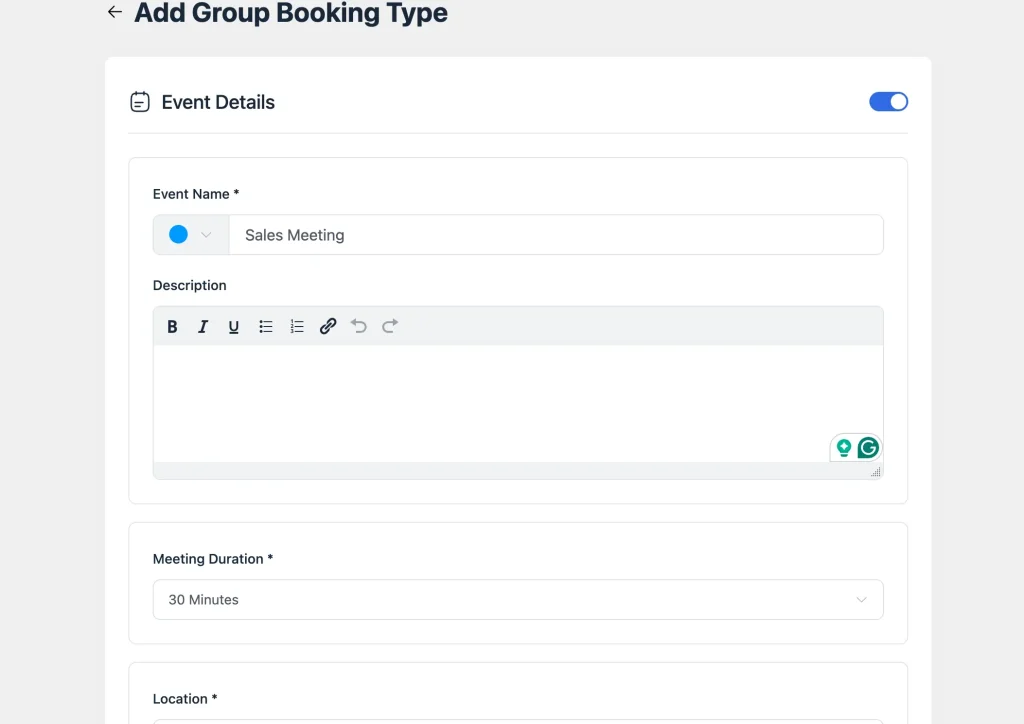
- From the dashboard, go to the Calendar tab and click + New → Add Host.
- Choose the host and select the appointment type: One-to-One or Group.
- Add event details: event name, description, meeting duration, location, and timezone.
- Click Continue.
Configure Your Availability
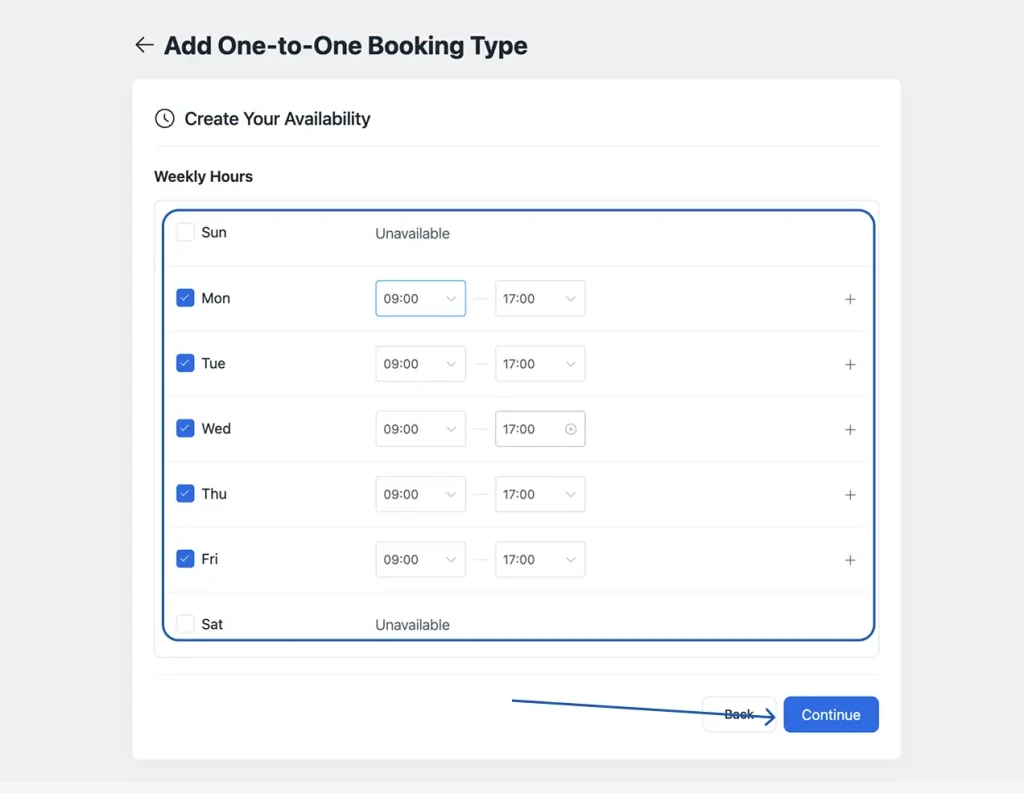
- Go to Calendar → Edit → Availability tab.
- Set your working days and available time slots for each day.
- Add custom dates or override specific dates if needed.
- Click Continue.
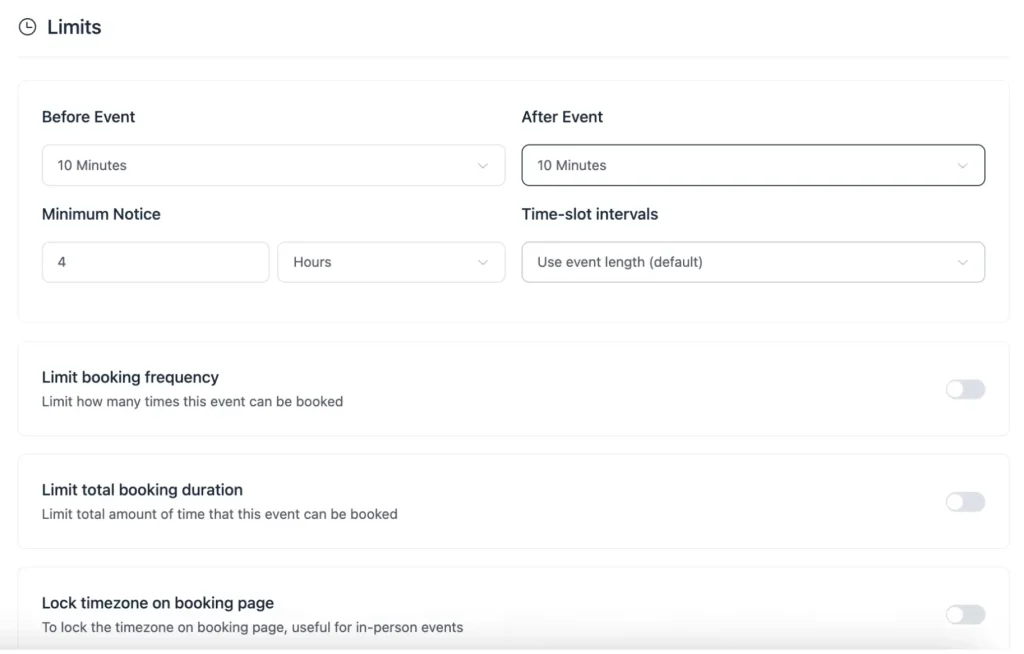
Set Appointment Limits
- Under Availability, click on Limits.
- Set buffer time before and after appointments to avoid back-to-back bookings.
- Set a maximum booking limit — how many times the event can be booked per day or in total.
- Optionally lock the timezone on your booking page for consistency.
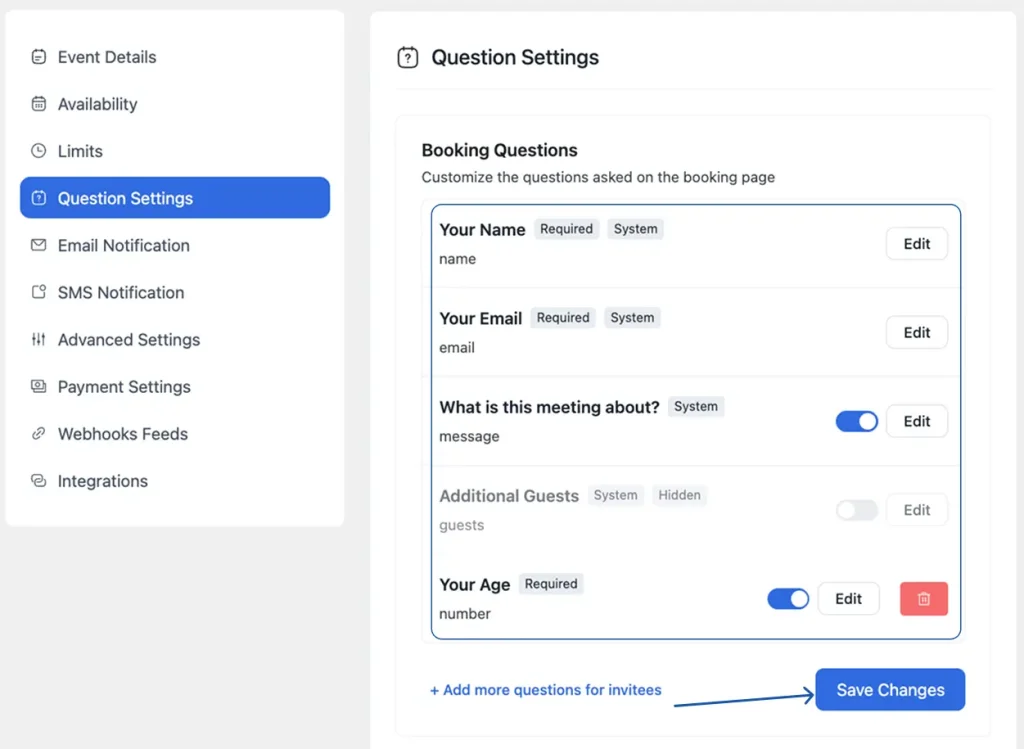
Booking Form Set Up
- Go to the Question Settings tab inside your calendar.
- You’ll find pre-built fields like Name and Email already added.
- Click Add More Questions to add custom fields such as Text, Number, Phone, Radio, or Checkbox.
- Click Save to apply your changes.
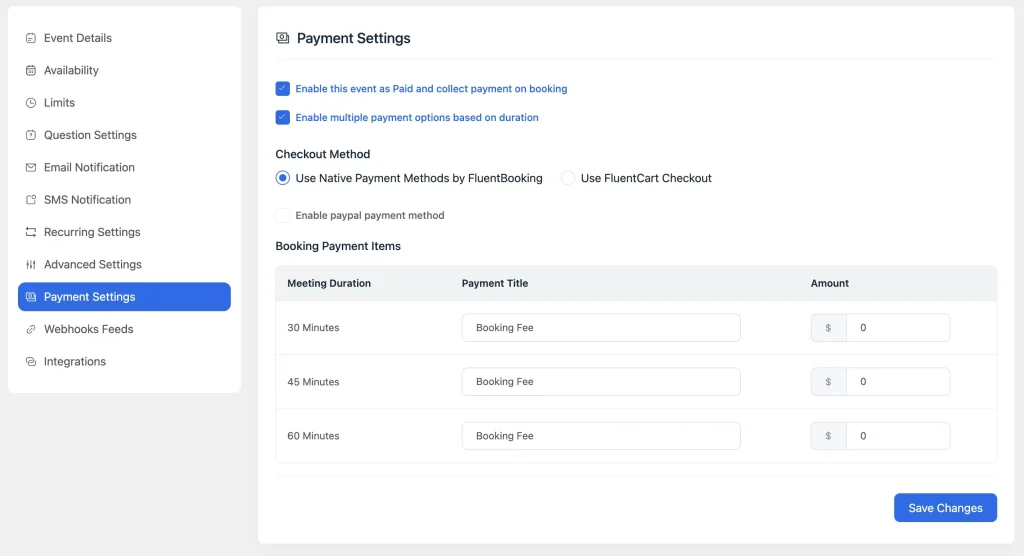
Set Up Payment Method
- Go to the Payment Settings tab and click Go to Payment Settings.
- Connect your preferred payment gateway:
- Stripe: for card payments (also supports Google Pay & Apple Pay if linked)
- PayPal: for PayPal-based payments
- Offline Payment: for manual/cash payments
- Set your price for the booking event and save.
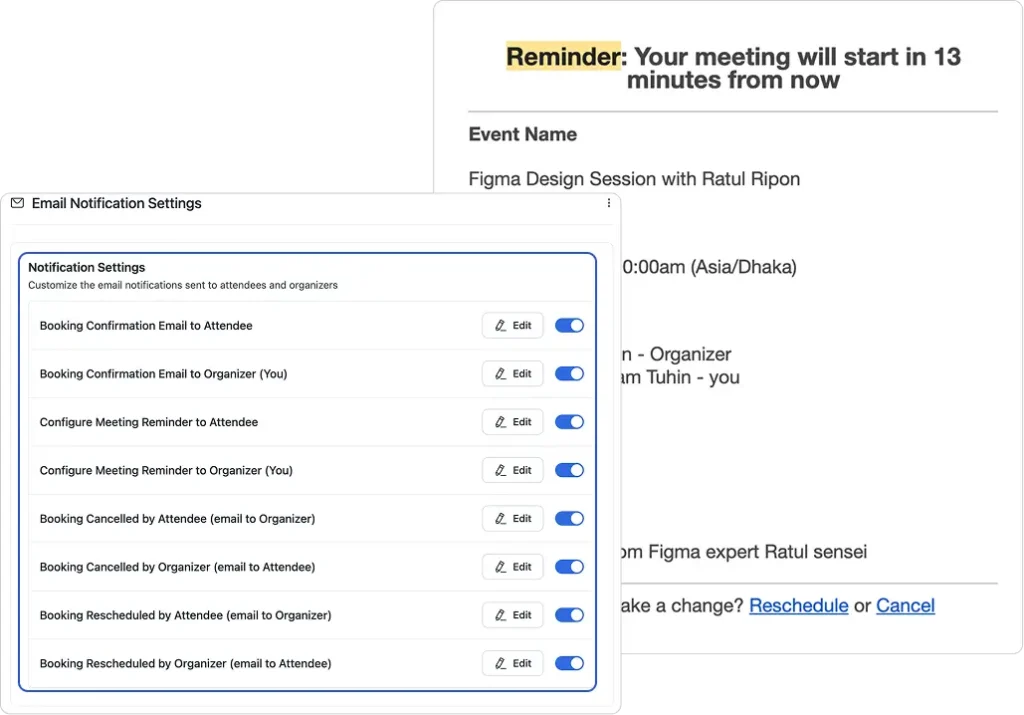
Configure Automated Reminders & Notifications
- Go to the Email Notification tab and turn on notifications.
- Set up the following:
- Booking Confirmation: sent to both host and attendee immediately after booking
- Reminder Emails: e.g., 24 hours before and 30 minutes before the appointment
- Cancellation Notification: alerts both parties if a booking is cancelled
- Customise the email content, subject line, and tone to match your brand.
- Click Save Email to apply.
- Optionally enable SMS reminders via Twilio for extra reliability.
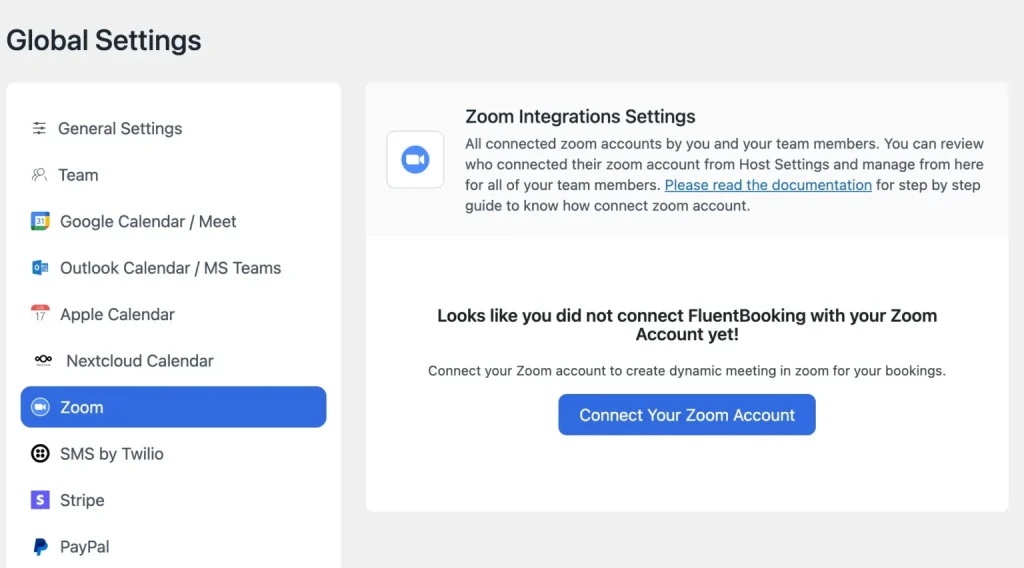
Set Up Integrations (Optional)
- Calendar Sync: Connect Google Calendar, Apple Calendar, or Outlook for two-way syncing to prevent double bookings.
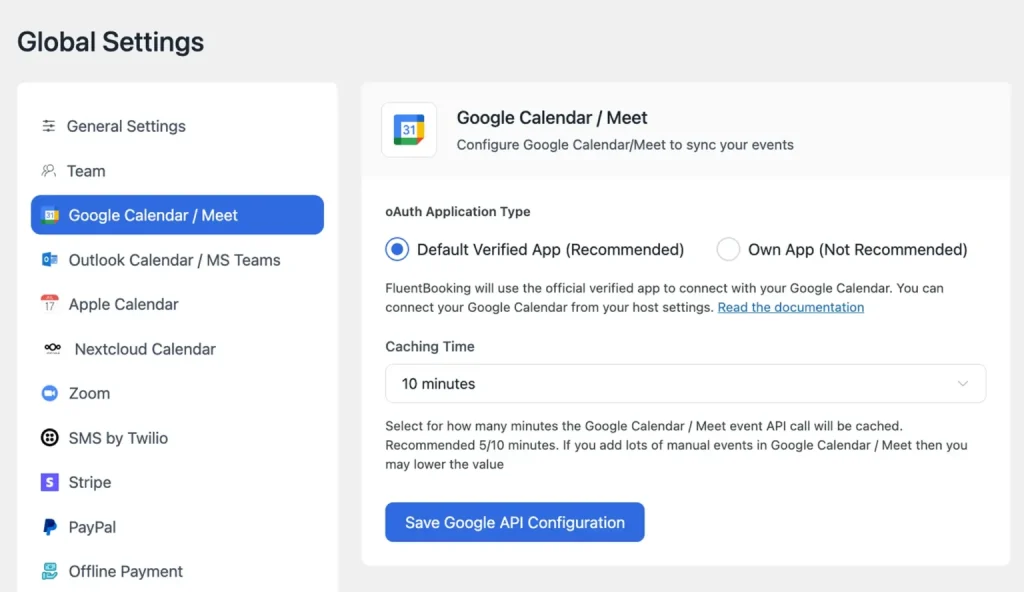
- Video Conferencing: Link Zoom, Google Meet, or Microsoft Teams. FluentBooking auto-generates meeting links on every booking.
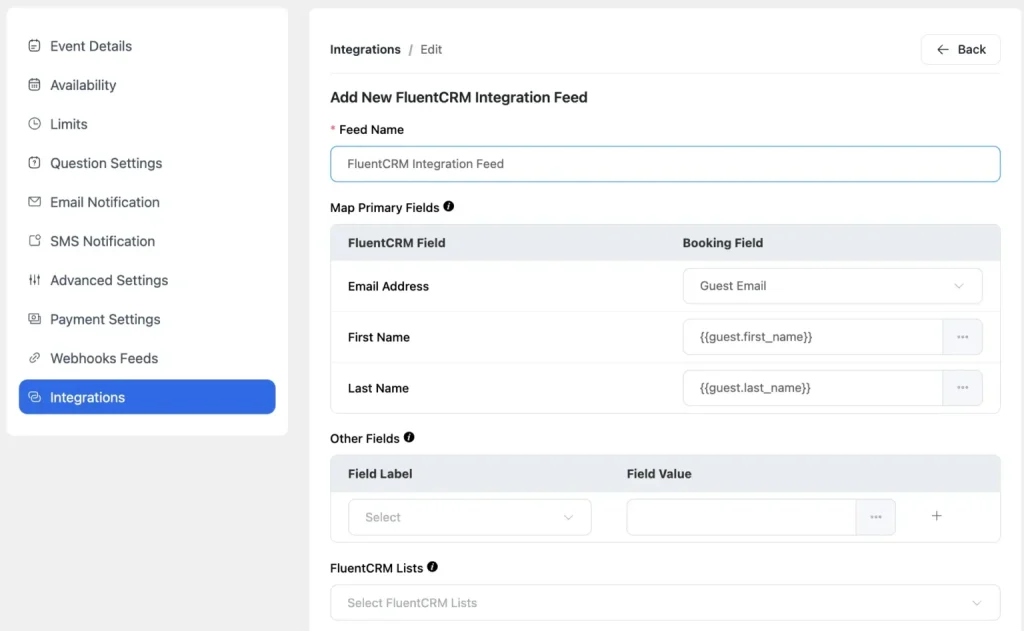
- CRM & Automation: Integrate FluentCRM, WP Fusion, Zapier, or Pabbly to automate follow-up emails and manage leads.
Test the Booking System
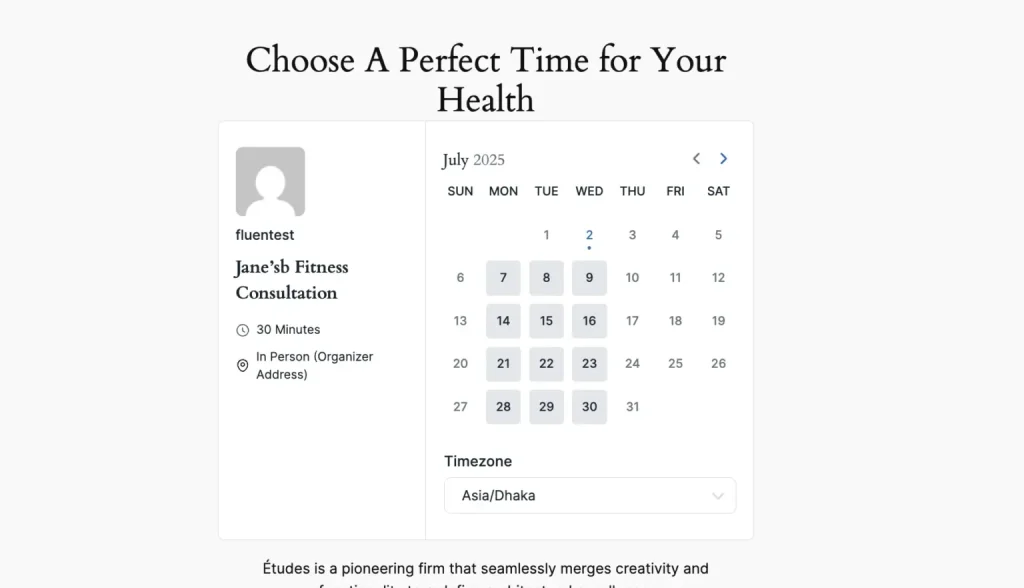
- Go to Calendar → Share → Landing Page → View.
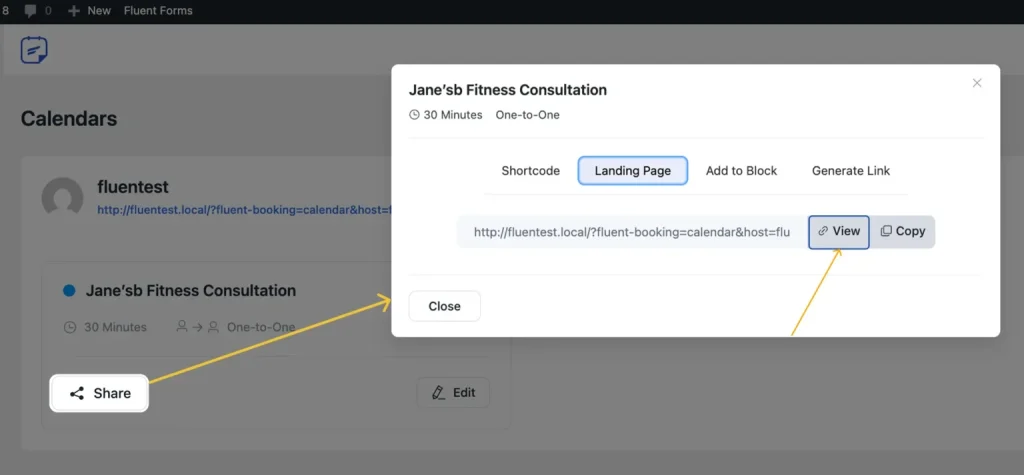
- Your booking page will show all available dates and time slots.
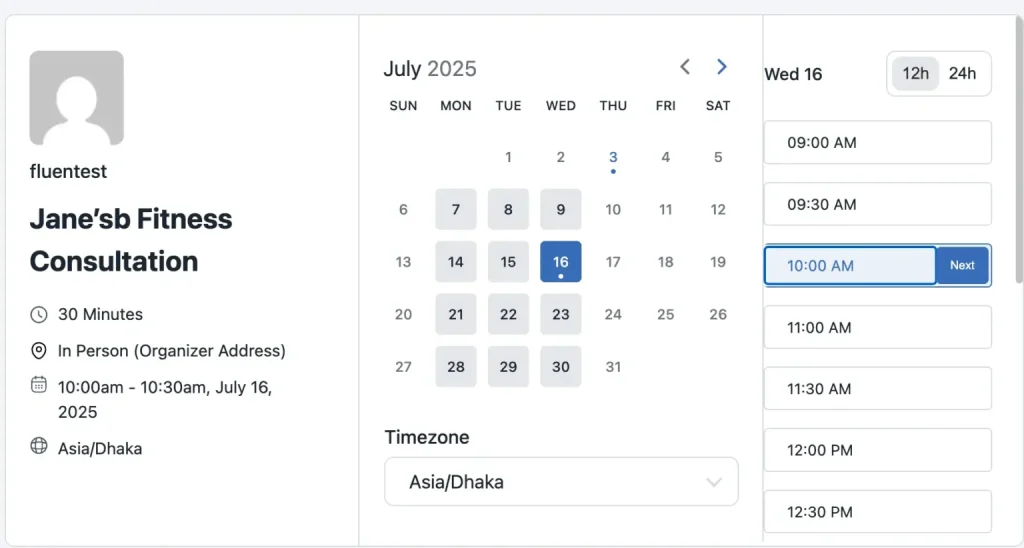
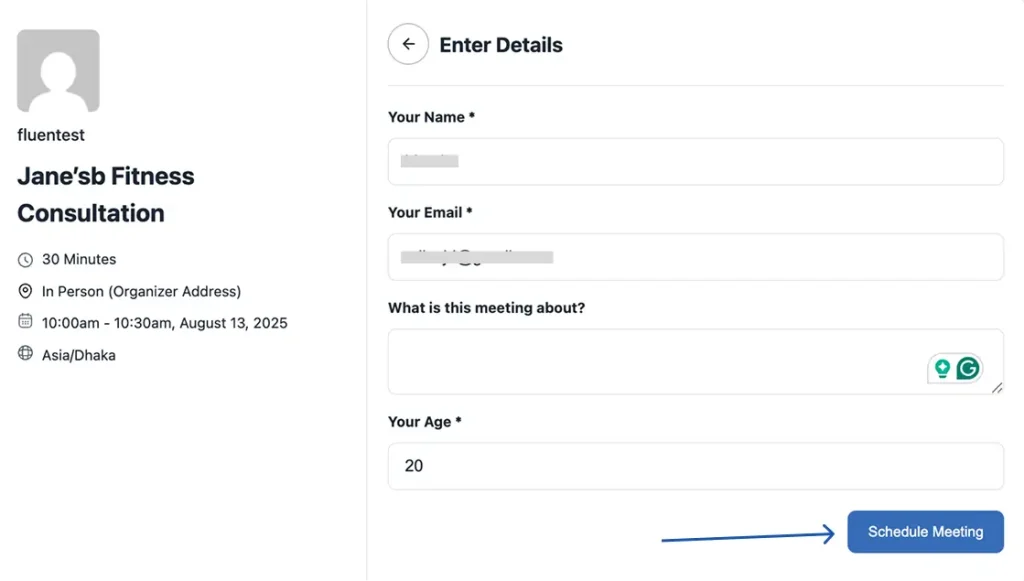
- Select a time slot, fill in the booking form, and click Schedule Meeting.
- Confirm that you see the “Your meeting has been scheduled” message.
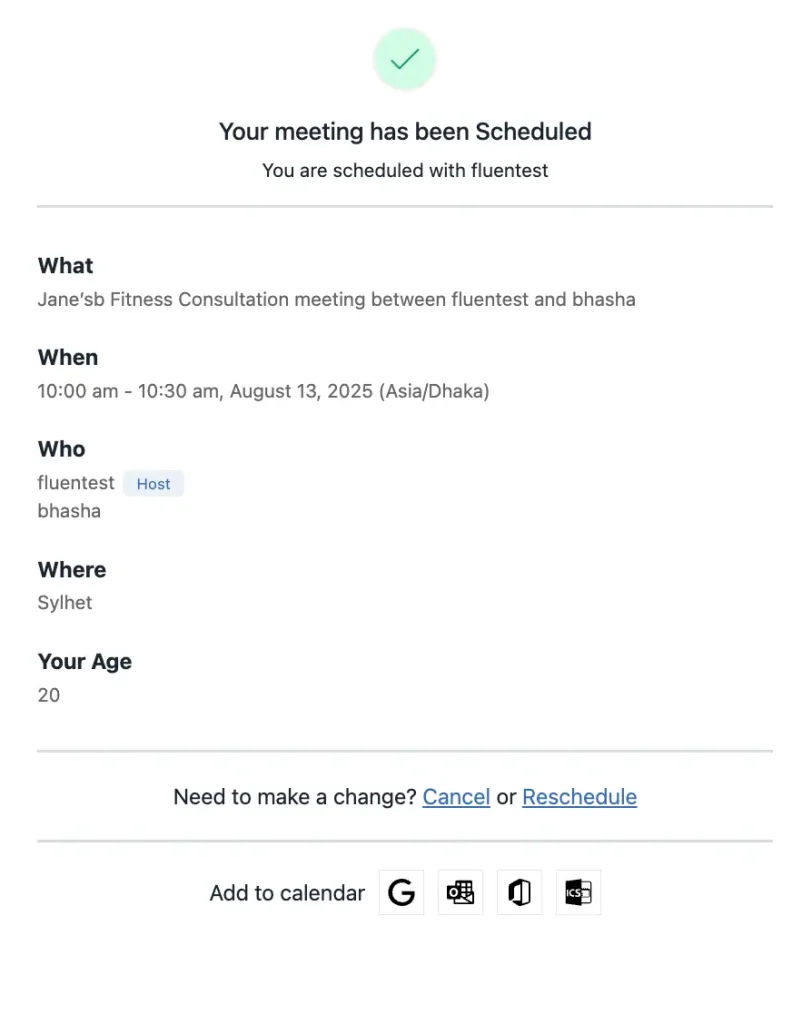
- Check that confirmation emails are received by both the host and the test attendee.
- Verify that payment is processed correctly if applicable.
Publish the Booking Calendar on Your Website
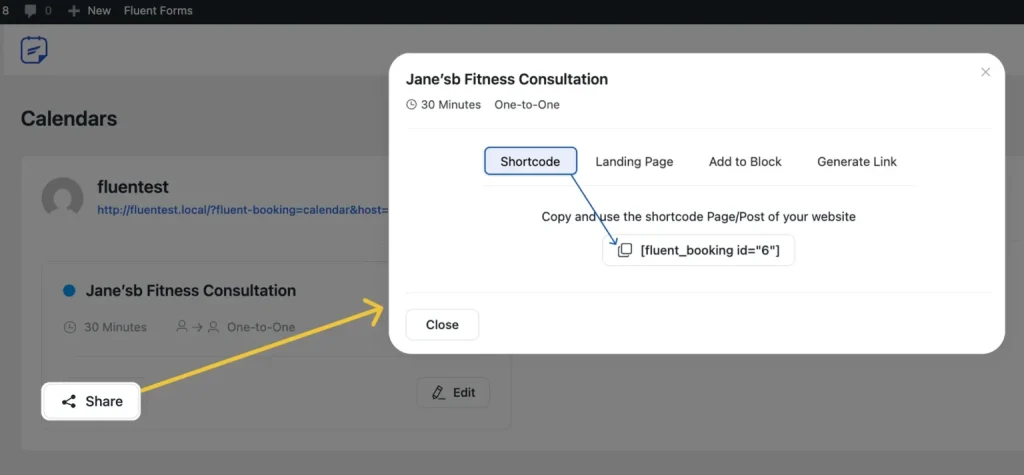
- Go to Calendar → Select your calendar → Share.
- From the pop-up, go to the Shortcode tab and copy the shortcode.
- In your WordPress dashboard, go to Pages and open the page where you want to embed it.
- Add a Shortcode block, paste the shortcode, and save the page.
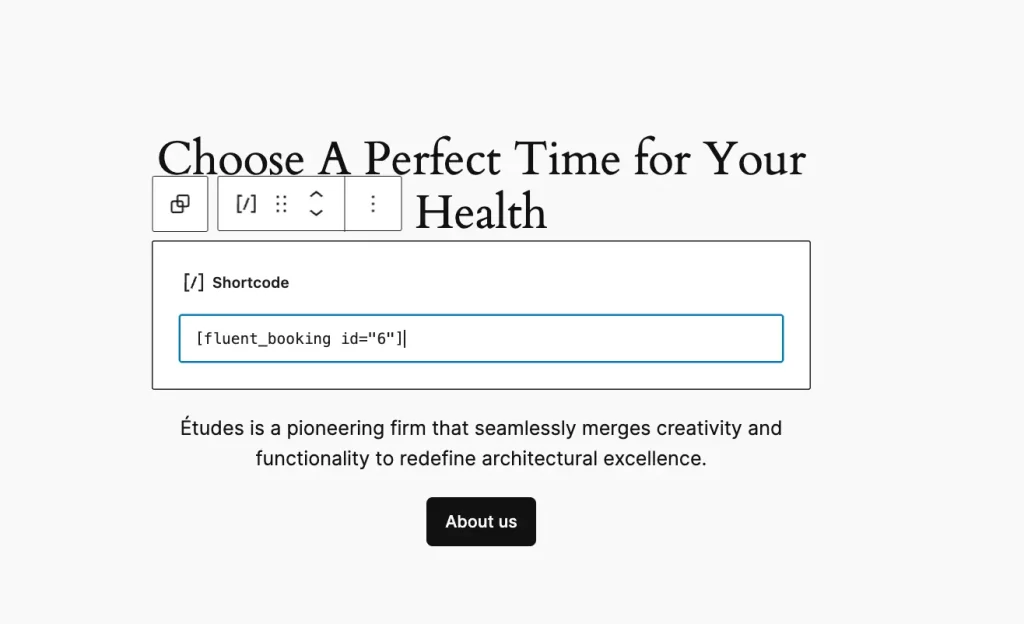
- Preview the page to confirm the booking calendar is showing correctly.
That’s it! Your complete booking system with payments and automated reminders is now live on your WordPress site.
A Few Things to Keep in Mind
Before you start sharing your booking link with clients, take a moment to tighten things up. A few small checks here can save you from awkward situations later:
- Test the full flow first: Book a test appointment yourself. Go through everything, from selecting a time to receiving the confirmation and reminder. This helps you catch any issues before your clients do.
- Keep your availability updated: Your calendar should reflect your real schedule. If your availability is outdated, you risk double bookings or missed appointments.
- Customize your notification emails: Default emails often feel generic. A quick tweak can make your messages clearer, more personal, and aligned with your brand.
- Check your timezone settings: If you work with international clients, this is critical. Make sure your system automatically adjusts time zones to avoid confusion.
- Review your booking limits regularly: As your workload grows, revisit how many sessions you allow per day or week. This helps you stay productive without burning out.
These small adjustments make your booking system more reliable, professional, and easier for both you and your clients.
How Your Booking System Works (Quick Example)
Here’s how everything connects:
- A visitor lands on your booking page
- Selects an available time slot
- Completes the booking form
- Pays for the session (if required)
- Receives a confirmation email instantly
- Gets reminder notifications before the appointment
This entire process runs automatically once your system is set up.
Turn Your Booking Process into a Time-Saving System
Now it’s your move. Install a booking plugin on your WordPress site, connect your calendar, and create your first booking page. Start with one service, enable payments, and turn on reminders. Test the full flow like a client, then publish and share your booking link.
After that, explore features like buffer time, rescheduling, and calendar sync to improve your setup.
Launch your booking system today and start saving hours every week.
Frequently Asked Questions (FAQs)
What is a free booking system for WordPress?
A free booking system for WordPress is a plugin that allows you to accept appointments without an upfront cost. Popular free options include tools like FluentBooking, Simply Schedule Appointments, and Bookly.
These plugins typically offer features like scheduling, calendar syncing, and basic notifications, while advanced features like payments or SMS reminders may require a paid plan.
What is the best booking plugin for WordPress?
The best booking plugin depends on your needs. Some tools focus on simplicity, while others offer advanced automation and customization.
For example, plugins like Amelia are known for their all-in-one features, while FluentBooking, Simply Schedule Appointments, and Bookly are popular for ease of use and flexibility.
The right choice depends on your workflow, budget, and required features.
Does WordPress have a built-in scheduling tool?
No, WordPress does not include a built-in booking or scheduling system. To add this functionality, you need to install a booking plugin.
These plugins allow you to create booking calendars, manage appointments, accept payments, and send automated reminders.
Is WordPress still worth it in 2026?
Yes, WordPress is still worth it in 2026. It continues to power a large portion of websites worldwide and remains one of the most flexible platforms available.
With plugins, you can easily add advanced features like booking systems, eCommerce, and automation without custom development.
What is the best free booking system for small businesses?
The best free booking system depends on your business needs. Tools like FluentBooking are useful for service-based businesses, while Calendly and Setmore are popular for simple scheduling and team bookings.
Most free tools offer features like online booking pages, automated reminders, and calendar syncing to prevent double bookings.
Is it easy to add a booking plugin on WordPress?
Yes, adding a booking plugin in WordPress is simple. You can install it directly from your dashboard, follow a setup wizard to create your first booking calendar, and embed it on any page using a shortcode or block.
The entire process usually takes less than an hour.

I enjoy making complex ideas simple and engaging through my writing and designs. With a strong knowledge of content writing and SEO, I create technical content that’s both easy to understand and interesting.
-

How to Build an Affiliate Program for Retailers: WordPress Guide
Build an affiliate program for retailers step by step. Margin-safe -
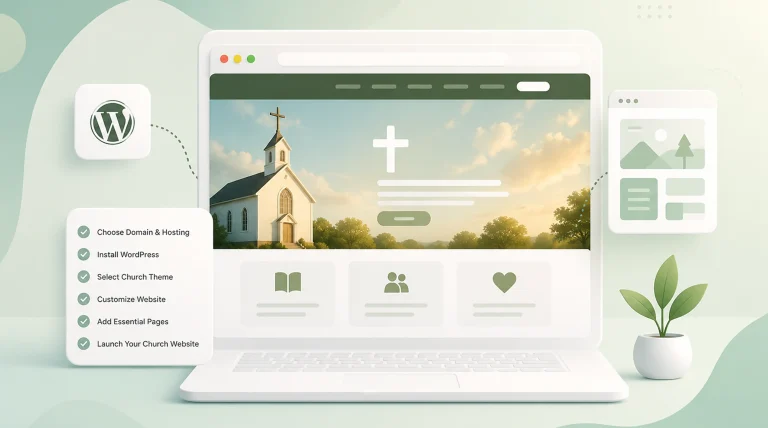
Complete Guide on How to Build A Church Website with WordPress
Learn how to build a church website with WordPress, from -
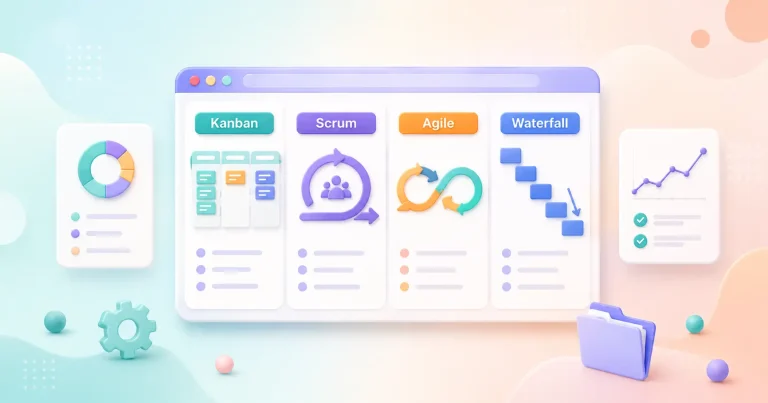
Kanban vs Scrum vs Agile vs Waterfall: What’s the Difference?
Get a clear, no-jargon breakdown of Kanban vs Scrum vs
Leave a Reply
You must be logged in to post a comment.