
Fluent Conversational Form – A Great Way to Start a Conversation
Share :

We will never spam you. We will only send you product updates and tips.
Each online business strives for customer engagement because it can help you grow your business steadily. Conversational forms are a great way to connect your users when talking about interactive content.
Don’t you want your forms to be converted more? A conversational form is different from the ordinary form because it feels more human as people get a chat-like feeling.
In this post, I’ll talk about Fluent Conversational Forms, what it is, and how to use it. After reading the post, you’ll have a clear idea of how conversational forms are easy to use, even without paying a dime.
YES!!! Fluent Conversational Forms is available with the free version, as well. For extended functionality, you have to purchase a pro license.
Let’s proceed.
Conversational Forms – a little preface

From the name, you can guess it – a form that works in a chat style. That’s the most about it. Unlike the classic forms, users have to insert some input and press the Enter button. Also, the look is stunning. While an ordinary form holds a bunch of fields together, a conversational form contains only a single field on a single page. That’s relaxing for users, right?
Why conversational forms?
Good question. When there are forms running for ages, why do we need conversational forms?
People may leave at any second, but the slower rate occurs during the first 30 seconds.
The half-a-minute-stat mentioned above is an old piece of data. In recent research exhibits, you have 15 seconds to amuse your readers.
In terms of effectiveness, interactive content is 93% positive at educating customers. The reason to choose interactive content becomes double when 81% of marketers believe this type of content is highly powerful at gaining the buyer’s attention.
See the top reasons to choose a conversational form:
- One question at a time that keeps your audience more attentive while answering
- Design variation. You can choose from different layouts to make your forms stand out
- Set conditional logic to guide your users to the right path based on their choice
- Less form abandonment. With conversational forms, people love to fill out forms instead of leaving them.
- Works with any type of form, including surveys, job application forms, order forms, and whatever you imagine.
Fluent Forms: a quick introduction

Before diving deep, let’s have a quick look at what’s Fluent Forms and why you can’t live without it. If you’ve been into WordPress for years, you must’ve heard of Fluent Forms since it’s been in the hype for the last few years.
Anyways, for those who are hearing it for the first time, Fluent Forms is a WordPress form builder with all the good features you need to run your online business. Want to collect leads? Take orders smoothly? Receive donations? Fluent Forms has solutions for each and every situation.
- Easy drag and drop form builder
- Multiple payment solutions
- PDF form submission
- Integrated quiz builder
- Lead collection at ease
- Email marketing tools integrations
- Advanced calculation capability
- SMS notification
Fields available with conversational forms
I must clarify this since all fields are not available with conversational forms. Because of the unique nature and different layouts, there are some limitations to these types of forms. The team is working on adding more fields, and currently, you will get as follow:
- Email Address
- Country List
- Radio and Checkbox
- File Upload
- Ratings
- Quiz Score
- And some more
I’m trying to give you an idea of the difference between the two types of forms. Although a lot of fields are available, still some fields are missing, like below:
- Address Field
- Name Field
- Shortcode
- Range Slider
- Net Promoter Score
Creating a conversational form
It’s easier than making a cup of coffee. Read the details and test yourself.
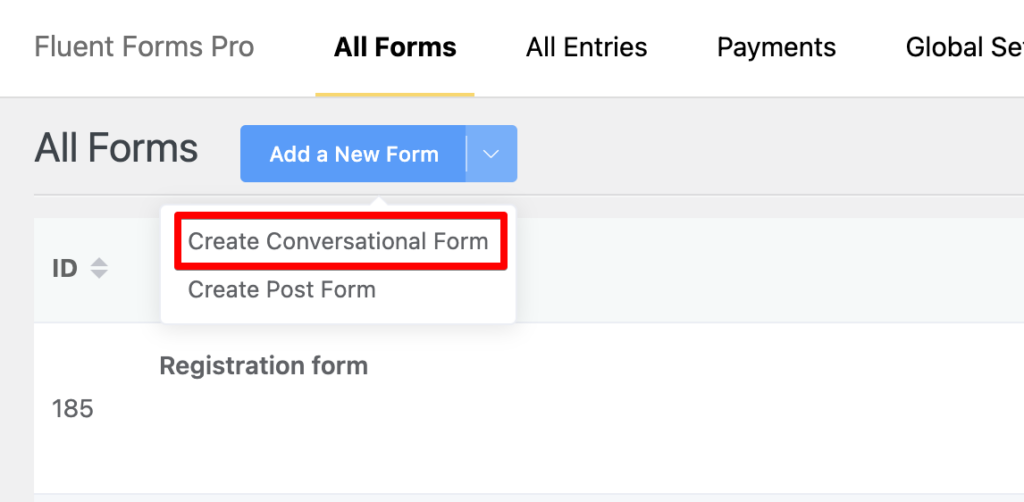
Go to Fluent Forms on your WordPress dashboard. From the Add a New Form button, click the dropdown option. Now click on Create Conversational Form.
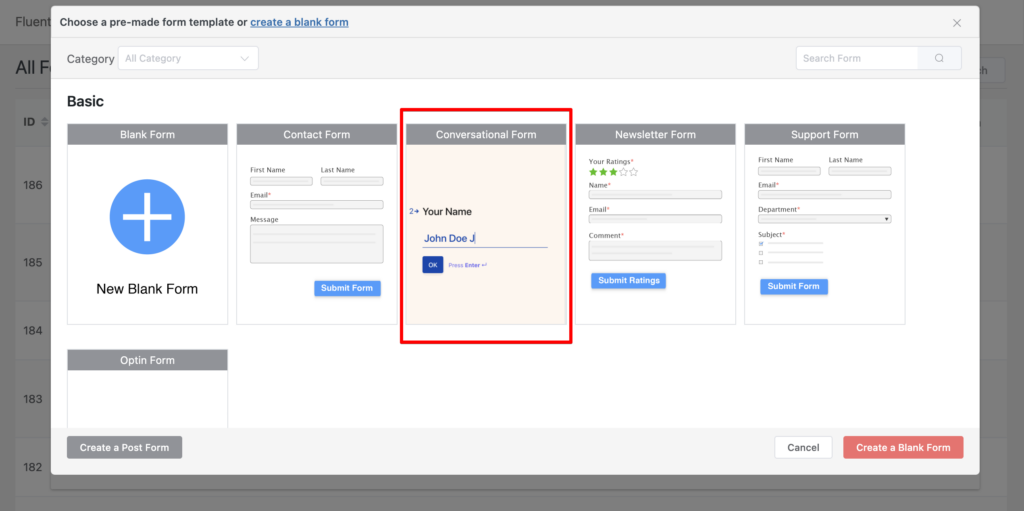
Alternatively, you can click the New Form under Fluent Forms on the left panel of the WP dashboard. Then, you can see the prebuilt form templates. From there, choose Conversational Form.
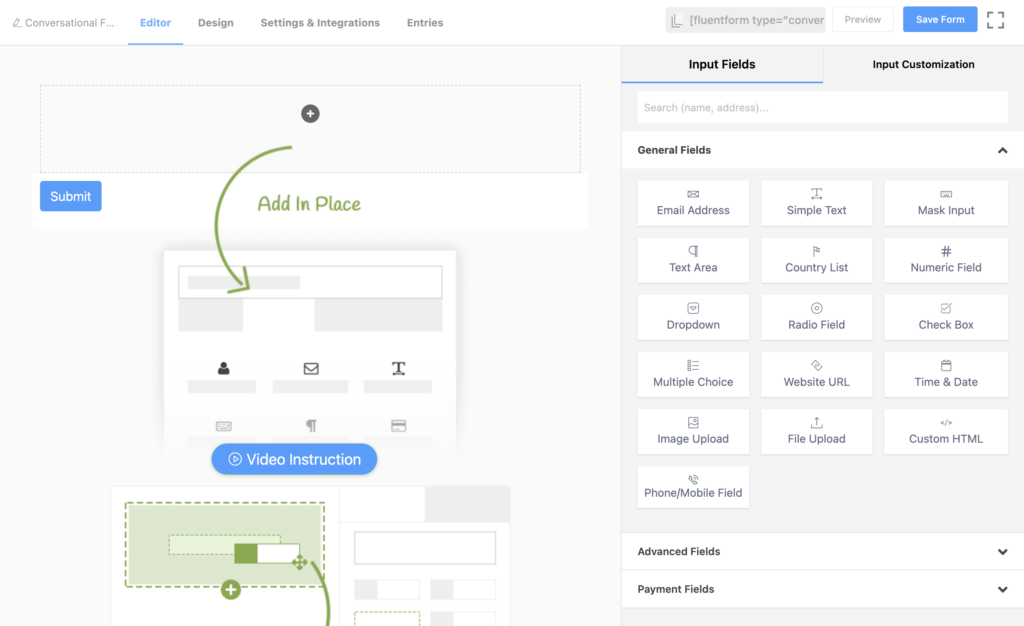
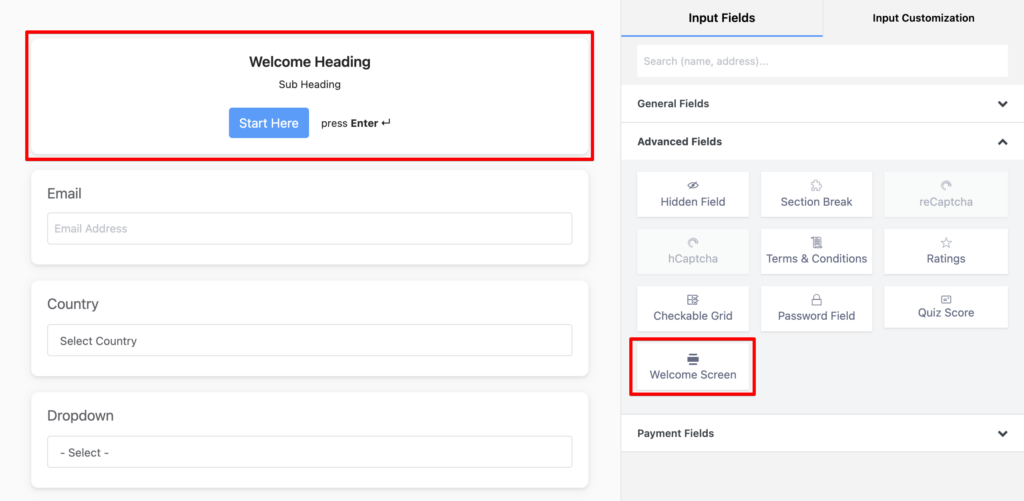
Now you’ll be landed on the Fluent Forms editor that looks like the below image:
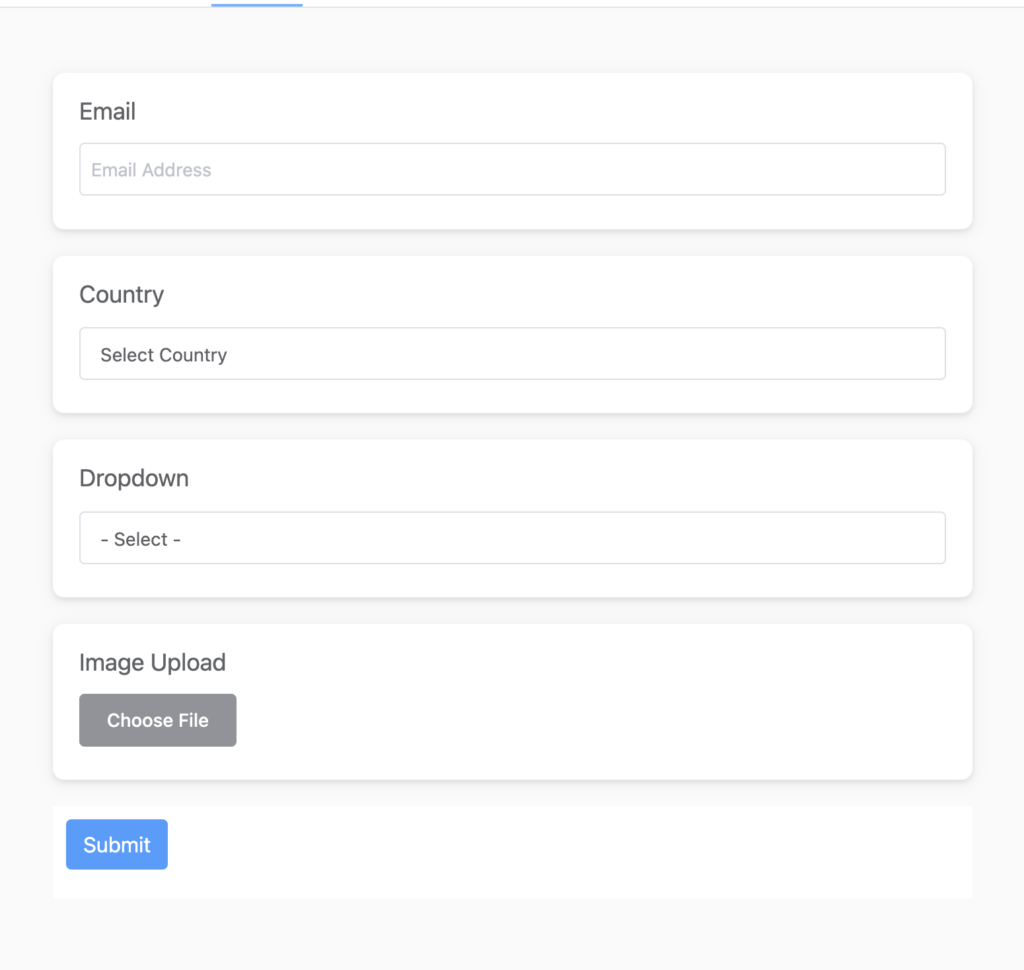
Start adding all the fields you need for your form and customizing them with the label, placeholder, and other settings.
Finally, don’t forget to add the Welcome Screen to the top of your form. It gives your users a great feeling to start feeling out of the form, and you can optimize the look of it. For instance, you can change the image and text of this field.
Designing a conversational form
First, I’ll show you how to optimize the Welcome Screen. Click that field, and all the relevant information will appear on the right panel. Edit the Element Label and subheading inside the text area. Fix the Content Alignment and Submit Button Text. Go to the next segment and see if you want to change anything in Advanced Options.
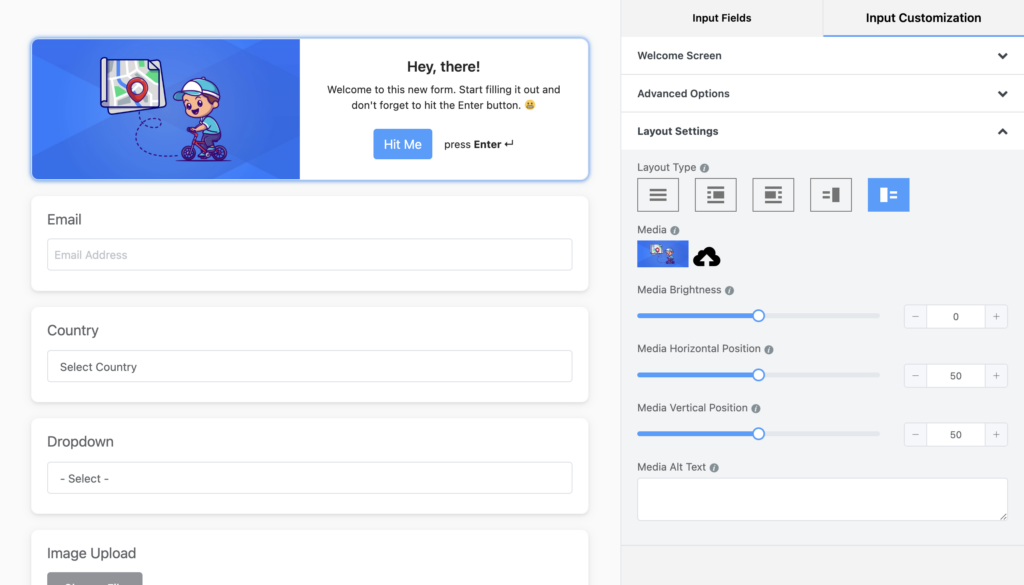
But the most important part of the conversational form is the Layout Settings, where you can give each section a different layout. Play with it and find which one goes with your imagination.
The same setting is attached to each field, so I’m not going into a detailed discussion.
Design
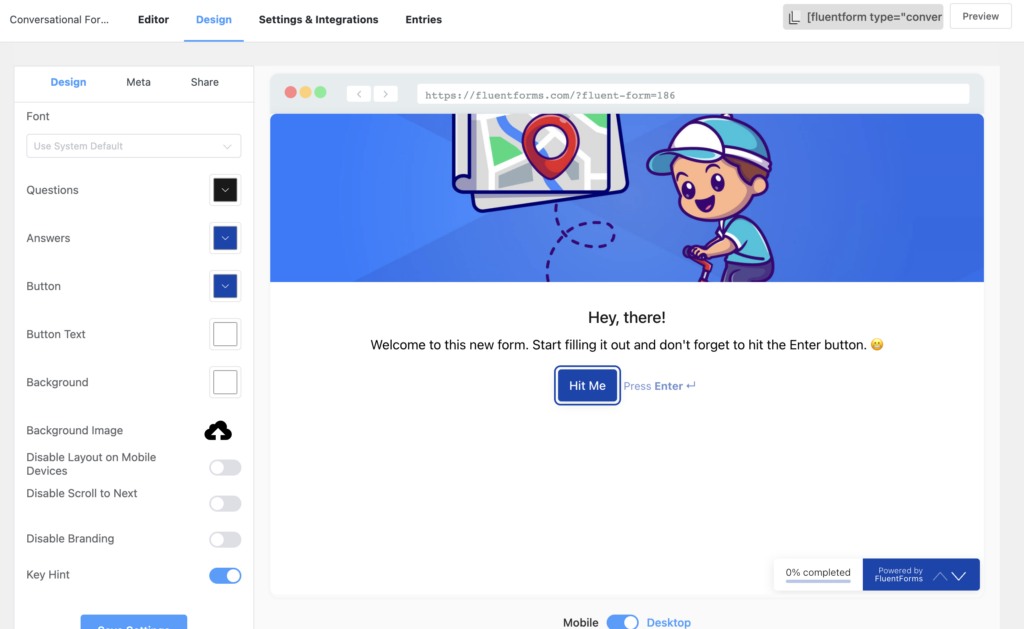
Font: You can use the system default font. The other fonts will work while using the landing page option.
Questions: Change the colors for questions.
Answers: You can change the colors for the answers, as well.
Button: Optimize the button color.
Button Text: Button text color can also be changed.
Background: Want to change the background color? Here you go.
Background Image: It will appear on each section if you change the background image.
Disable Layout on Mobile Devices: If you enable this option, the layout won’t work on mobile devices.
Disable Scroll to Next: You can enable or disable the Next button.
Disable Branding: Fluent Forms won’t appear as a brand name on the bottom of your form if you enable this. This option is for pro users only.
Key Hint: You can show or hide key hints for multiple-choice questions.
After checking all the options, click the Save Settings button, and move on to the next tab.
Meta
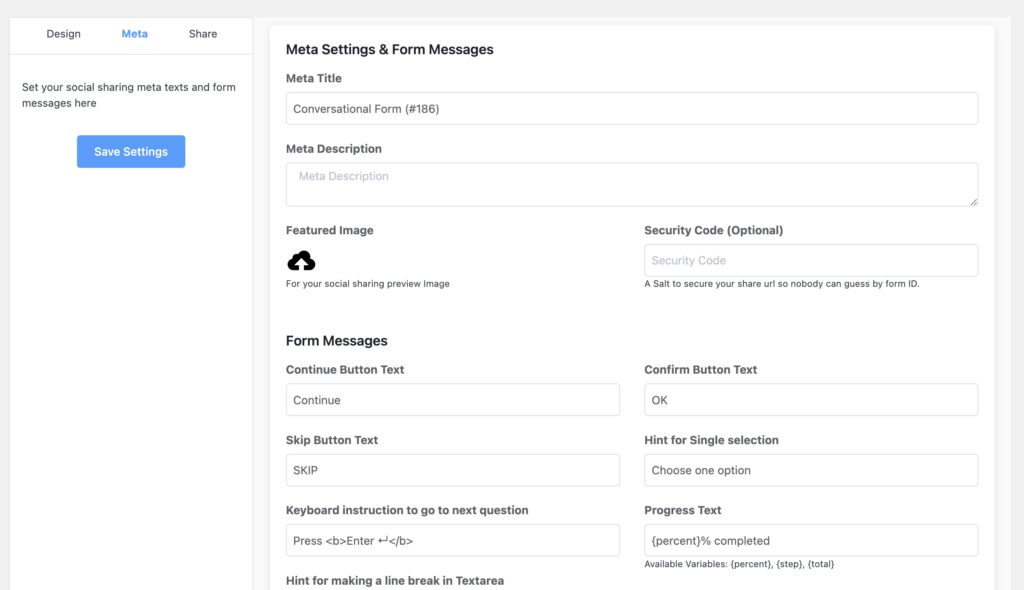
Meta title, description, and featured image are for search engines and social media. You can customize them for better visibility. There’s a Security Code option available that will add an extra layer to your form’s security.
But I’ll ask you to focus on the Form Messages section since it holds all the options to customize the look of different parts of the form. If you want to change the continue or confirm button text, you can do that here. Keyboard instruction, progress text, placeholder – everything’s available in order.
Share
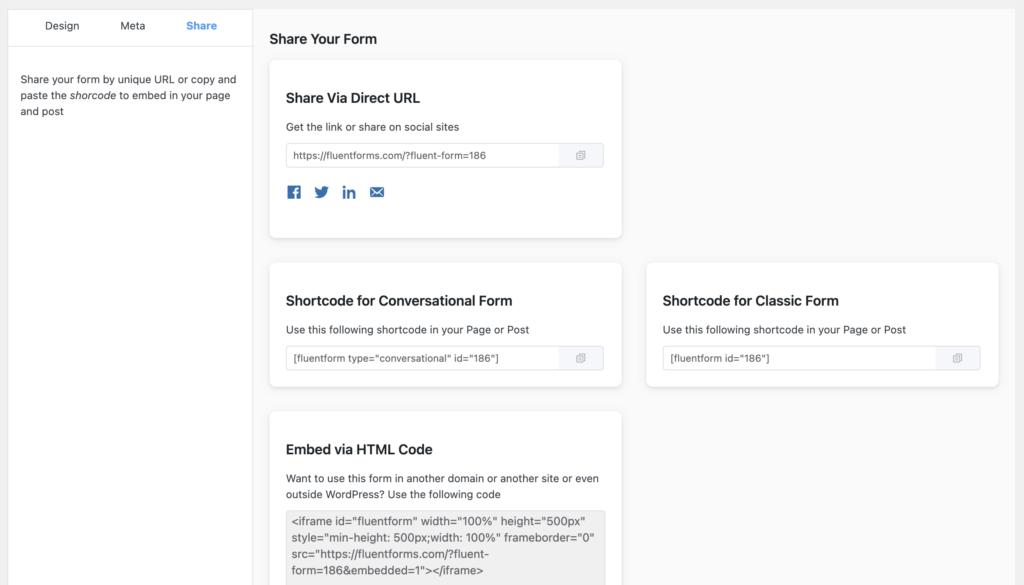
Yes, you can easily share your beautiful conversational forms wherever you want. Under the Share tab, you’ll get four options.
Share Via Direct URL: Here, you’ll find a link to share across social media or attach it to an email. In addition, you can share directly on your social channels by clicking on the social media icons.
Shortcode for Conversational Form: This shortcode works for the conversational style. Meaning, that wherever you place the shortcode, the form will appear as it is.
Shortcode for Classic Form: Well, if you use this shortcode, your form will be transformed from conversational to classic.
Embed via HTML Code: This is the last sharing option and an amazing one, I must say. If you want to share your conversational form across another website or on a website not made with WordPress, you need to embed the HTML code.
Wrapping up
Conversational Forms are a part of interactive content, and interactive content is best for a higher customer engagement rate. With Fluent Conversational Forms, you can achieve more than you think. On top of that, you can consider other benefits of Fluent Forms as the cherry on top of growing your online business—at an accelerated speed.


Leave a Reply
You must be logged in to post a comment.