Pricing Table Builder is a WordPress plugin created for the responsive table in order to manage the pricing of a particular organization. The plugin helps to create unlimited clean and smooth design based pricing table on your site.
The Pricing Table plays an important role in every organization that offers different products or services. This is a significant challenge from both a design and usability standpoint. They must be simple and easy but at the same time clearly able to differentiate between the features and prices of different products and services. Today, I am going to demonstrate the total procedures for creating a responsive pricing table.
Now, let’s get into the starting! I am going to create a pricing table using the Pricing Table Builder WordPress plugin.
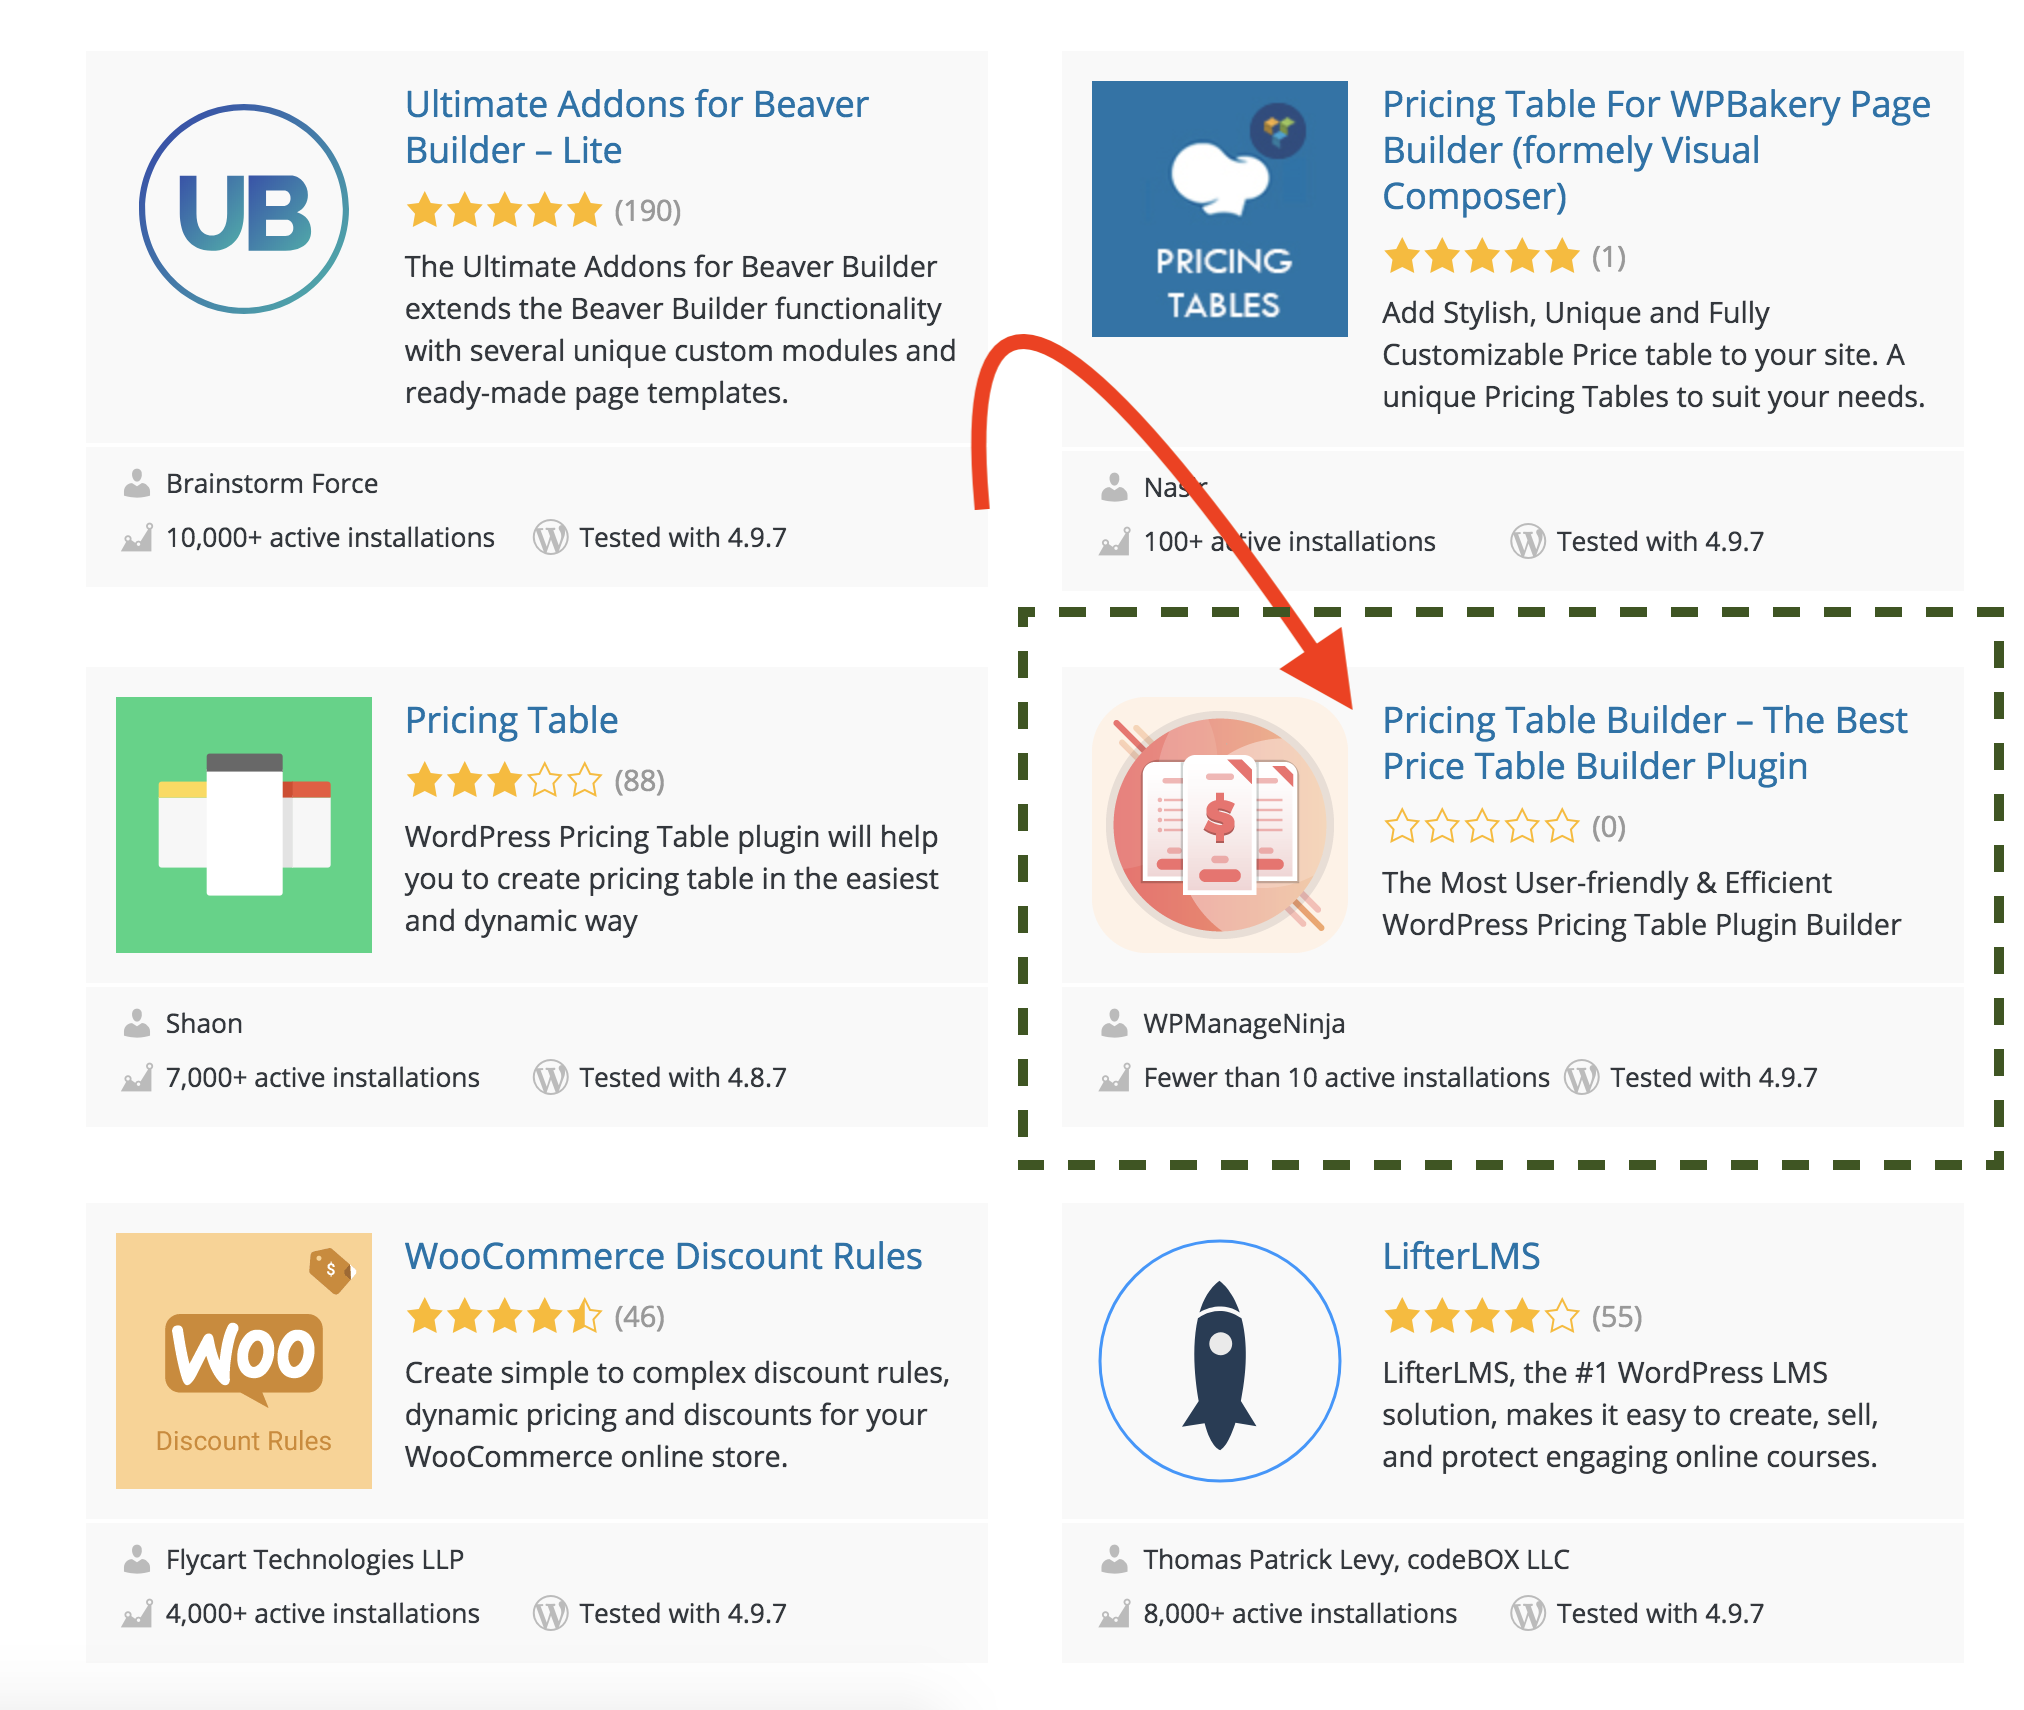
First of all, you need to download and install the Pricing Table Builder plugin in your site. To do so, you have to go to the plugin section of your dashboard. Then search ‘Pricing Table Builder – The Best Price Table Builder Plugin’ on the WordPress directory.
Next, after installing then activate the plugin and you will find the plugin left sidebar in your dashboard.
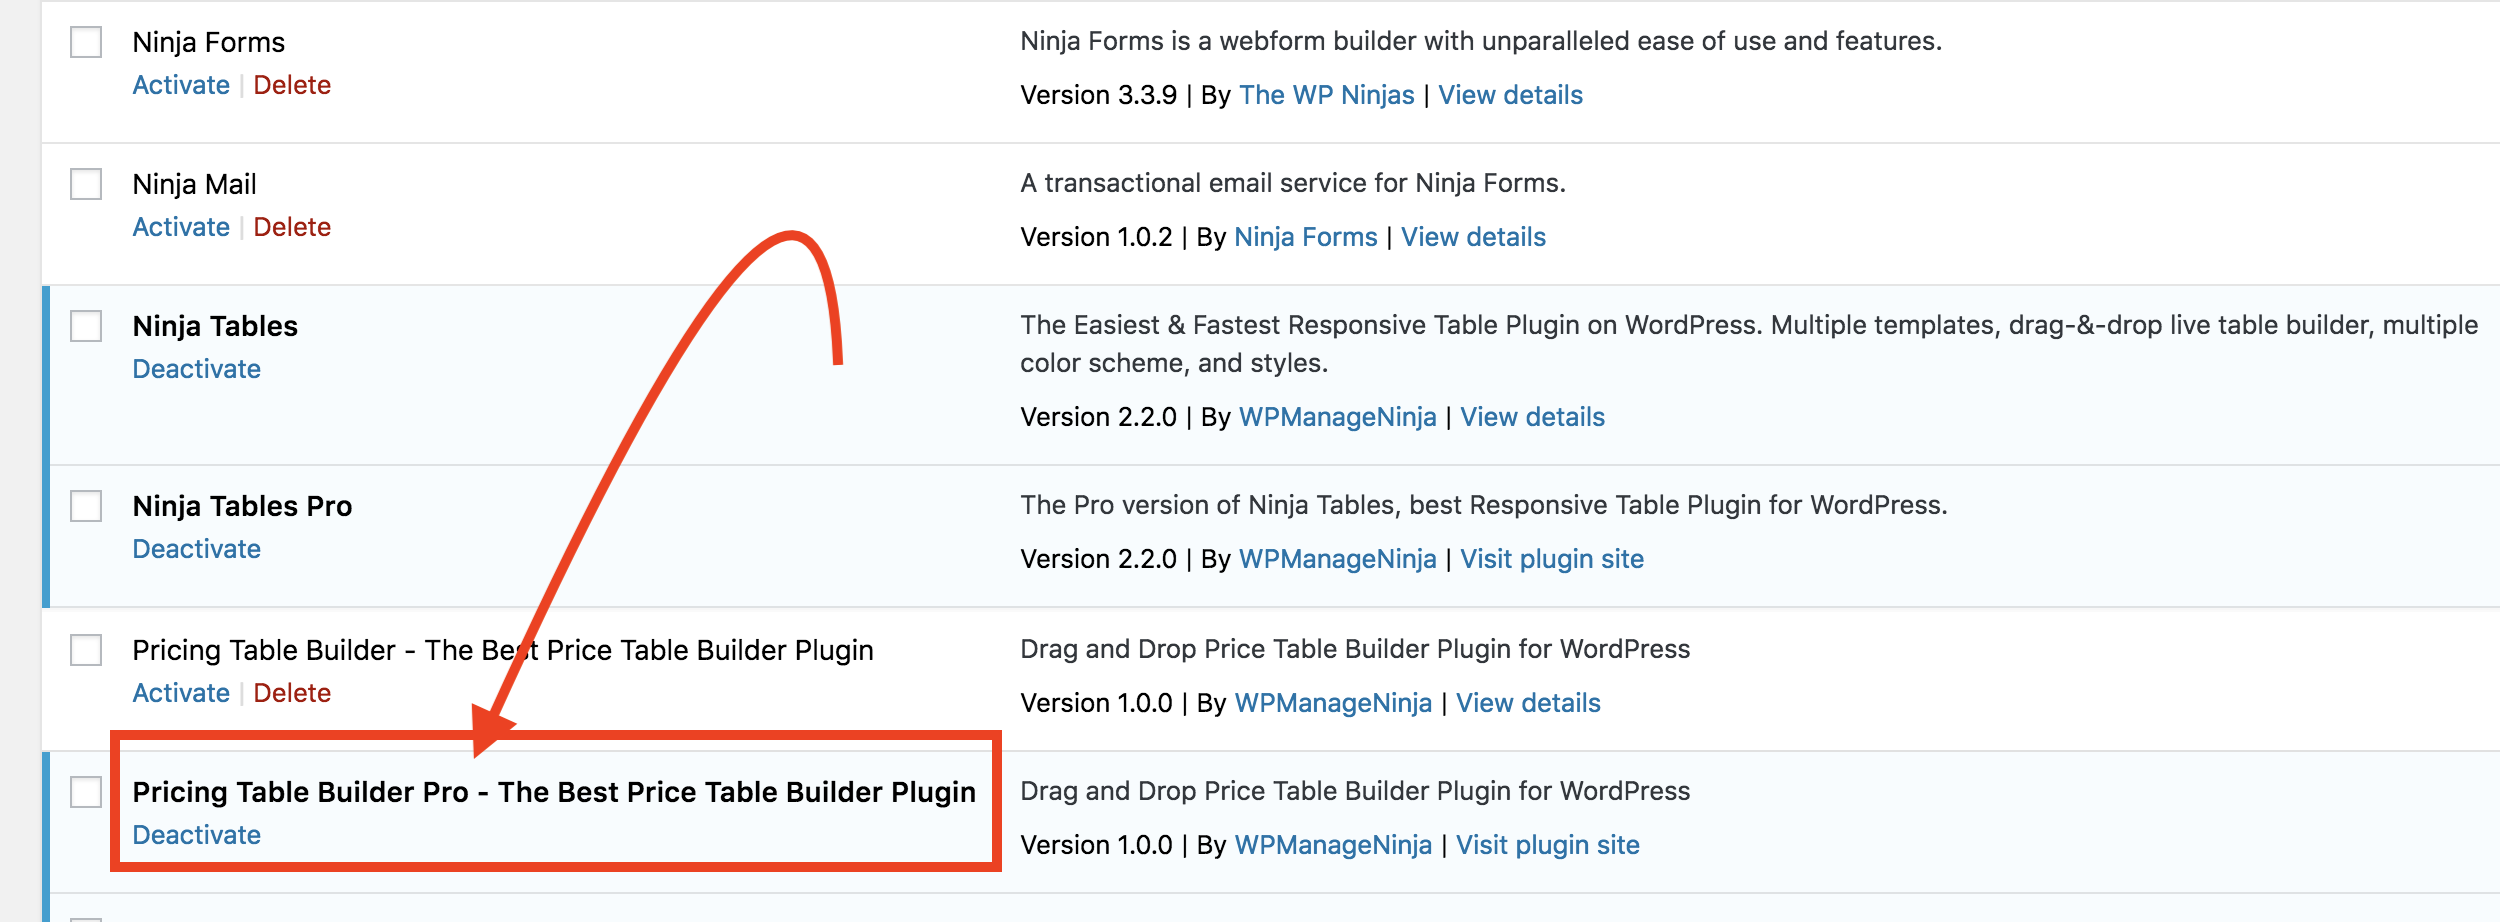
Then click on the plugin Pricing Table from your left sidebar.

After clicking the plugin, you will be taken to the dashboard of that particular plugin. If you don’t have any existing plugin then the interface would be like so. In this case, you just click on Create Your First Pricing Table (located in the middle of the board) button or Add Table(located in the top right corner of the board) button.

Or if you have existing tables on the board then the interface would be like so. In this case, you just click on the Add Table(located in the top right corner of the board) button to create a new table.

So far you have come to know how to integrate Pricing Table Builder plugin with your WordPress site. Now it’s time to create a beautiful pricing table.
To create a new pricing table click Add Table button, then you will have a pop-up to assign your table name. Put your expected table name in the input field and click on the Add New button.

A new pricing table has already created according to your given name. Then you will be confirmed by a popup notification and will be directed to a new page where a default design pattern of a pricing table has given to you. Now you can customize the existing design as you need.

There are three separate sections for customizing the inbuilt design. They are as follow:
Now, I am going to describe all the sections practically to make you understand in the best possible way.
1. STYLE
First of all, click on the STYLE section located in the right top panel of the dashboard.

There are several options out there in that section. In the LAYOUT part, you will find two built-in layouts. They are Columns and Grids.

If you click on the Columns, consequently you will have the following output.

If you click on the Grids, the output would be like the following snapshot.
And I am clicking Grid to demonstrate the tutorial precisely to you.
Next, go to the SKIN option and you will have four different skin designs named Skin 1, 2, 3, 4 consequently.

Skin 1 and Skin 2 are for the free version and Sking 3 and skin 4 are for pro version.
I am clicking Skin 1 to demonstrate the tutorial precisely to you. Then go back to the previous core options through the back arrow.
Next, come to the PRIMARY COLOR option where you can change the default color. Click on the icon given at below the title. There will have a custom color pad from where you can customize you expected color. The chosen color will affect the following parts of the table. A crystal-clear snapshot is given below in order to clear your confusion.

Come to the next option which is Table Column Border and this is responsible for table border. You can enable and disable the table border using this option. Following image is given for your better understanding.

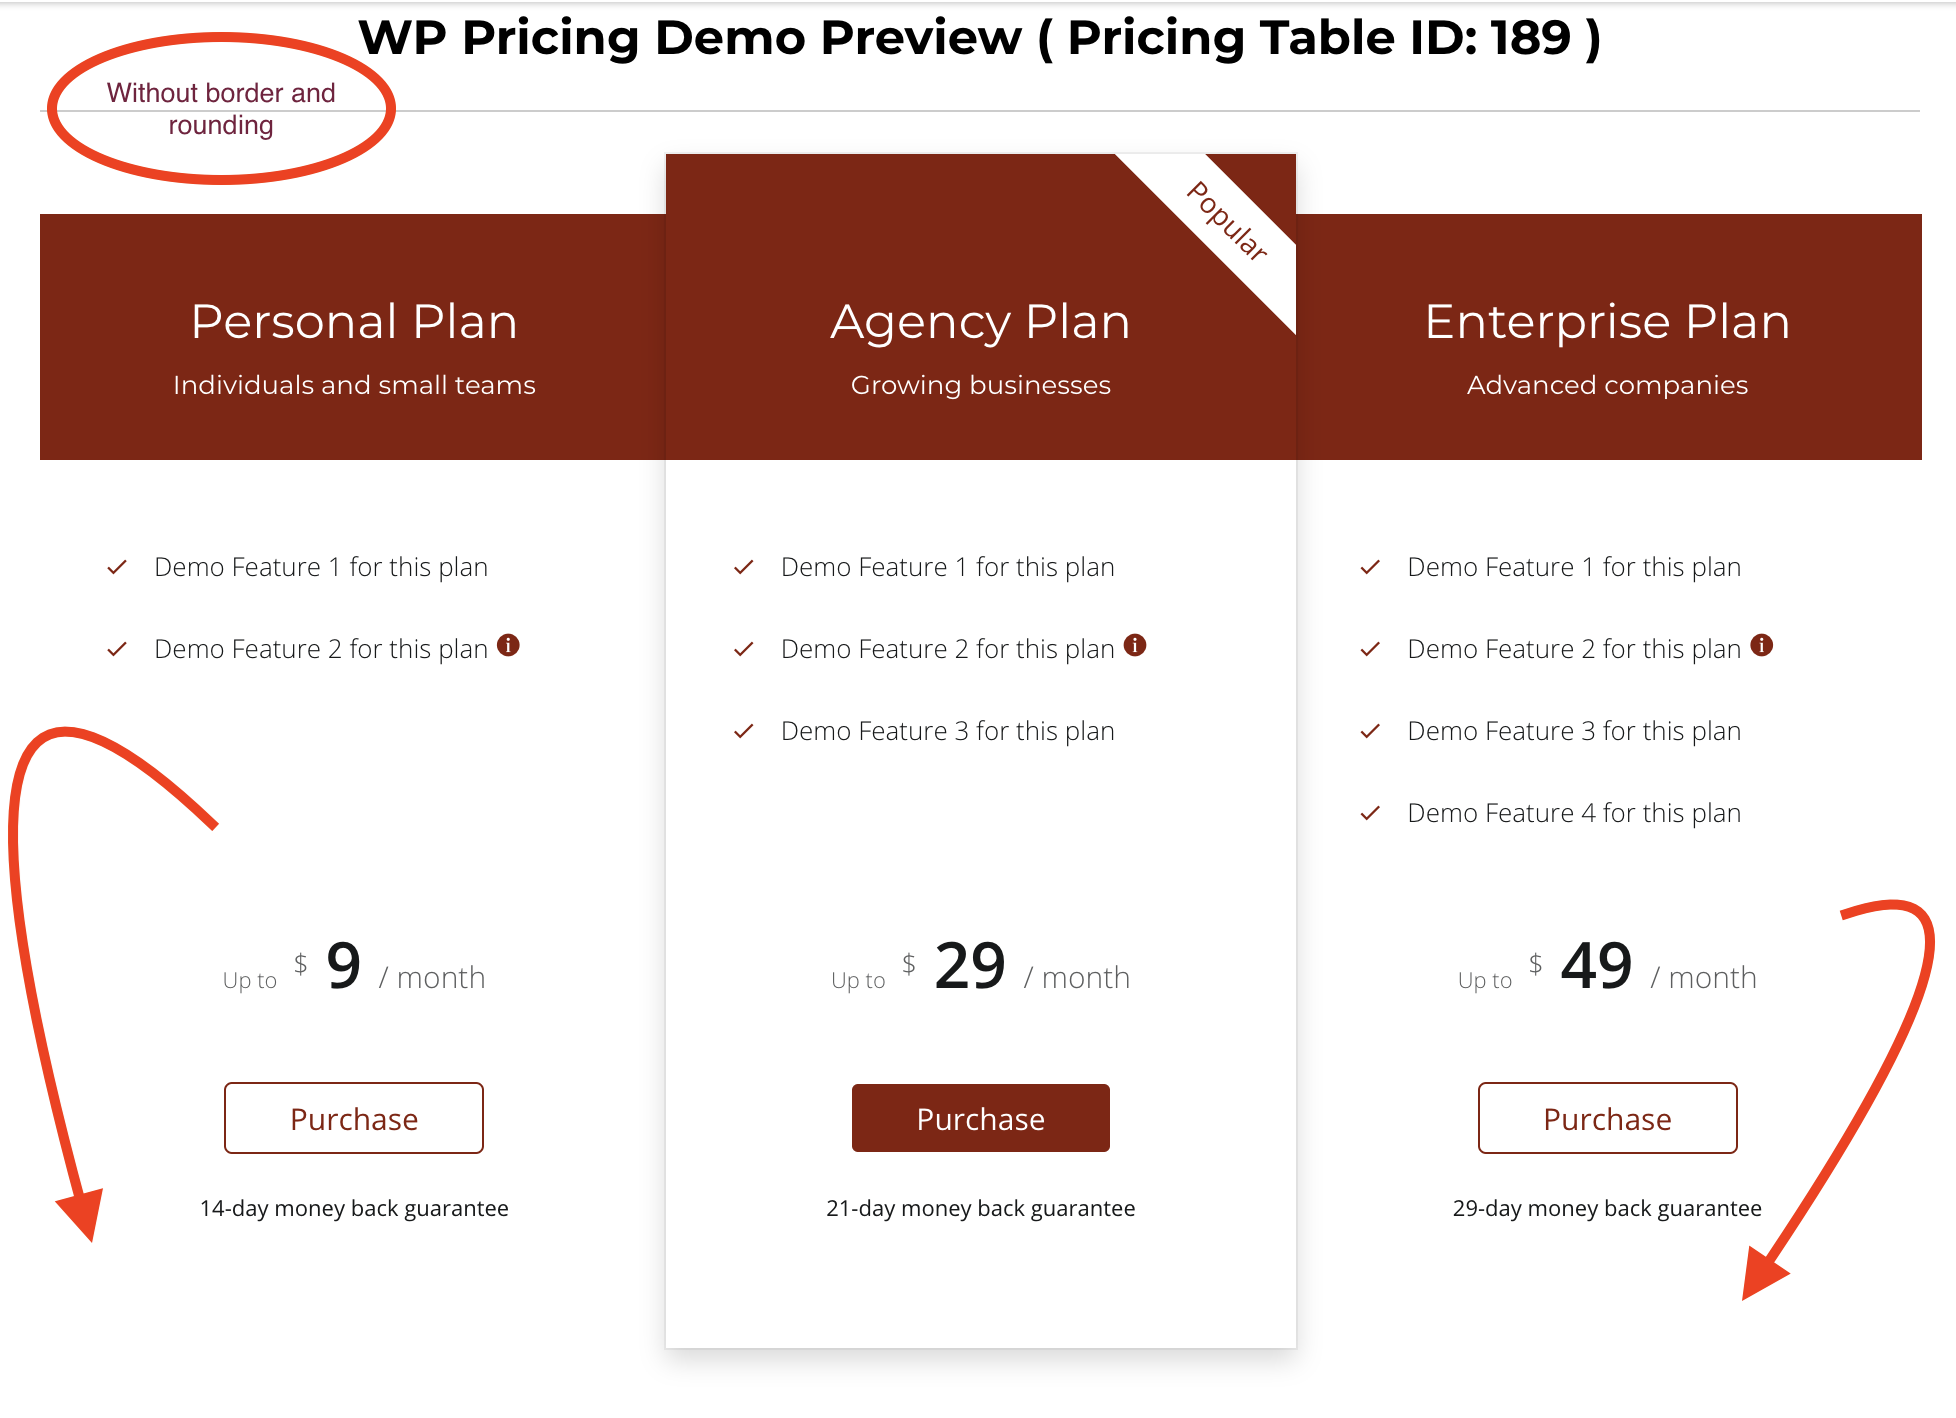
Then the last but not the least option of the STYLE section is Table Column Rounder which is for ensuring border rounding. You can enable and disable rounding through option. After configuring all the settings click on the Update button to save the changes.
Here, have a look without the border and the round options.
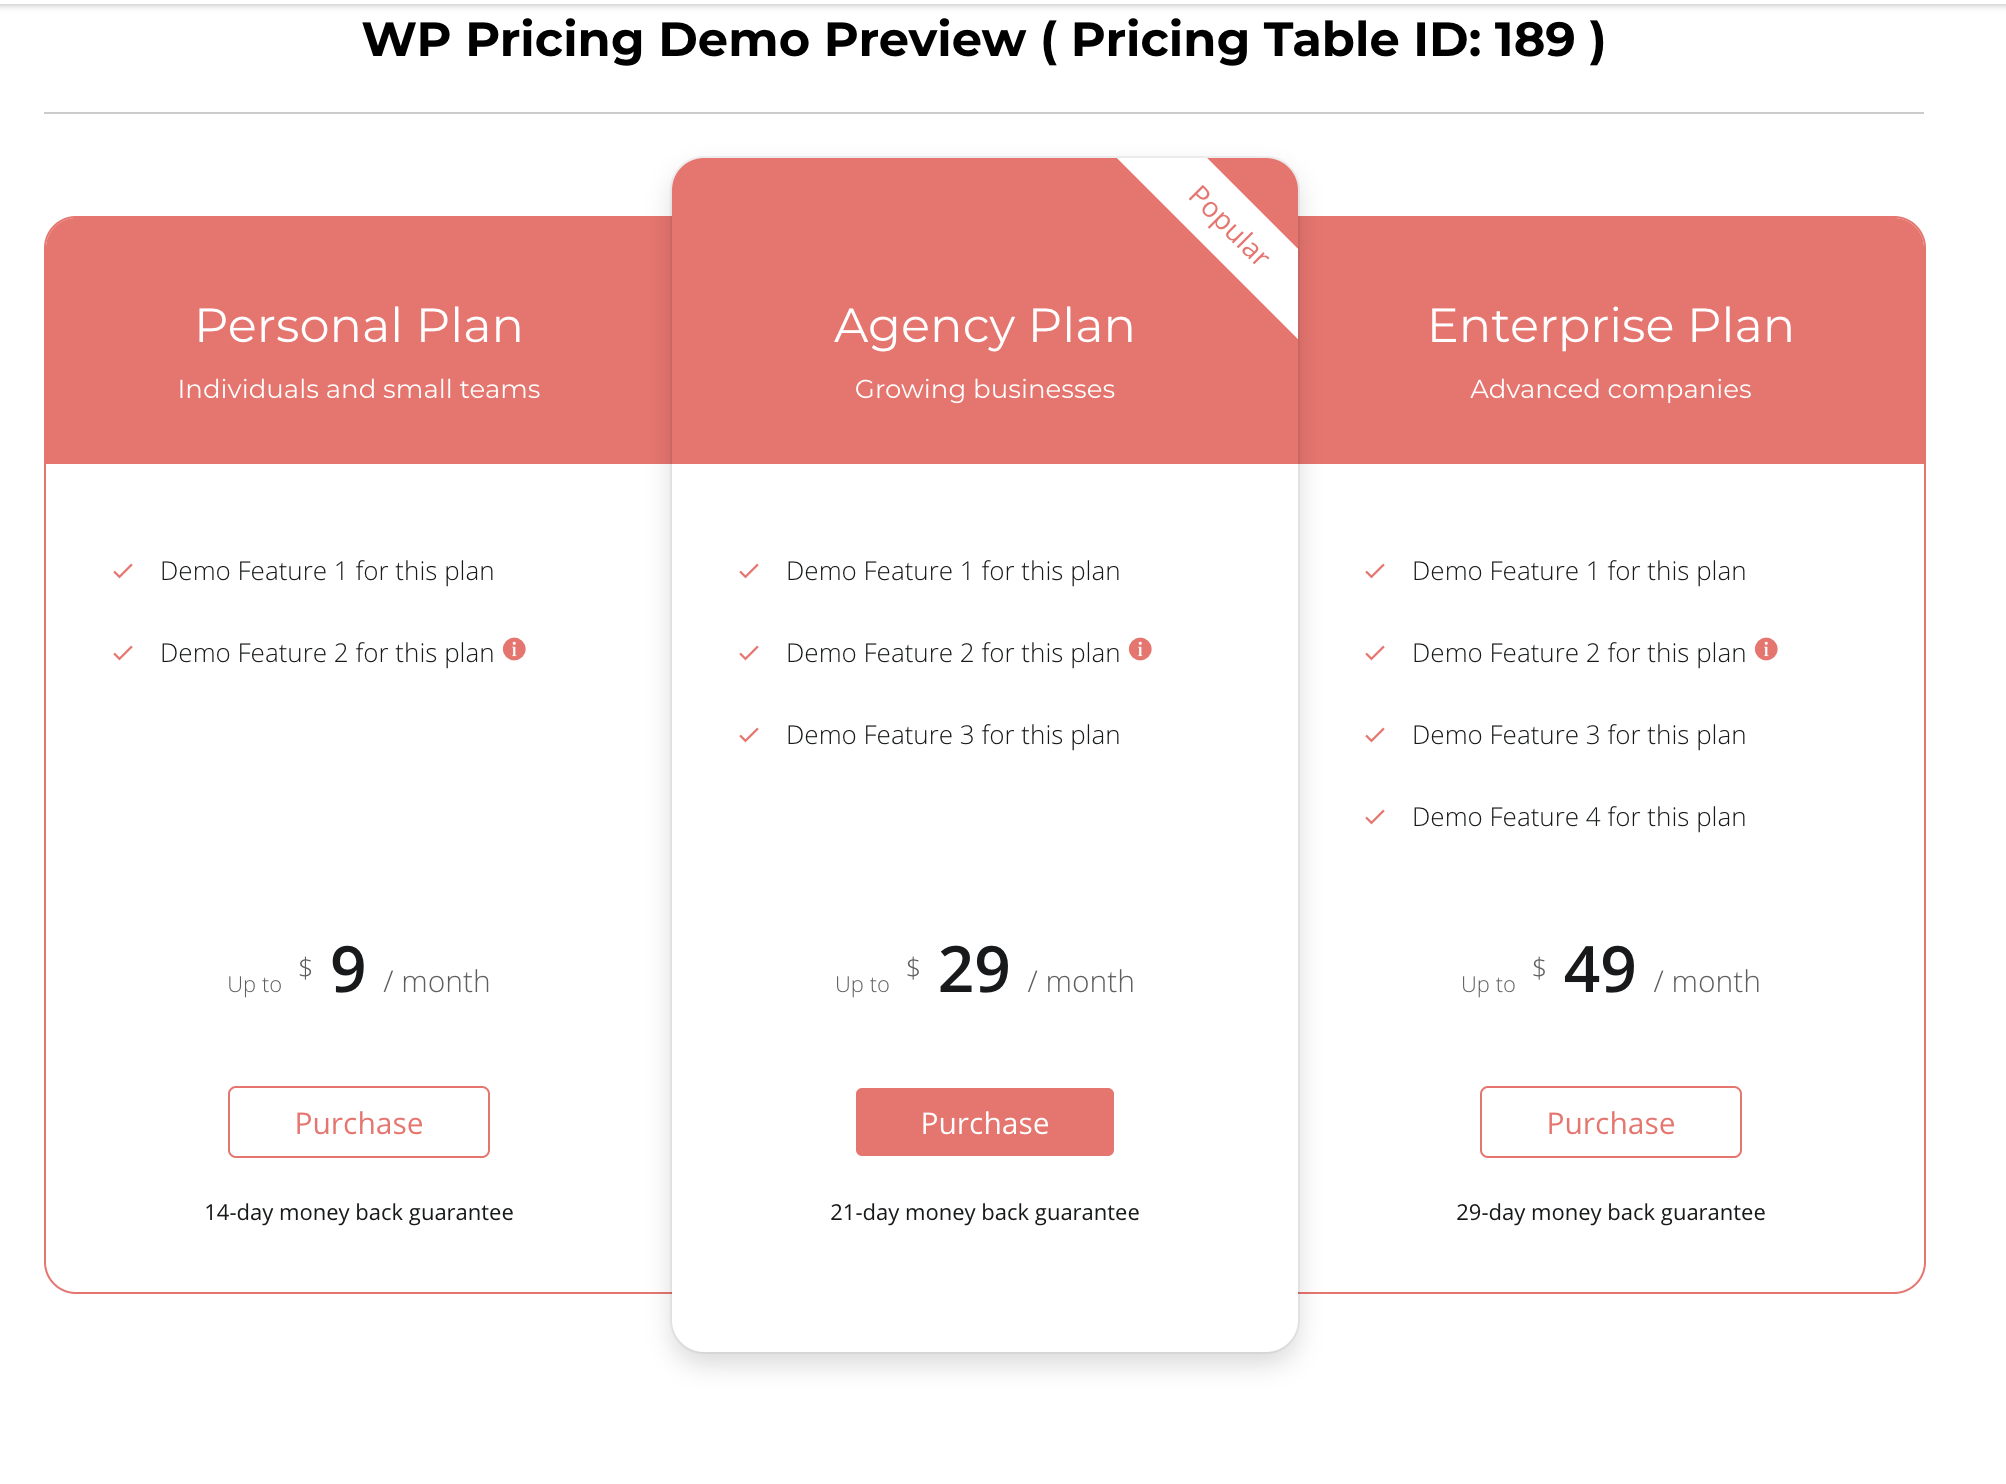
I am using border and rounding to demonstrate the tutorial.

And Table Column Rounder option is the last option of the STYLE section.
2. CONTENTS
Then move on to the next section of the plugin which is the CONTENT section. There are 3 built-in content slides in the plugin. You can add as you need. Each content slide settings and configuration works in the same way. I am showing the all the system and configuration in general. In this section, you can add, edit, delete the contents altogether. To make sure I am showing you all of its functionalities. First of all, click on the CONTENT section and you will be have the following options given below in the snapshot.

You can edit existing content by clicking the content part. You also can copy by clicking on the copy icon of the respective content part. By applying the same way you can delete by clicking the delete icon. At the bottom, there is an ADD button to add any content needs to be added. Most importantly you can rearrange the existing contents through drag and drop.

Let’s move to the edit part of the section by clicking the first content part itself. 
Then you will find a custom slider option appear to you bearing the existing contents.
In this part, at first, you have an icon for featuring the existing content. If you want to do so, just enable the icon then the existing content would be the featured content.
Then come to the next, in this part, in this part you can customize the texts of the content. Click on the Title field to change the text of the title. I am typing Standard in place of Personal Plan. In the same way, you can change the caption part situated just under the title. I keep it the same as before.

Then come to the body part by clicking the Features option.

In this part, you will have a custom slider bearing the existing content.

This part is almost the same as the previous one. Here just one option is given for adding for more features. To add more features just click on the Add icon.
You also can edit specific data by clicking on that particular data.
Then you will have another slider for that particular text. You can edit, add, delete and also make a text hint for this particular text.

You can make a hint of any of the features for securing the thing user-friendly.

The output is given below for your better understanding.

You can change the feature icon from the dropdown list. There are six inbuilt icons given for the text. You can choose one of them.

The output of the feature icon would be like so.

This is the last option of the Feature part. Next, come to the Price part of the section. Click on the Price option to make any customization.

Then you will have another custom slider for customizing pricing materials. There are 4 options for that part.

There is a PRICE PREFIX option on top of the list. This option contains a drop-down bearing 3 default semi options to limit the business policy. You can choose one of them.

Then you have CURRENCY option that contains 2 default currency. The good part of this is, you can add any sign of a currency as your choice.

Then you have the input field for giving the PRICE. This part is used to input the price you want to add. You can use the expected number digit you want.
The last part of the PRICE option is PRICE POSTFIX with a drop-down option for adjusting duration of your pricing policy. This field determines how long you want to last the price offering.

This is how the pricing option works.
Let’s get into the Button option. To get into the Button option, click on the Button option of the content part. In this option, you will have five functionalities.

First of all, there is a BUTTON LABEL which determines the text of the button. You can give any text you want as I have given here Purchase.
Next turn to the BUTTON URL which determines button link you want to provide. Usually, this link is directed to the purchase page where all the purchases functionalities happen.
Next, come to the OPEN LINK IN NEW WINDOW option that actually enables you to open a new window with the given link. It actually works as target=”_blank” in the programming. You can enable or disable the option using this part.
The CAPTION is the next part of the BUTTON option. This part determines the additional texts that usually say about the offerings. Typically it says about the offer duration.
The last part of the button option is CUSTOM CLASS which actually allows you to add any additional custom CSS into the button option. This is how the button option works.
The last part of the Content section is MAIN SKIN COLOR which determines the color code of the respective content slider.

You can choose your custom color according to your choice. Here is a default custom color pad is given to customize the expected color.

This is how y0u can use the color code of a specific part of a content slider.
These are the functionalities of the CONTENT section.
3. ELEMENTS
Next, the last section of the plugin is the ELEMENTS section which allows you to customize/configure every element of the content slider. In this section, there are four options to configure. Each option plays a different kind of rules for a particular content slider.

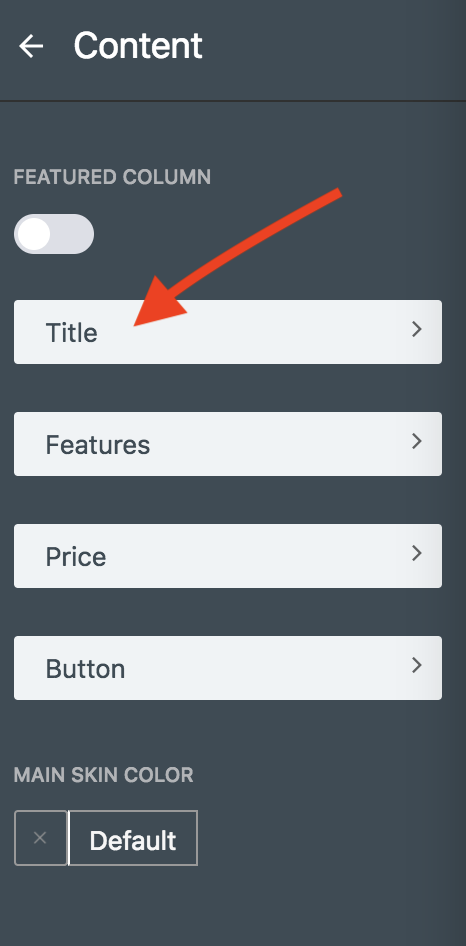
The first option of ELEMENTS section is Title. To get to that click on the option on top.

There are five parts of the options. In the first part, you have an option of hiding the title which is HIDE TITLE. You can enable or disable the title using this option.

Next, come to the HEADER COLOR option. By this option, you can customize the color of a header in a particular content slider.

After this option, come to the HEADER FONT SIZE option. By this option, you can customize the header title size.

Next option is SUB-TITLE COLOR which determines the color of the subtitle in the header section.

You can customize the color as you wish and make a proper adjustment according to your expectation.
Then come to the SUB-TITLE FONT SIZE option that allows you to customize the sub-title font size in pixel.

This is how you can use the Title element in the ELEMENTS section.
Next, come to the Features element which allows you to customize and configure the all the features of the content slider.

In the FEATURE element, you can have four different options to configure all the feature in the elements.
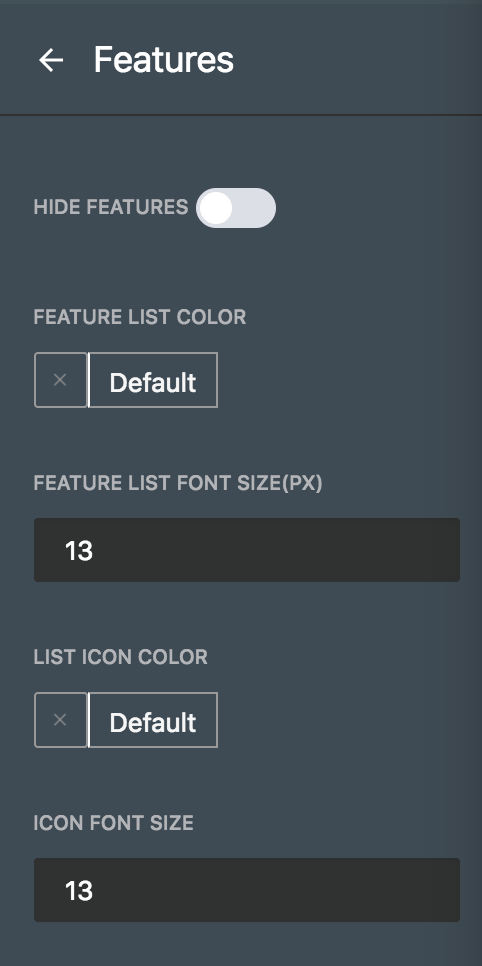
Next, come to the first option which is HIDE FEATURES that allows you to enable or disable the features of the content sliders.

You can enable all the features just by single click.

Then come to the FEATURE LIST COLOR option that determines the features texts color.

Next, come to the FEATURE LIST FONT SIZE option which allows you to customize the features text color.
Next option is LIST ICON COLOR which allows you customize the color all the icons given in the features including sign icons and hint icons.

Then come to the last option of this element which is ICON FONT SIZE which allows you to customize the size of the icons.

You can easily increase or decrease the icon size of that of the features element.
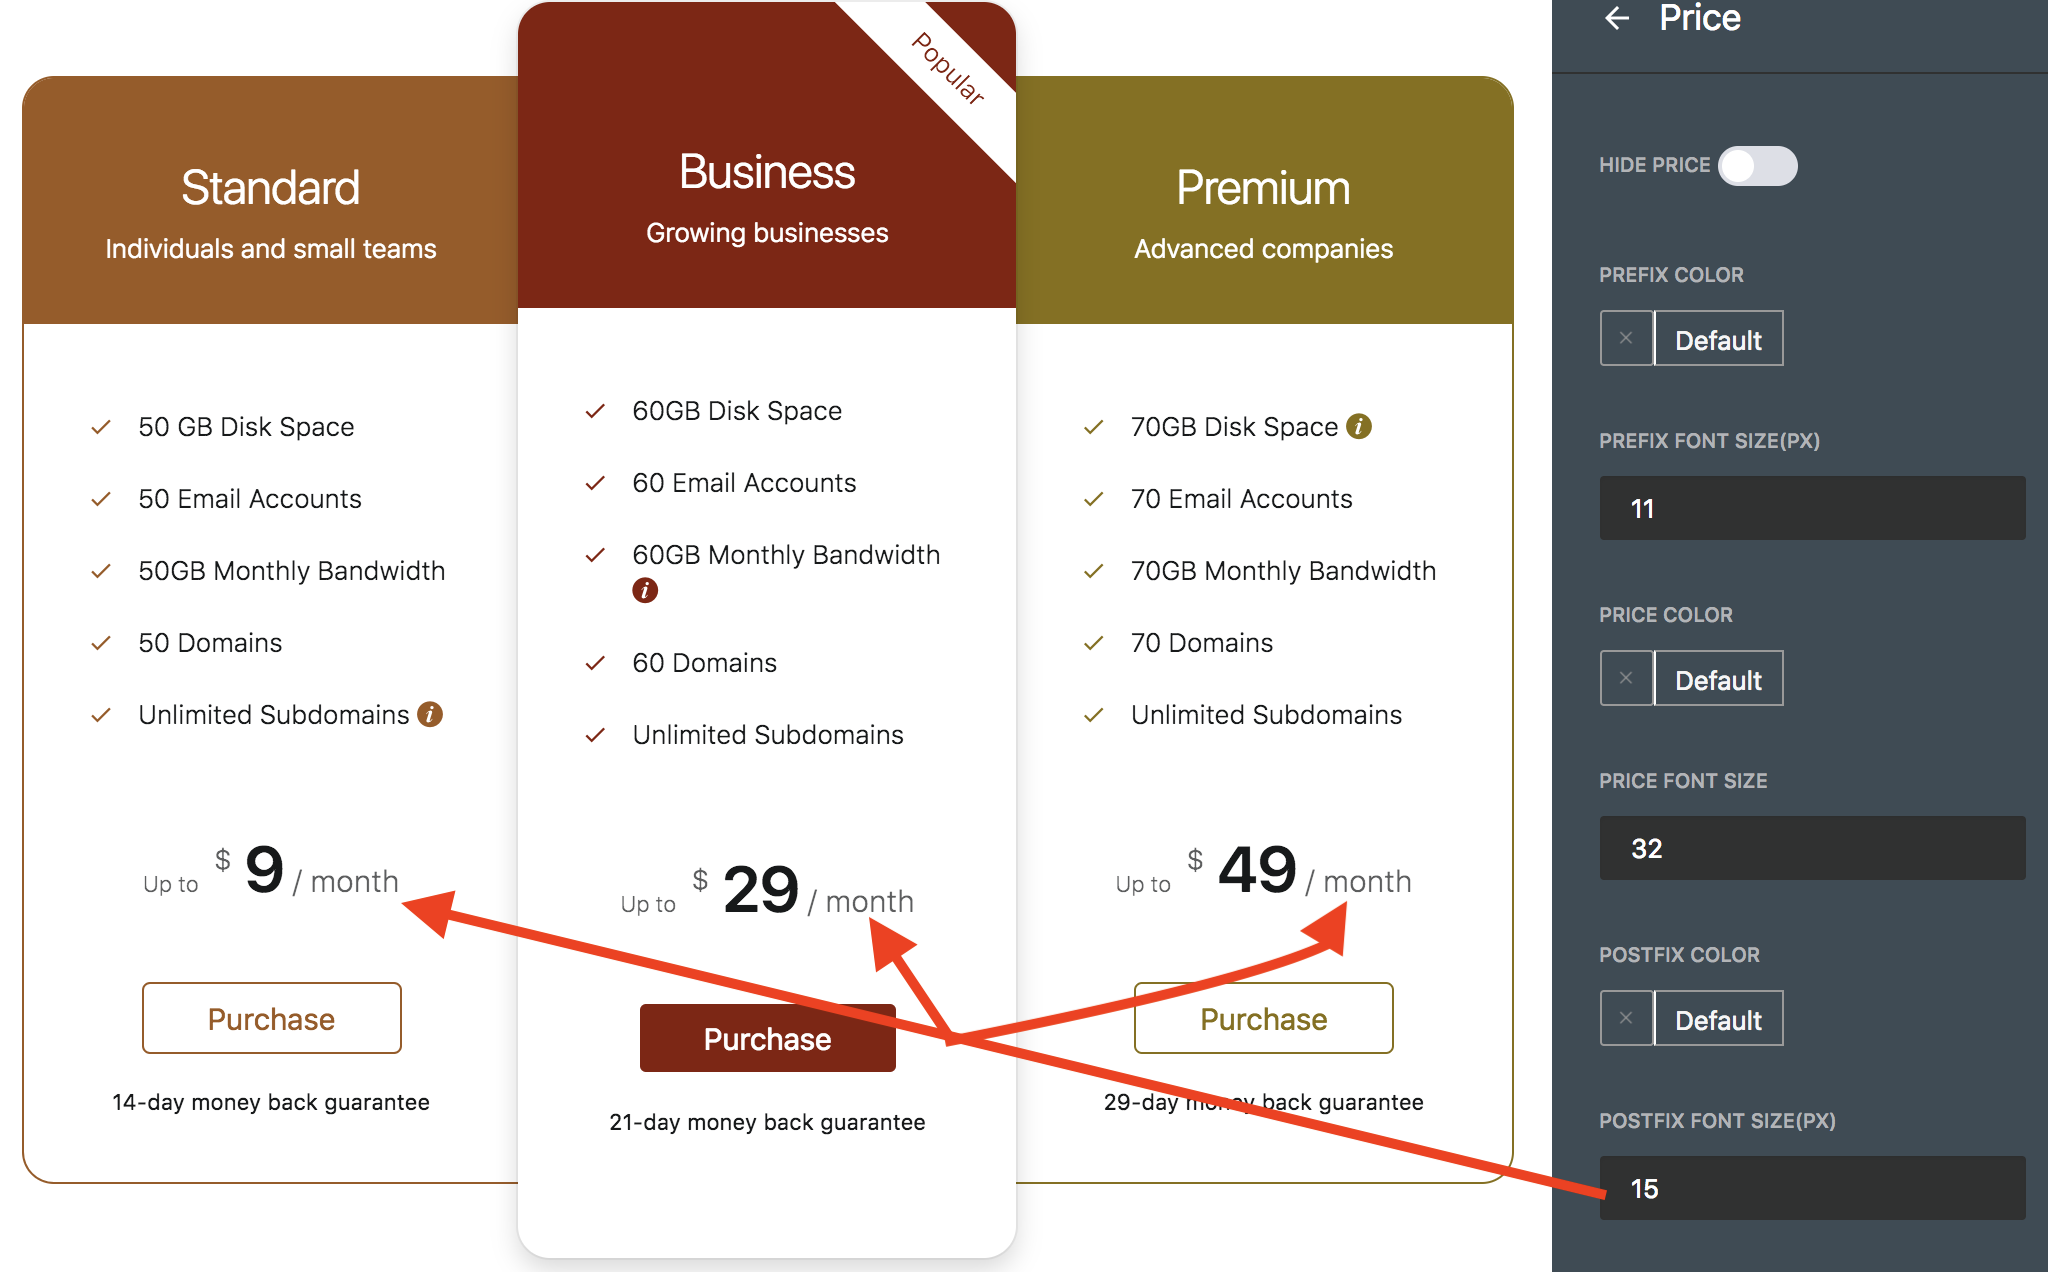
Next element is Price which allows you to configure all the elements in the price.

There are seven options in the Price element. All the options are given you to configure according to your requirement.

By the first option of Price element, you can enable or disable the price element of every content slider. This title is entitled with HIDE PRICE name. You can hide the Price element using this option.

You also can enable Price element by this option through a single click.

Come to the next option which is PREFIX COLOR that determines the color of the proceeded text to the dollar sign.

You can customize the color of the proceeded text to the dollar sign as you want by this option.
Then you can have PREFIX FONT SIZE option to customize the font size of the proceeded text to the dollar sign.

Next, come to the color option which is PRICE COLOR. You can change the color or customize the price font through this option.

Then come to the PRICE FONT SIZE option which allows you to customize the font size of the given price.

Next option is POSTFIX FONT COLOR which is to customize the text color situated next to the price font.

Next option is POSTFIX FONT SIZE which determines the font size situated next to the price font.
This is the last part of the Price element.
Next, turn to the last element of the plugin which is Footer. This element is for configuring and customizing the footer part of the pricing table. To figure out this element, click on the Footer element.

Then you will be taken to the footer element panel. There are seven items contain in the FOOTER element.

Come to the first option of the FOOTER element which is HIDE FOOTER. This option allows you to enable or disable the FOOTER element.
You can disable the footer as it’s done below.

At the same way, you can enable FOOTER element.

Then come to the next option which is BUTTON COLOR. This option allows you to customize the button color.

Next option is BUTTON FONT SIZE which is used to customize each button text size of the FOOTER element.

After that option, come to the BUTTON BACKGROUND COLOR option. This option is used to customize the background color of the button.

Next option is BUTTON BORDER COLOR which is used to customize the border color of the button.

The following option is CAPTION COLOR which allows you to customize the color of the caption located under the button.

The last option of the FOOTER element is CAPTION FONT SIZE which is used to customize the texts of each caption given under the button.

This is the last part of the FOOTER element. This is how you can configure your pricing table altogether.
After configuring all the requirements, you just click on the Update button located on top of the panel. Then click on the Preview button to look up the ultimate outcome of the configuration.

Now, let’s have a look of the ultimate view of the pricing table I just have created now.

Featured Content
Pricing Table Builder plugin allows you to make the featured content from the contents in the pricing table according to your choice. To make this happen, just go to the ELEMENTS section and choose the desired content from them. Click on the respective content slider as I choose Business content to make it as featured content.

Then you will have the several options in the right sidebar. Click on the first option named FEATURED COLLUM and make it enable.

Then automatically, the selected content would be a featured content according to your own needs.
This is how you can do all the staffs to fit your pricing table into your website using the beautiful Pricing Table Builder Wordpress plugin.
In this tutorial article, I just showed how can you create and manage a beautiful pricing table using the pricing table builder WordPress plugin. Hopefully, this tutorial makes you able to understand the total procedures for making a smart pricing table. If you have any query let us know about your concern.