
Divi is powered by the Divi Builder, an amazingly accomplished WordPress Theme with a Drag & Drop Page Builder that makes it easier than ever to build beautiful WordPress websites. Before I get to how to create a pricing table for Divi theme, let me make you understand about the pricing table.
The Pricing table plays an important role in every organization that offers different products or services. This is a significant challenge from both a design and usability standpoint. They must be simple and easy but at the same time clearly able to differentiate between the features and prices of different products and services. Today, I am going to demonstrate the total procedures for creating a responsive pricing table for Divi theme.
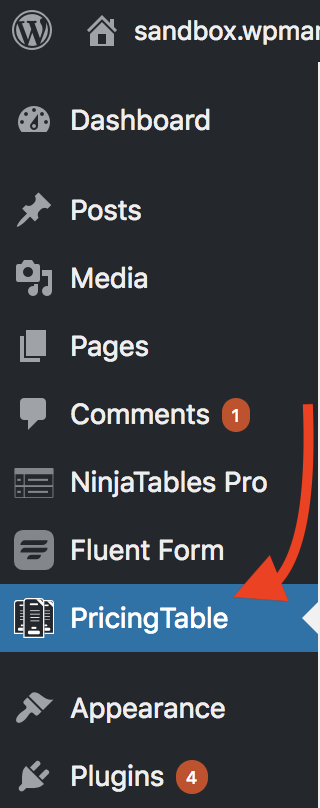
Creating a pricing table for Divi theme is as simple as other pricing table creation. In this case, I am using a beautiful WordPress plugin named Pricing Table Builder plugin. First of all, you have to download and install the plugin on your site. Then make it active and open the plugin by clicking on the plugin title located in the left sidebar of the dashboard.
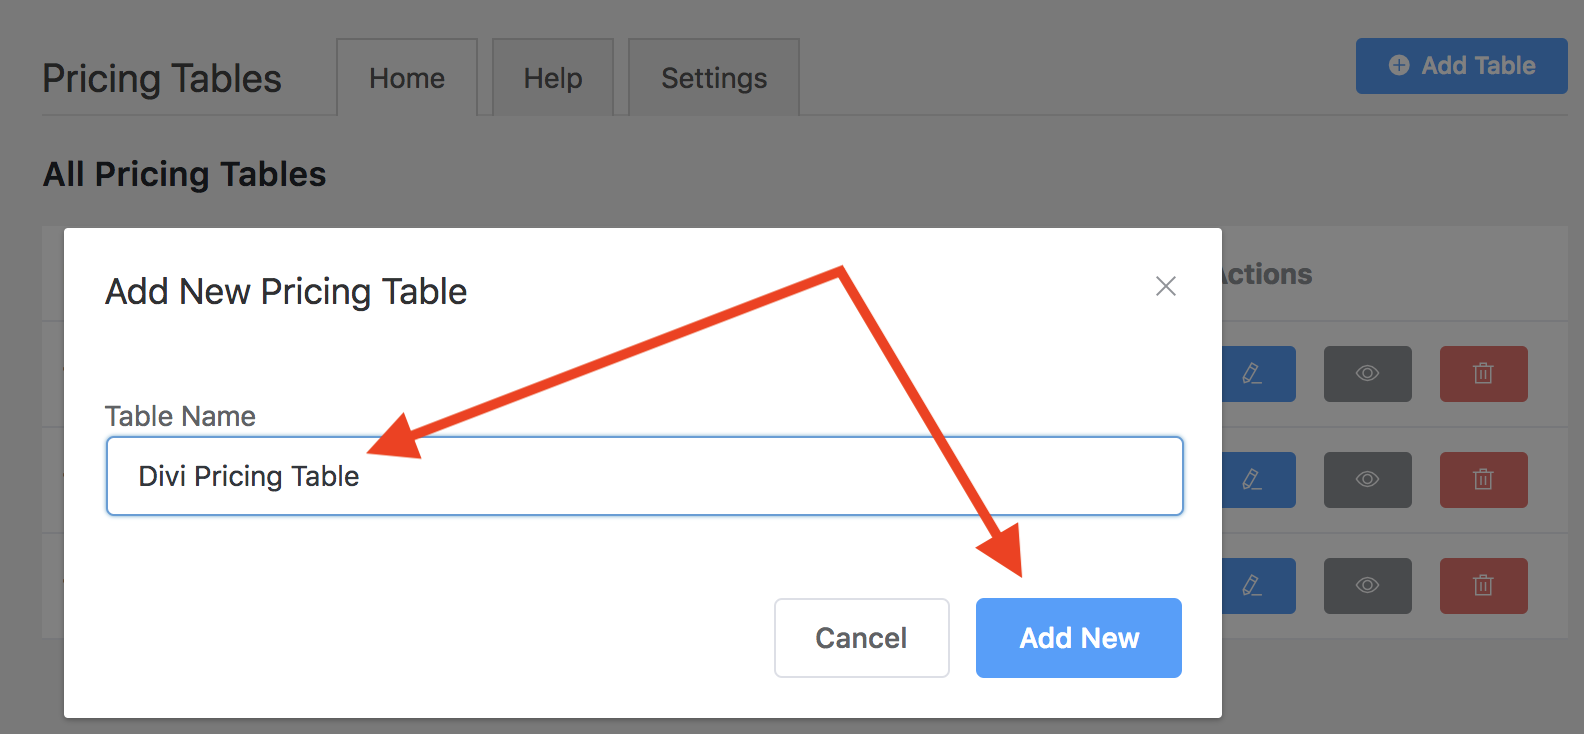
Then you will have a dashboard of the plugin and click on the Add Table button to create a new pricing table.

Then a popup window will appear to you to give the table name. Give the table title which one you want to create. Then click on Add New button.
A default pricing table has created after clicking the Add New button. Here is the look of default view of the pricing table.
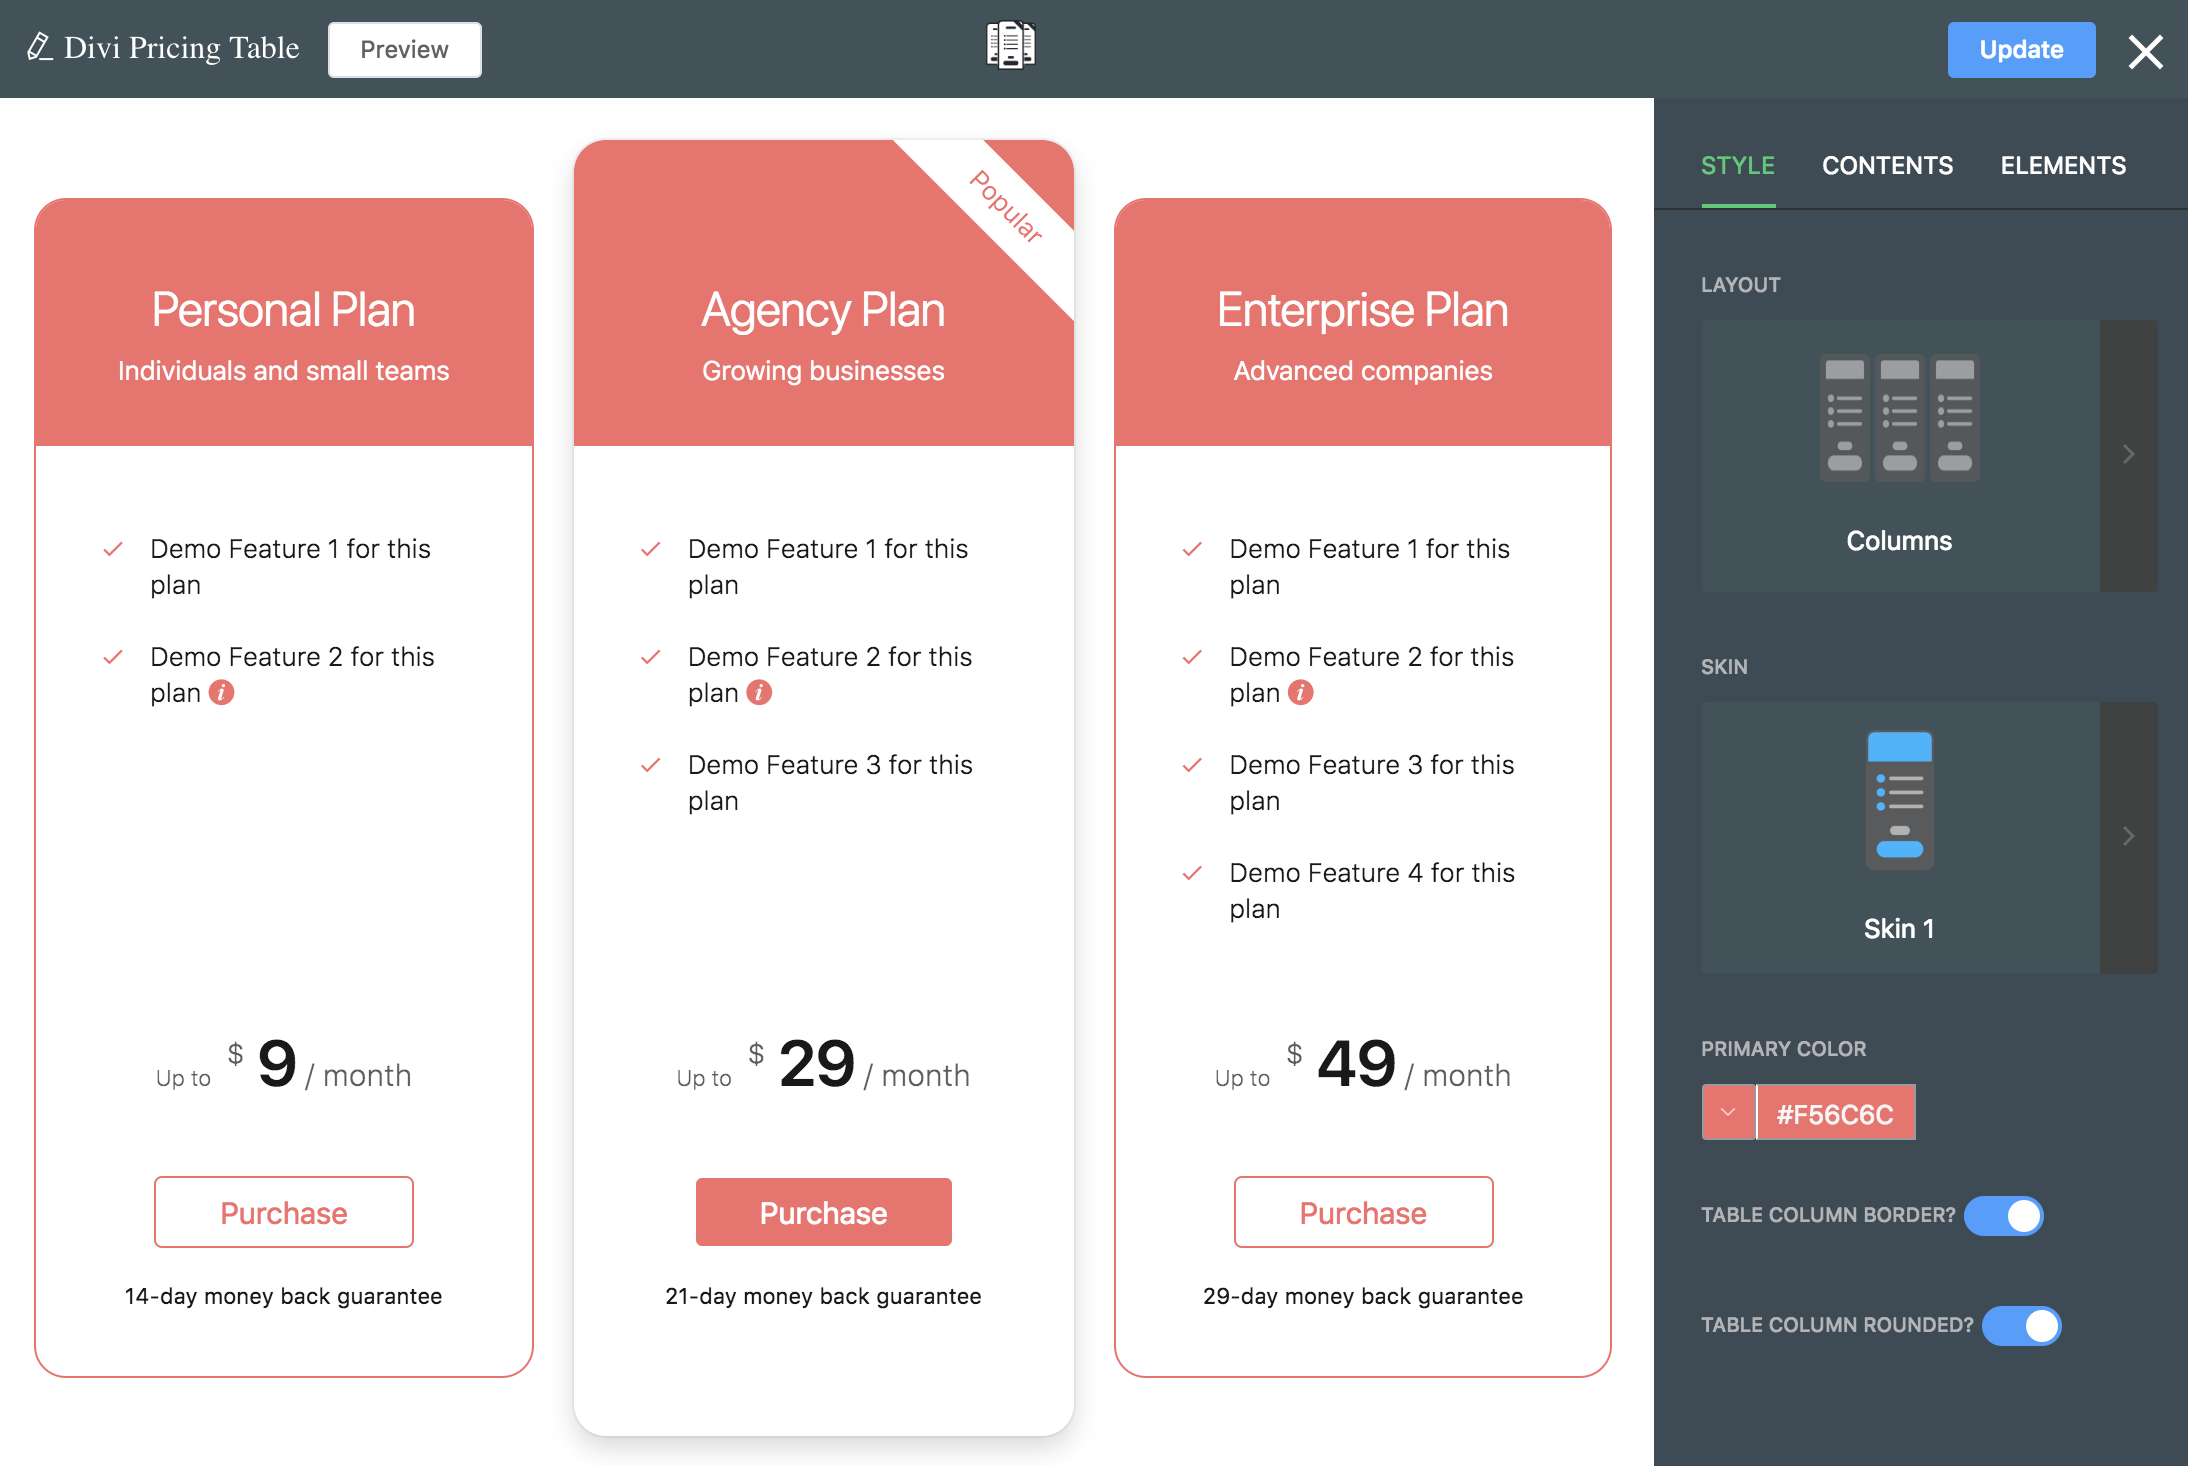
Now, you can edit, add and erase the necessary parts of the table. First of all, you can change the layout from the STYLE section. Click on the STYLE and you will have two layouts and four different skins design for your table. Choose the second layout and first skin design from the STYLE section. Keep the border and the column rounded enabled for a different look.
Then go to the CONTENT section to make a change in the contents of the default content slider. There are three default content sliders in the plugin dashboard. Make a proper customization clicking on the particular content slider from the content section.

You also apply drag and drop for rearranging the content column. If you want to add something, you can do this easily by clicking on the plus(+) icon located on the bottom.
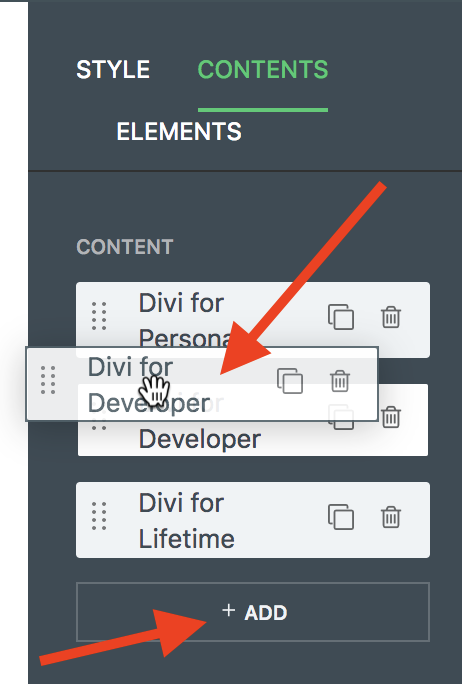
To make a change click on the specific content item, then a custom slider will open with its options.
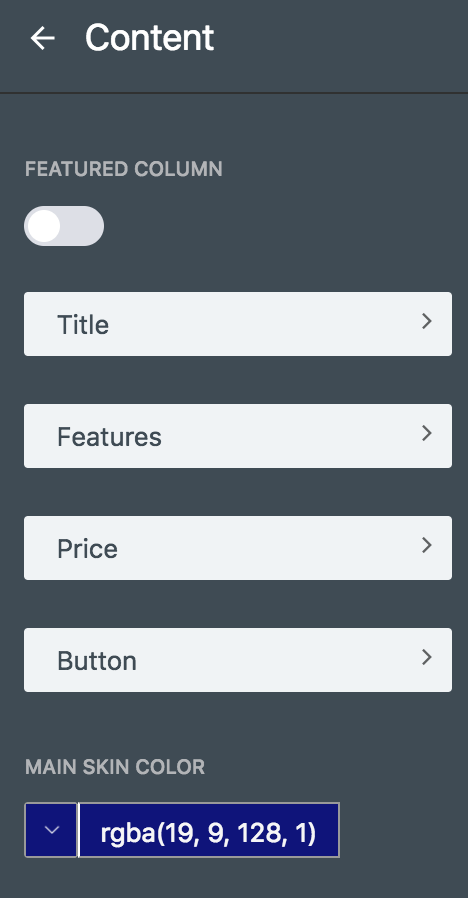
There are several options there for a specific customization. For the title, you can click on the Title option, for the features you can click on the Features option. Same things happen for the rest of the options.
If you click on Title, it will take you to another custom slider where y0u can edit the content.
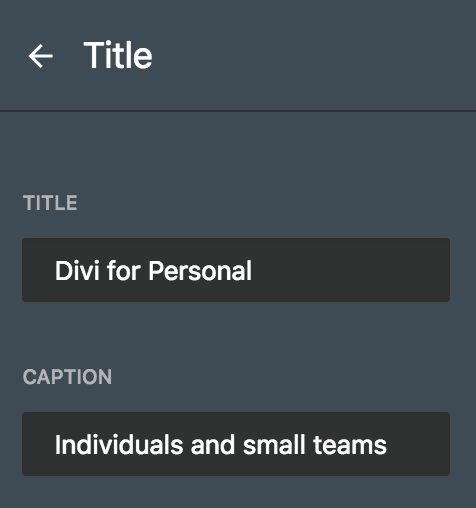
This is how you can change every content slider as your will. For every content slider, this is the same way to customize.
Now come to the FEATURES, this is as simple as the previous one. Click on the FEATURES, you will see a custom slider will open with the existing features.

Now, you can change by clicking on each feature. Here, you also can rearrange the features by drag & drop facility.

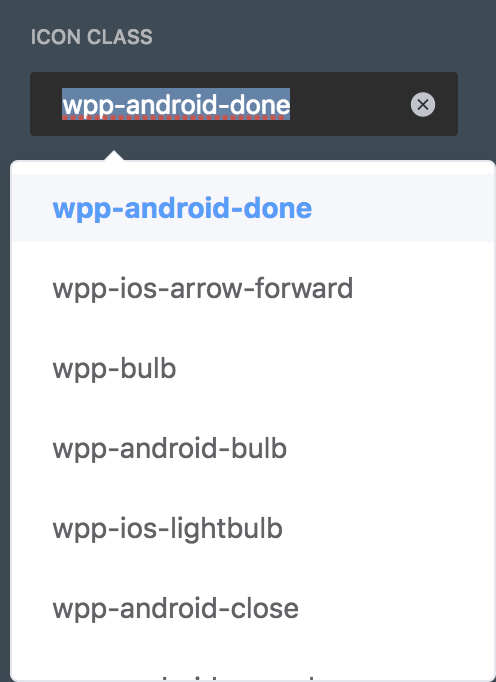
You can change the icon from the ICON CLASS as it has the default six icons.
You also can add a hint text for making things easy by typing text in the input field named HINT TEXT.

Have a look at the preview of the configuration.

These all are the features of the CONTENTS section.
Next, come to the ELEMENTS section. To make a change elements of the contents, you can go through the section. There are four different options within the section. Each section contains the same procedures.

I am showing one of the options. Click on the Title and you will be taken to a custom slider where you can customize the elements of the content.
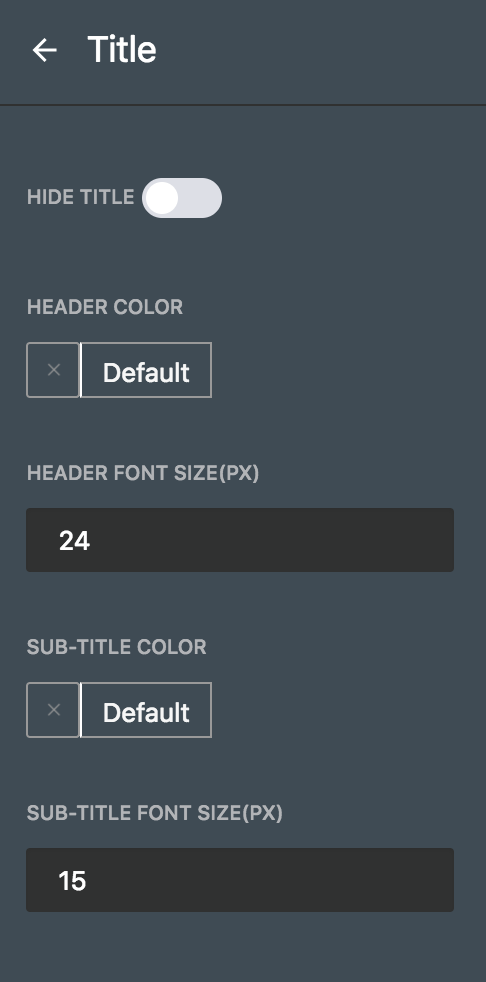
You can hide the title, you can change header color and font size. At the same time, you can customize the sub-title by changing the color and font size of the sub-title.
Next, click on Features option then, in the same way, you will have a custom popup for hiding features, color changing, for font size changing. Then you can have change icon color and icon font size.

Next, click on the Price option, in the same way, you will have a custom popup for hiding price, change prefix color and font size. The price color and price font size can customize here. You can change postfix color and postfix font size as well.

Now, click on the Footer option to customize it. Here in the footer part, you can hide footer, button color, button font size. You can also customize button background color, button border color, button text color and button font size.
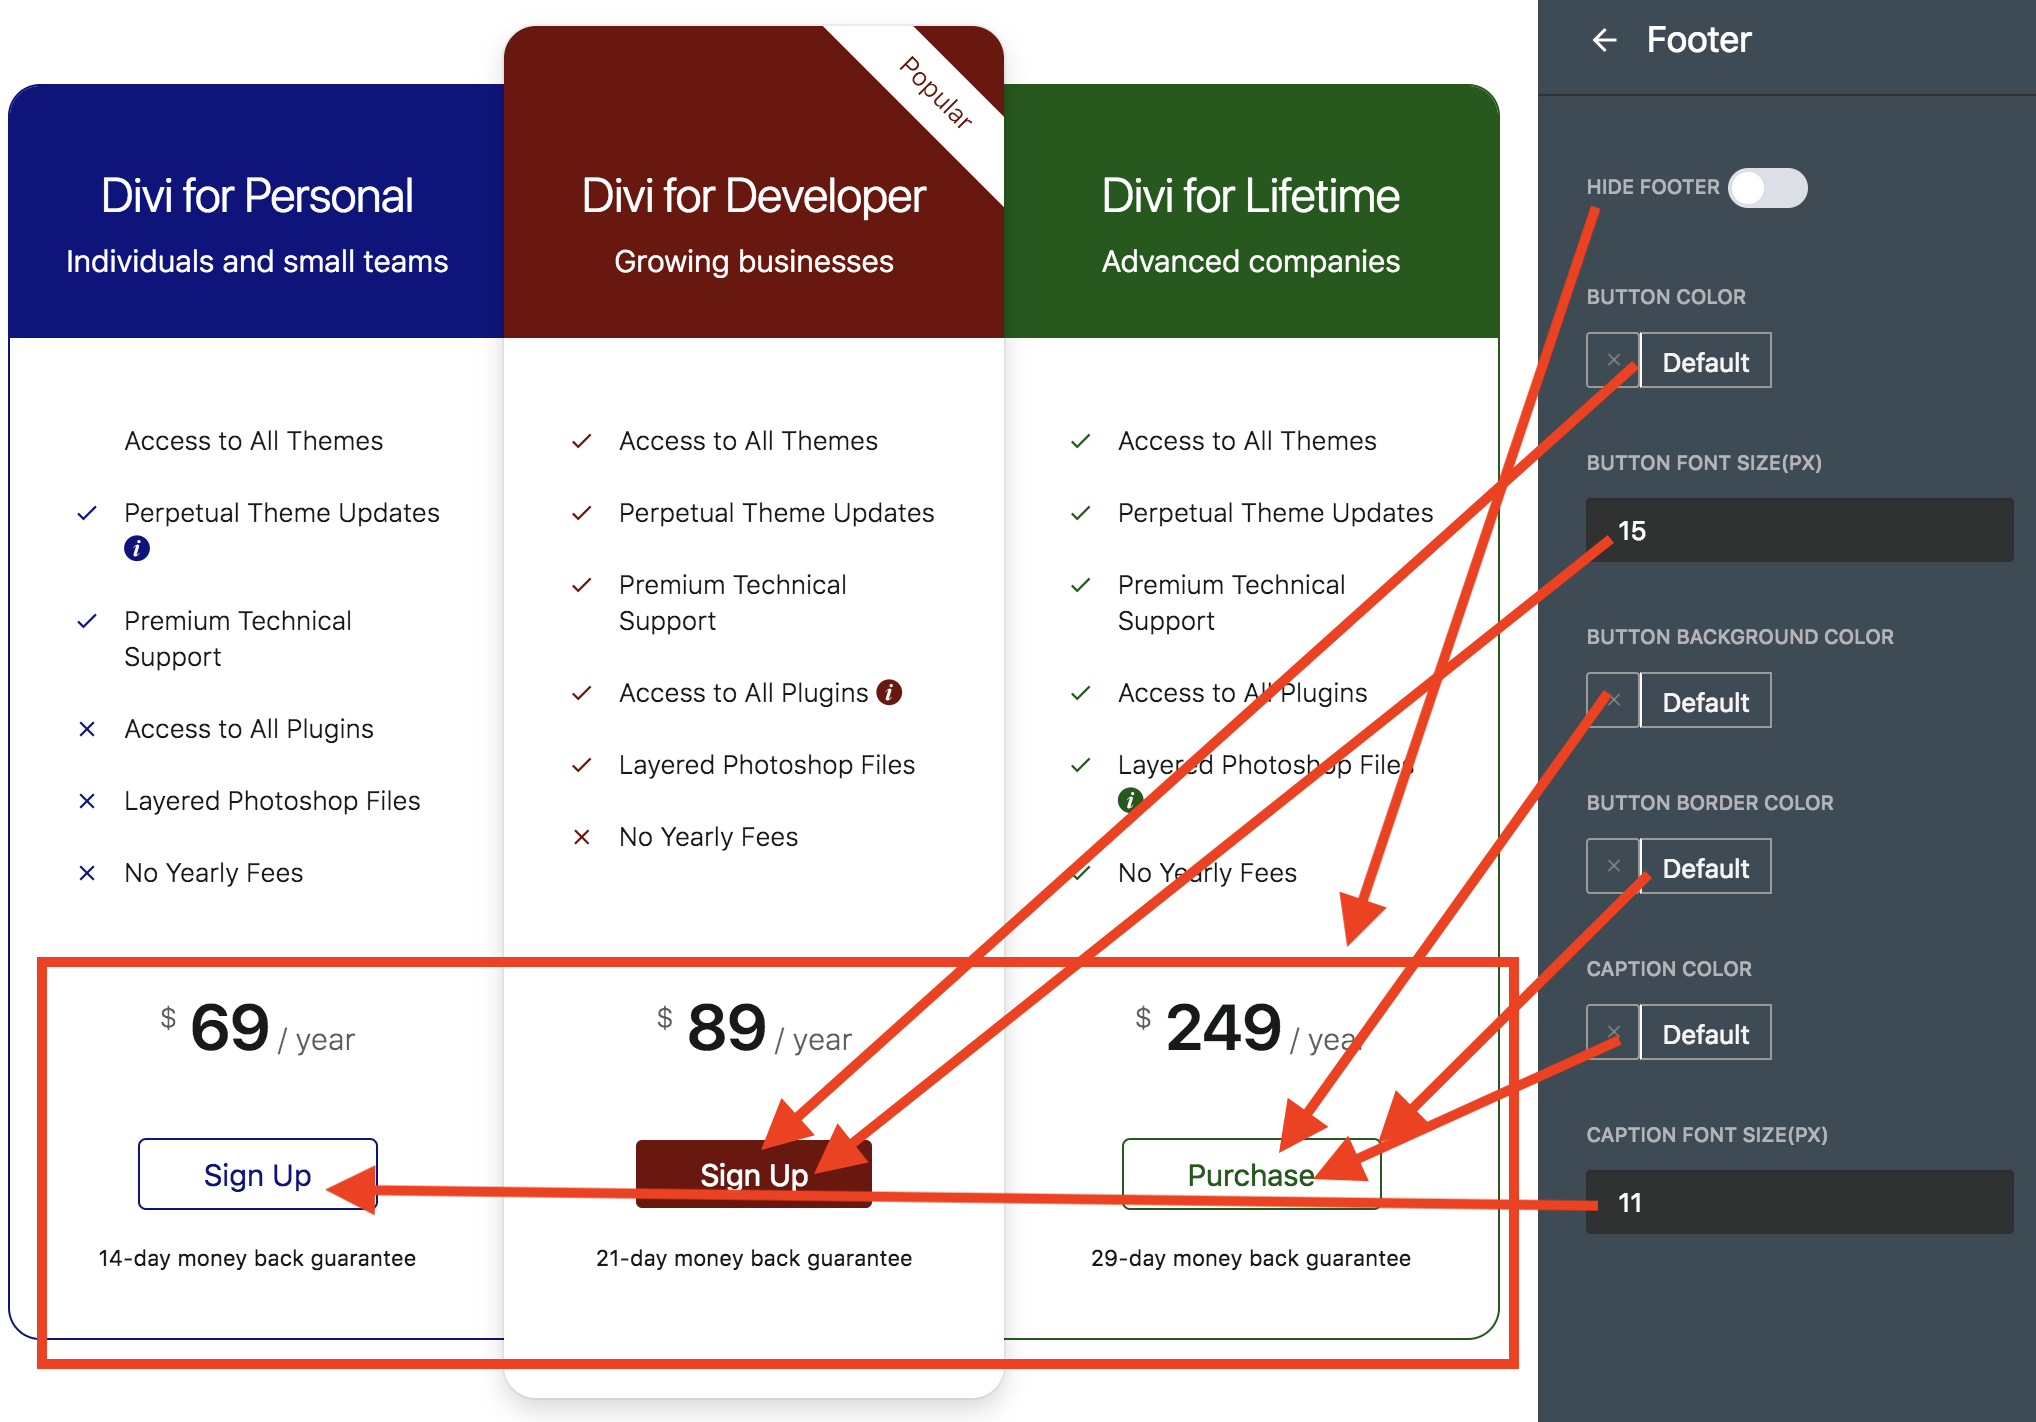
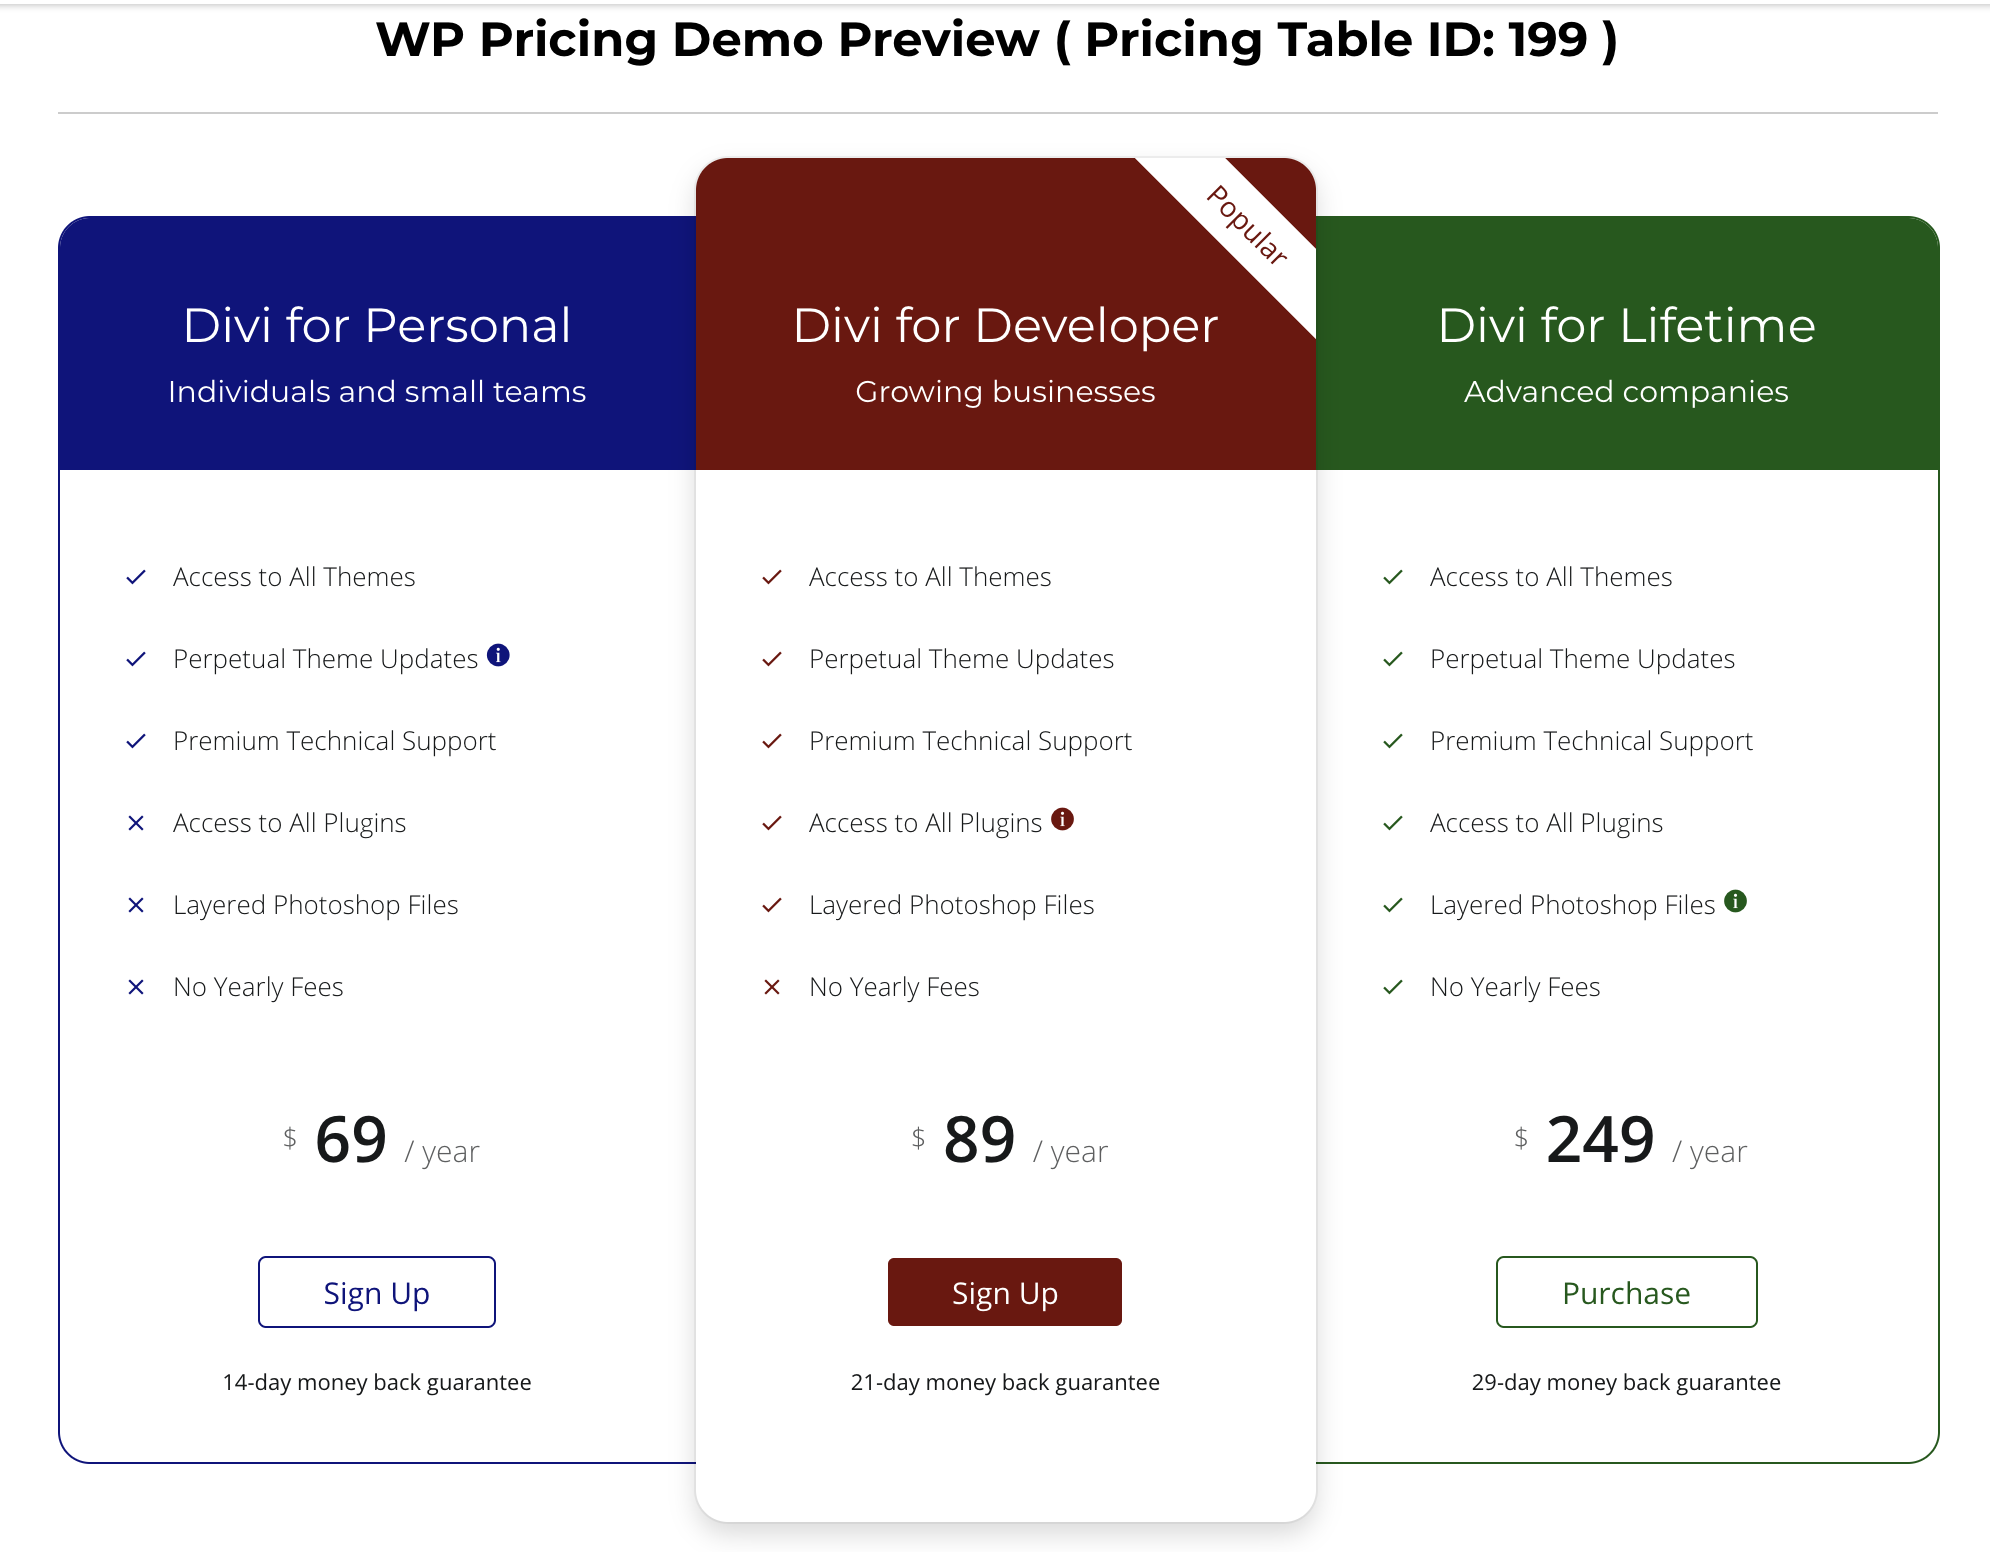
Now, have a look for an ultimate view of the output. This is the final viewpoint of the Divi pricing table.

That’s all for creating a pricing table of Divi theme. You can create such a wonderful pricing table for the Divi theme. Hopefully, this article helped you to make you understand creating a pricing table for any kind of purpose. If you learn more about the issue, please click on the link.
To download the Pricing Table Builder click here. To learn more about Divi Theme, just click here.