
How to Create Gmail Filters to Organize Your Inbox and Automate Email Cleanup
Your inbox should help you focus, not bury important messages under newsletters, receipts, updates, and promotions. With 376 billion emails sent and received daily in 2025, Gmail filters help sort email automatically, reduce manual cleanup, and keep the right mail visible when you need it.
Key Takeaways
- A Gmail filter helps you organize incoming email based on sender, keyword, subject, email address, or other search criteria.
- Around 376 billion emails were sent and received daily worldwide in 2025, so manual inbox cleanup is no longer realistic for busy users.
- Professionals spend about 28% of the workday reading and answering email, which makes filters useful for saving time and protecting focus.
- Spam made up almost 45% of global email traffic in 2025, so filters can also help separate useful mail from unwanted noise.
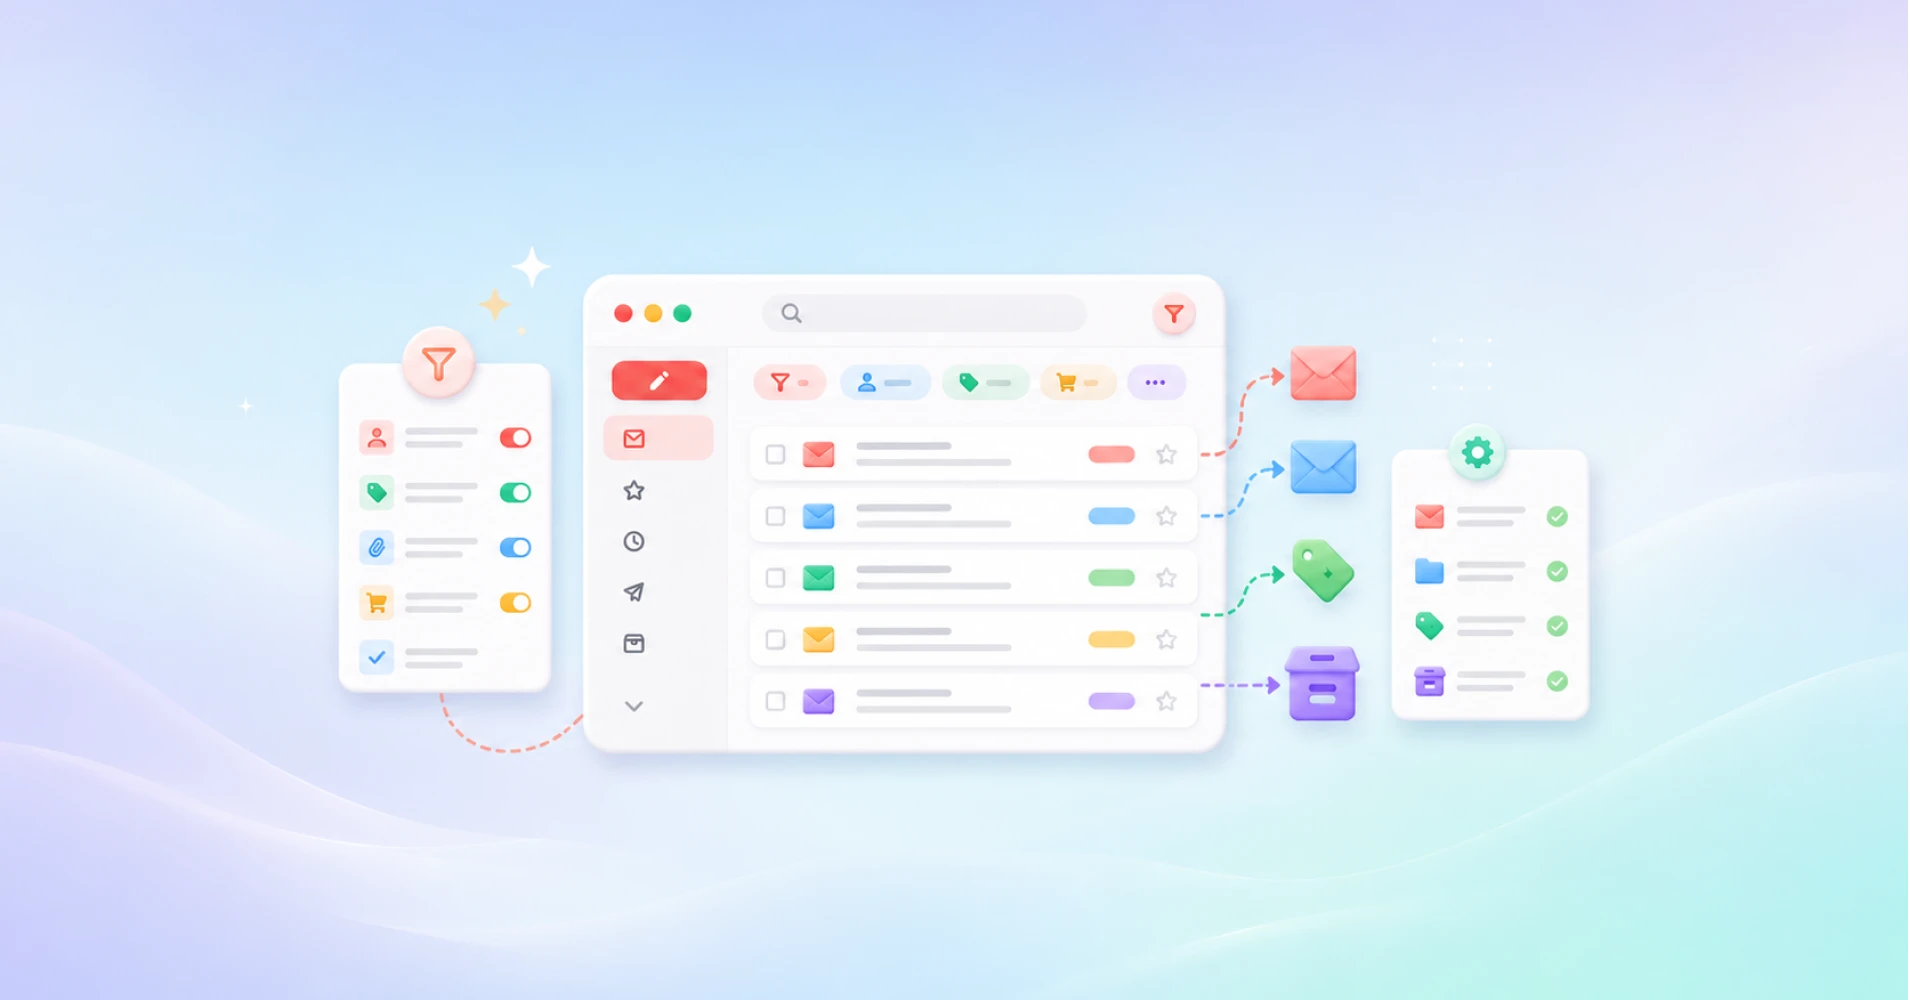
- You can use filters to automatically label, archive, delete, forward, or mark email messages as read.
- Gmail filters work best when your search criteria are specific enough to catch the right messages without affecting important mail.
- You can create a filter from the search bar or directly from an existing email message.
- Filters are useful for organizing newsletters, receipts, client emails, team updates, notifications, and low-priority mail.
- You can edit or delete filters in Gmail anytime if your workflow changes.
- Gmail also lets you import and export filters, which is helpful for backups or team inbox setups.
- A simple filter system can improve productivity and help you reclaim control of your inbox.
What Is an Email Filter and Why Should You Use One?
An email filter is a rule that tells your email service what to do with a message when it arrives. Instead of checking every email manually, you create a filter based on a sender, keyword, email address, domain, subject line, or another criterion.
For example, you can create a filter that sends invoices to a finance label, moves newsletters to a reading folder, marks client messages as important, or sends unwanted promotions to trash. The filter works quietly in the background, so your inbox stays cleaner without extra effort.
This is especially useful if you receive a lot of incoming emails every day. A good filter helps you reduce noise, protect focus, and improve productivity. You still control your mail. You simply stop doing the same sorting task again and again.
How Do Filters in Gmail Work?
A Gmail filter works by checking incoming mail against the search criteria you choose. If an email message matches the rule, Gmail automatically performs the action you selected.
The action can be simple. You can apply a label, archive the email, mark it as read, forward it to another email address, or delete it. You can also use a filter to automatically move certain messages out of the inbox and into a folder-like label.
Here is the simple logic:
- You choose the condition.
- Gmail checks incoming messages.
- If a message matches, Gmail performs the action.
- Your inbox stays more organized.
For example, if you get reports from a specific sender every morning, you can create a Gmail filter that applies a “Reports” label and marks those messages as read. That way, the mail is still available, but it does not interrupt your main inbox.
How to Create a Gmail Filter on Desktop
The easiest way to create a filter is from Gmail on the desktop. This gives you access to the full filter setup options.
Follow these steps:
- Open Gmail on your desktop.
- Go to the search bar at the top.
- Click the filter icon or drop-down icon on the right side of the search bar.
- Enter your search criteria.
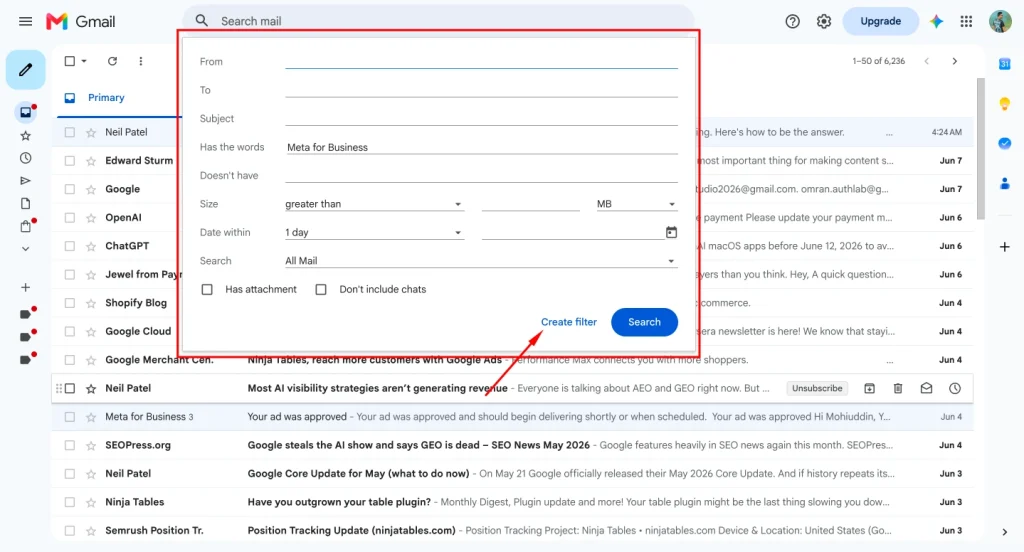
- Choose a sender, subject, keyword, or other condition.
- Click “Create filter.”
- Choose what Gmail should do with matching emails.
- Select the checkbox beside your preferred action.
- Click the create filter again to save it.
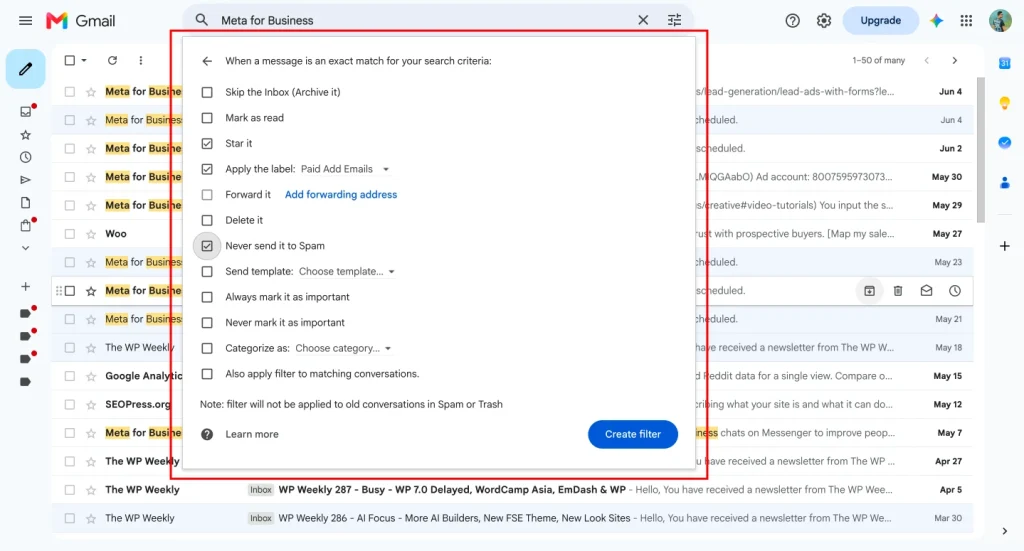
For example, let’s say you want all emails from [email protected] to go into an “Invoices” label. Add the sender in the “From” field, click create filter, choose “Apply the label,” select or create the “Invoices” label, and save the new filter.
This filter will now catch future incoming mail from that sender and organize it automatically.
How to Create a Gmail Filter from an Existing Email Message
Sometimes the easiest way to create a filter is from an existing email. This is useful when you already have the kind of message you want to filter.
Follow these steps:
- Open Gmail.
- Open the specific email you want to filter.
- Click the three-dot menu near the top of the message.
- Choose “Filter messages like this.”
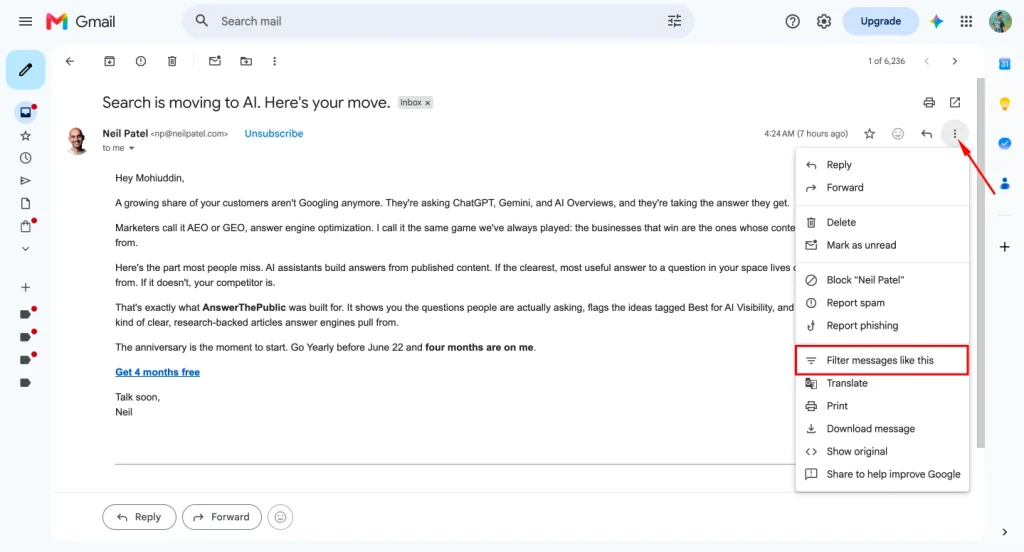
- Gmail will fill in some search criteria for you.
- Review the sender, subject, or other details.
- Click “Create filter.”
- Choose the action you want.
- Click the create filter to save it.
This method is helpful because you do not have to guess the sender’s email address or exact wording. Gmail uses the existing email message as the starting point.
For example, if you keep getting product update emails from the same sender, open one of those emails and create a filter from it. You can then apply a “Product Updates” label, archive the message, or mark it as read.
How to Use Search Criteria to Filter Emails More Accurately
A filter is only useful when the search criteria are accurate. If your filter is too broad, it may catch emails you want to keep in your main inbox. If it is too narrow, it may miss emails you want to organize.
You can filter email by:
- Sender
- Recipient
- Subject line
- Keyword
- Attachment
- Size
- Date
- Domain
You can also use a Gmail search operator for more control. For example:
from:[email protected]
This finds mail from one sender.
subject:invoice
This finds emails with “invoice” in the subject.
has:attachment
This finds emails with attachments.
from:(@company.com)
This can help filter messages from a specific company domain.
Before you create a filter, run the search first. If the search results show the emails you want, then the filter is likely ready. If the wrong emails appear, adjust your criterion before saving the rule.
How to Automatically Organize Incoming Mail with Labels and Folders
Gmail does not use folders in the same way some email service platforms do. Instead, Gmail uses labels. A label works like a folder, but one email can have multiple labels at the same time.
To automatically organize incoming mail, create filters that apply labels based on sender, keyword, or subject.
Here is a simple tutorial:
- Open Gmail on the desktop.
- Click the filter icon in the search bar.
- Add your search criteria.
- Click “Create filter.”
- Select “Apply the label.”
- Choose an existing label or create a new one.
- Decide whether to skip the inbox.
- Click create filter.
If you want the email to stay visible in your inbox, only apply the label. If you want Gmail to automatically move it away from the main inbox, choose “Skip the Inbox” along with the label.
For example, you can create filters for:
- Newsletters
- Receipts
- Client messages
- Support tickets
- Team updates
- Payment alerts
- Calendar notifications
This is one of the best ways to use filters to organize your inbox without losing important mail.
How to Edit Gmail Filters When Your Workflow Changes
Your inbox workflow will change over time. A sender may change their email address. A project may end. A newsletter may become important. In those cases, you do not always need to create a new filter. You can edit the existing one.
Here is how to edit filters in Gmail:
- Open Gmail on the desktop.
- Click the gear icon in the top-right corner.
- Click “See all settings.”

- Go to “Filters and Blocked Addresses.”
- Find the filter you want to change.
- Click edit.
- Update the search criteria.
- Click “Continue.”
- Update the action if needed.
- Save the filter.
Use this when a filter is mostly correct but needs a small change. For example, maybe your invoice filter catches old billing mail but misses messages from a new payment tool. Instead of creating a duplicate, edit the filter and add the new sender or keyword.
Editing filters keeps your setup clean. Too many similar filters can become confusing later.
How to Delete Gmail Filters You No Longer Need
Sometimes the best way to fix your inbox is to delete filters that no longer make sense. Old filters can hide important mail, send messages to the wrong label, or delete emails by mistake.
Here is how to delete filters:
- Open Gmail on the desktop.
- Click the gear icon.
- Click “See all settings.”
- Open “Filters and Blocked Addresses.”
- Find the filter you want to remove.
- Click delete.
- Confirm the action.
You should delete filters when:
- The project is finished.
- The sender is no longer relevant.
- The filter catches the wrong messages.
- The action is too aggressive.
- The same rule already exists somewhere else.
Be extra careful with filters that delete messages. A filter to automatically delete mail can be useful, but it can also create problems if the search criteria are too broad. When in doubt, archive or label the mail first instead of deleting it.
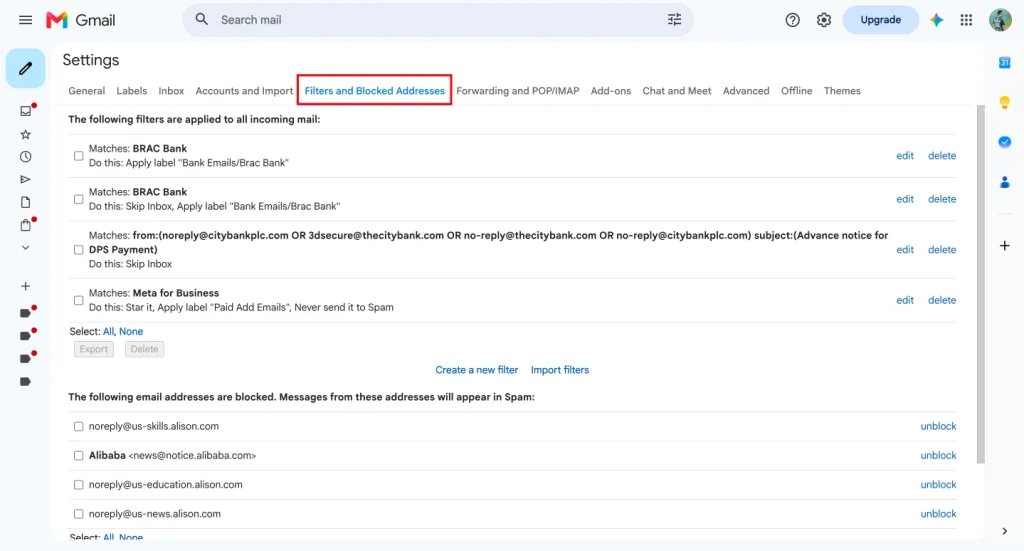
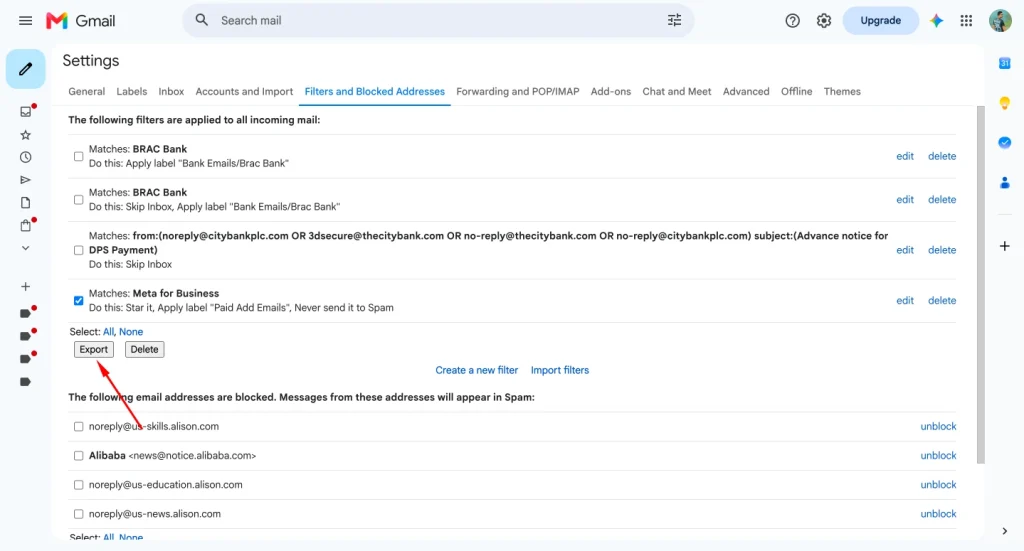
How to Import and Export Gmail Filters
Gmail allows you to import and export filters. This is useful if you want to copy rules from one email account to another or share a filter setup with a team.
To export filters:
- Open Gmail on the desktop.
- Go to Settings.
- Click “See all settings.”
- Open “Filters and Blocked Addresses.”
- Select the filters you want to export.
- Click “Export.”
- Gmail will download a filter file.
To import filters:
- Open Gmail on the desktop.
- Go to Settings.
- Click “See all settings.”
- Open “Filters and Blocked Addresses.”
- Choose “Import filters.”
- Upload the filter file.
- Review the imported filters.
- Apply filter rules carefully.

Import filters only after reviewing them. A rule that works well in one email account may not be safe for another. For example, one account may archive marketing emails, while another account may need those messages in the inbox.
Export is helpful for backup. Import is helpful for setup. But both should be used with care.
How to Use AI and Automation to Improve Inbox Productivity
AI can make email management smarter, but it should not replace a clean filter system. A filter handles sorting. AI helps with understanding, writing, summarizing, and prioritizing.
For example, you can use AI to review your inbox patterns. You may find that your distractions come from newsletters, social notifications, product alerts, or promotional mail. Once you know the pattern, you can create rules to handle those messages automatically.
An ai-powered workflow may look like this:
- Use AI to identify common email types.
- Create a filter for each common type.
- Use labels to group important mail.
- Archive low-priority messages.
- Use AI to draft a reply when needed.
- Review your filters monthly.
This setup helps you reclaim focus. AI simplifies thinking and writing. Filters automate sorting. Together, they make your inbox feel less chaotic.
Gmail vs Yahoo vs Microsoft: How Do Email Filters Compare?
Gmail, Yahoo, and Microsoft all let users automate inbox organization, but the names and interfaces are different.
In Gmail, you use filters. You can create a Gmail filter from the search bar, an existing message, or the settings area. Gmail’s filters can label, archive, forward, delete, or mark messages automatically.
In Yahoo Mail, filters can move incoming messages into folders or trash. Yahoo also considers filter order, so if more than one filter matches a message, the order may affect what happens.
In Microsoft Outlook, similar automation is usually handled through rules. Microsoft rules can move mail, flag messages, delete messages, or redirect them depending on the conditions you configure.
The concept is the same everywhere. Choose a condition, choose an action, and let your email service automate repetitive inbox work.
Final Email Filter Tips to Organize Your Inbox Faster
Do not create too many filters at once. Start with the biggest inbox problems first. Usually, those are newsletters, receipts, client emails, team updates, spam-like promotions, and system notifications.
Use labels before delete actions. It is safer to organize mail first and delete later. If you are unsure whether an email is important, archive it instead of sending it to trash.
Also, check your filters every month or two. If your inbox feels weird, missing messages, wrong labels, too many archived emails, the problem may be an old filter.
Summary: Important Things to Remember
- A Gmail filter helps you organize email automatically.
- Use clear search criteria like sender, keyword, subject, email address, or domain.
- Create Gmail filters from the search bar when you want more control.
- Create a Gmail filter from an existing email message when you want a faster setup.
- Use labels to organize your inbox without hiding important mail.
- Be careful with delete filters because they can remove useful messages.
- Edit filters in Gmail when your workflow changes.
- Delete filters that are outdated, duplicated, or confusing.
- Import filters and export filters only after reviewing the rules.
- AI can improve productivity, but filters are still the foundation of inbox automation.
- Gmail, Yahoo, and Microsoft all support email automation, even if they use different names.
- The best filter system is simple, safe, and easy to maintain.

WordPress, automation, eCommerce and growth marketing specialist, a WordPress Core Contributor and Media Corps member blending storytelling with technology to craft strategies in SEO, email marketing, and beyond.
-

How to Build an Affiliate Program for Retailers: WordPress Guide
Build an affiliate program for retailers step by step. Margin-safe -

Complete Guide on How to Build A Church Website with WordPress
Learn how to build a church website with WordPress, from -

Kanban vs Scrum vs Agile vs Waterfall: What’s the Difference?
Get a clear, no-jargon breakdown of Kanban vs Scrum vs
Leave a Reply
You must be logged in to post a comment.