

We will never spam you. We will only send you product updates and tips.
If you care about making your WordPress data tables more user-friendly and dynamic, adding multimedia is a great way to spice things up! You can use images in your columns or rows to visualize products, services or add images as CTA buttons linked-to URLs.
Your visitors and customers can make an informed decision using data table visualizations and action images. It reduces the bounce rate from your page and increases conversion.
Ninja Tables is a unique WordPress table plugin that comes with copious multimedia functionality. This post will cover how you can add media to WordPress tables using Ninja Tables.
Why use Ninja Tables multimedia feature
Adding media to a table in Ninja Tables is simple and fast. You can easily add images to your table columns and rows, and show image buttons.
Let’s say an electric product seller wants to showcase his products online in Ninja Tables. To make things simple for customers, he can add tabular displays for the product image, name, price, and the “Buy Now” button.
The “Buy Now” can be an image button with a “Link to URL”. Users can add URLs to “Buy Now” images using them as CTA. Here’s a screenshot of our example table.
Before getting into the details of adding media to WordPress tables, here’s a video tutorial for Ninja Tables.
How to add media to WordPress tables: Ninja Tables
You can add images into your WordPress table’s columns and rows using Ninja Tables plugin. You can also add media to the table description as well.
Add Media to Table Description
When you create a table using Ninja Tables the first step is to add table title and table description (optional).
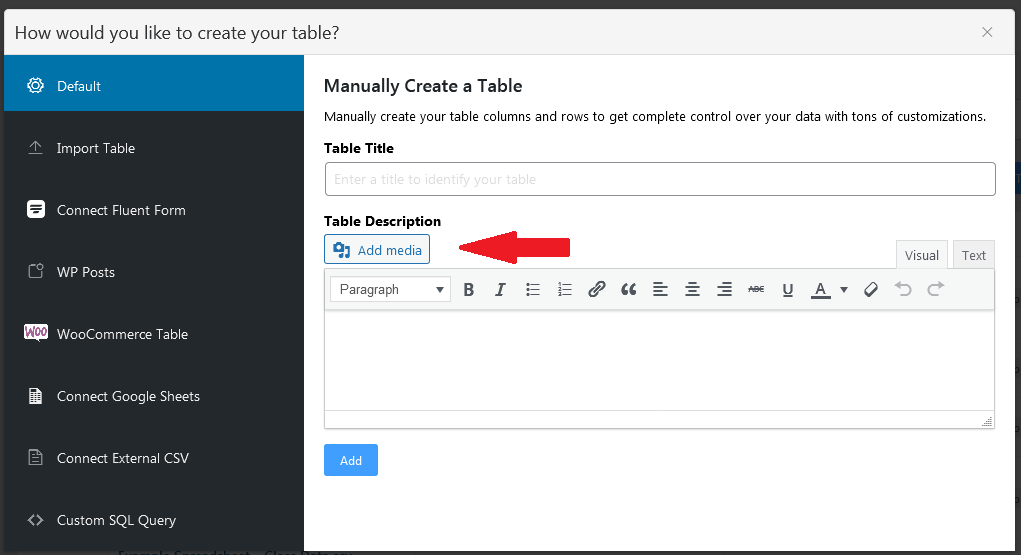
Click “Add Media” and upload files from your computer or media library.
Add Media to Table Columns and Rows
Now you want to add images to your columns and rows. Here is a sample table (pre-made) for our example.
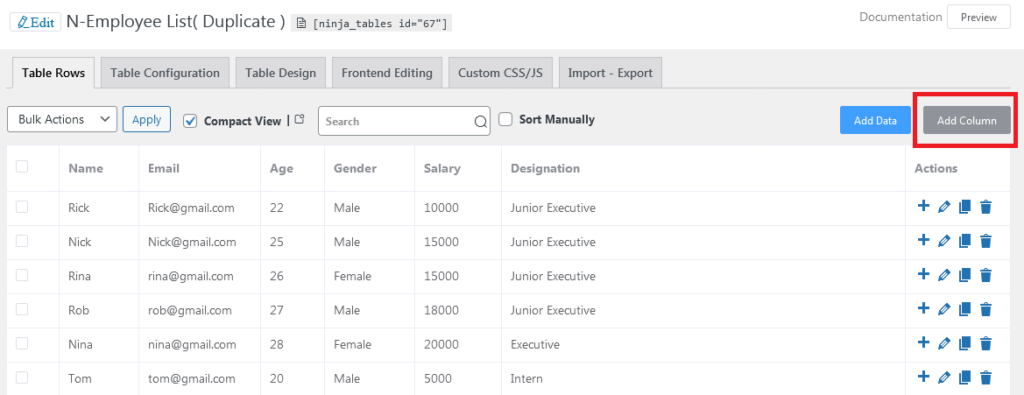
We’re happy with the table so we will just add a new column now for images. Click the “Add Column” button on the right upper corner.
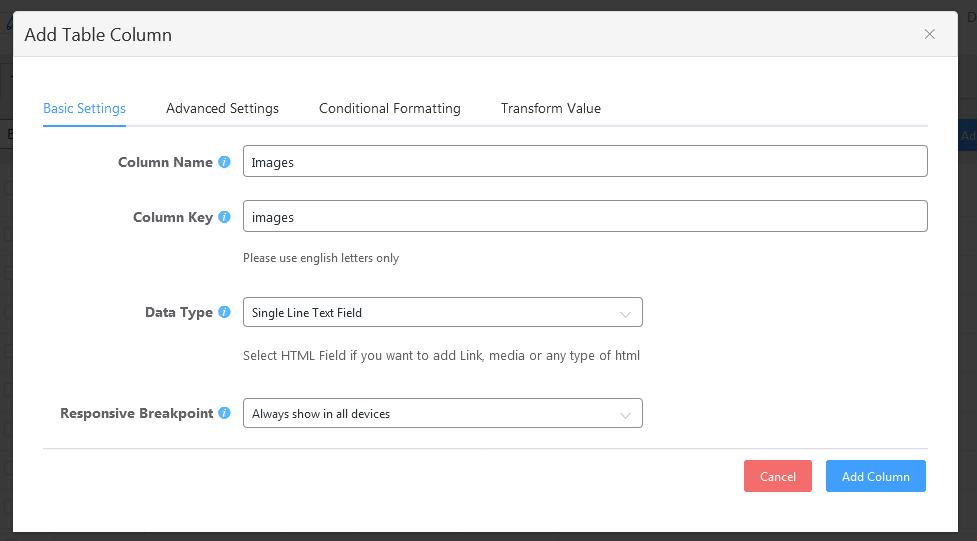
We’ll name the column “images” for simple use and from “Data Type” select “Image/File/Lightbox”.
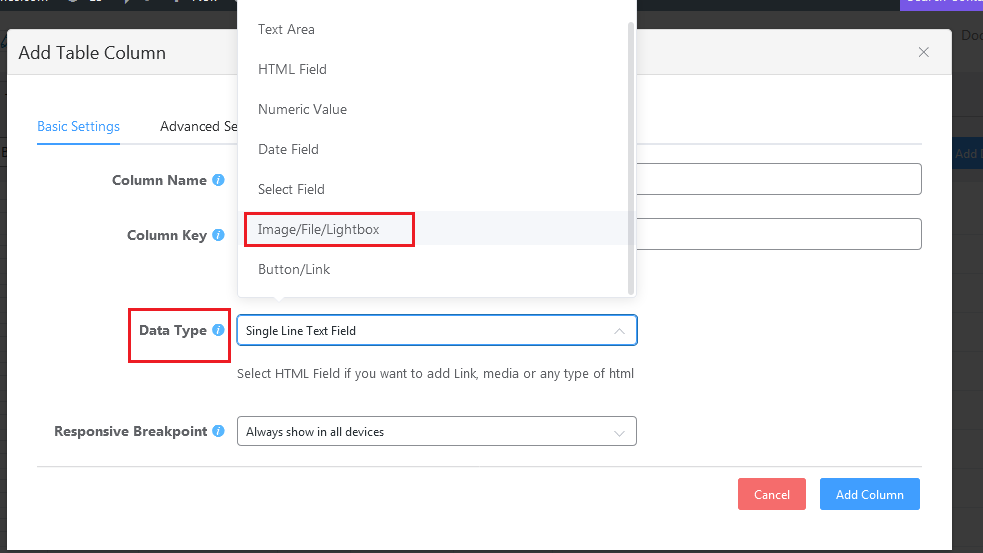
After this, you’ll see new options under it-
- Image Only
- Image Lightbox
- Iframe Lightbox
- Link to URL
Each option has its own function.
- Image Only: Only image files can be added to this option
- Image Lightbox: When an image is uploaded, it appears in a pop-up window when clicked
- Iframe Lightbox: Add the image along with the iframe URL here
- Link to URL: This option allows you to link the uploaded image to a URL
See our documentation for a detailed understanding.
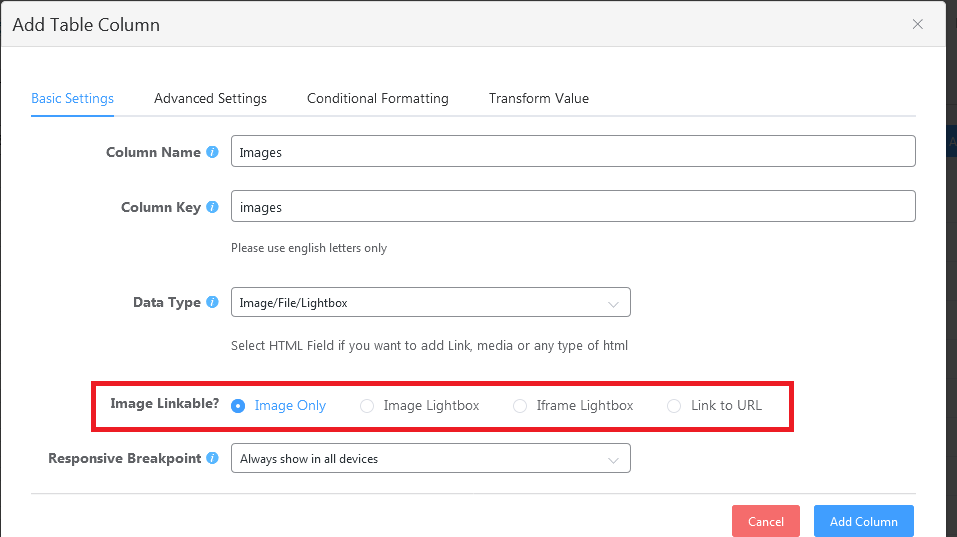
You can choose what you want. We’ll select “Image only” for now.
After clicking “Add Column”, you’ll see a new column has been added to the table.
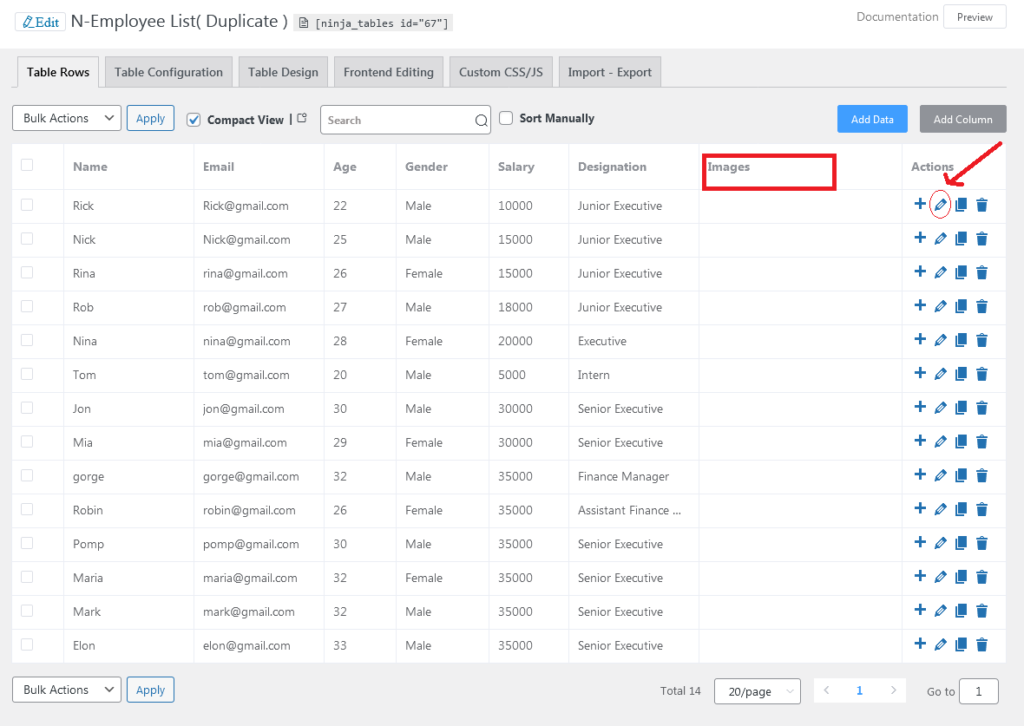
Now click on the pencil icon from the left.
A new window will open. You can upload images for this row. Click upload image and upload your desired image.
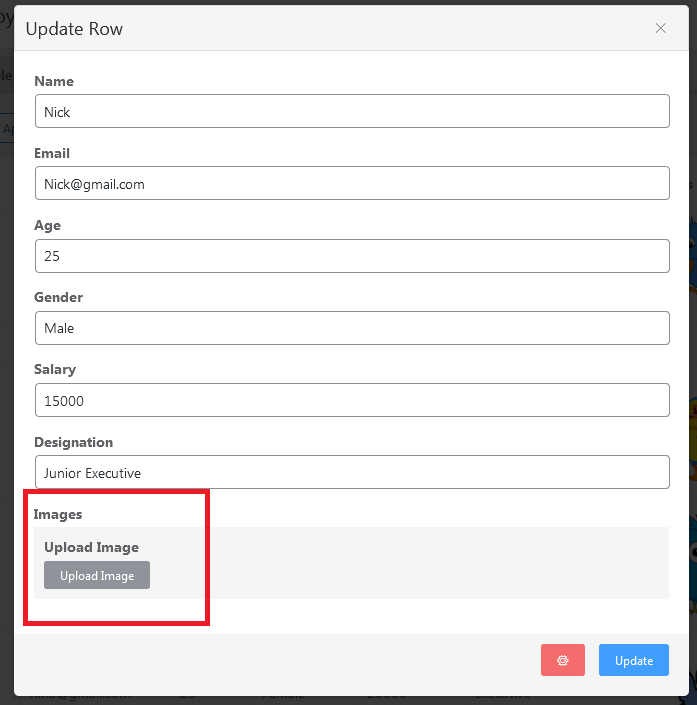
Repeat this process for other rows. After uploading all images, click preview.
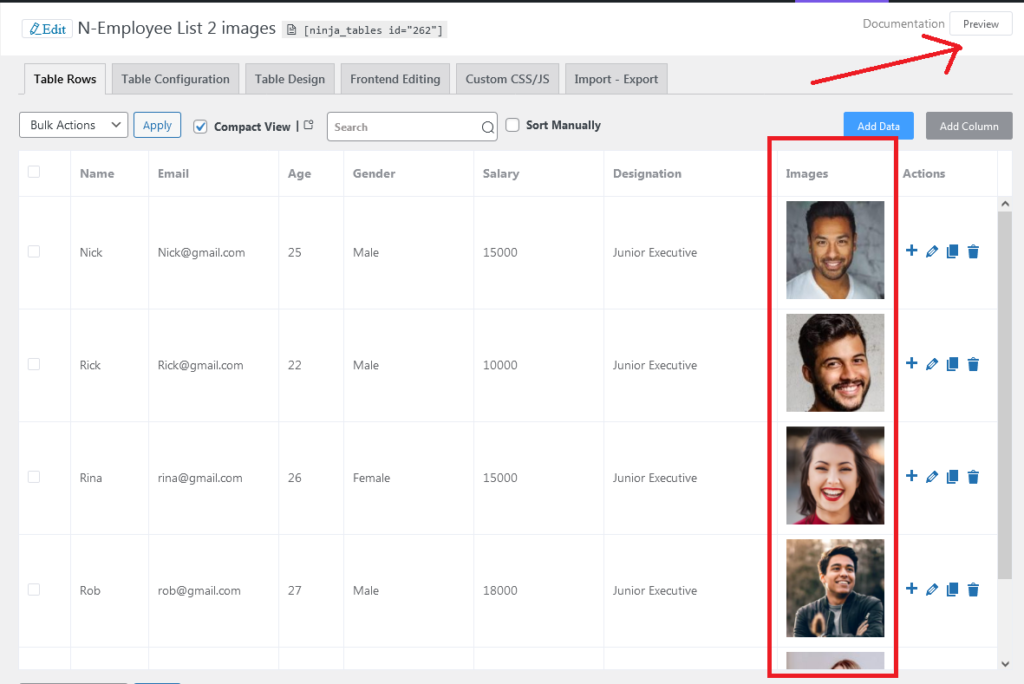
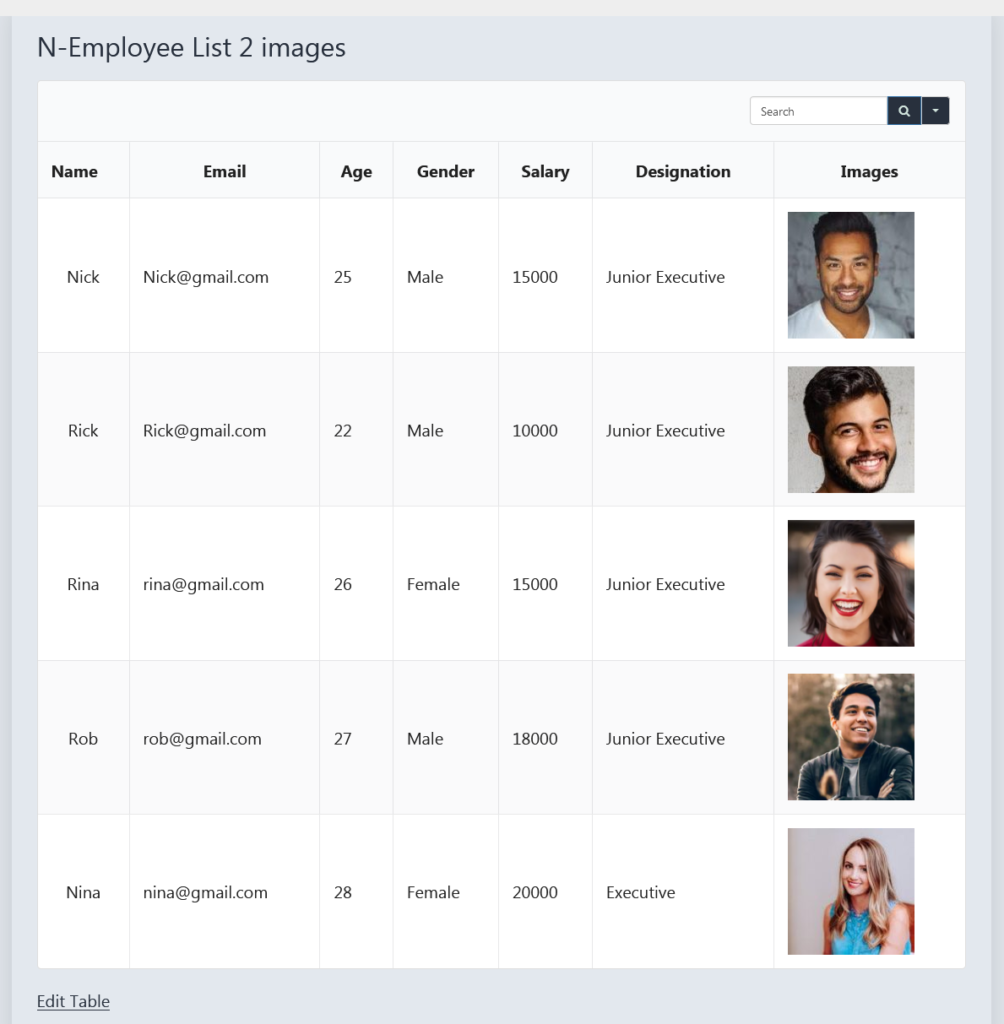
And there you will find all the newly added images in your table!
Finish-Up
Ninja Tables comes with various other useful features like this PRO feature. You can add media to WordPress tables using this simple drag and drop function.
If you run a WooCommerce store or a product review website, Ninja Tables is highly recommended. Using this table plugin, you can create WooCommerce Product Tables with product images and videos and organize the store products in tabular format.
Having interactive tables allows visitors to easily view, filter, and sort your data according to their preferences, resulting in a better user experience in your website. Ninja Tables makes your WordPress tables more user-friendly by adding media and making your tables more aesthetically pleasing.

Related Posts
Comments
-
Only been using Ninja for a day, but so far, so good! At the moment I am trying to add a Woo product attribute inside the same cell as the product image. Is that even possible?
-
Hi Sean. You can add product attribute inside the image cell. For this, you need to use Transform Value option.
1. Add a new column for attributes. In the Dynamic Column Data Settings, add your preferred field type and value
2. Add another column and move to Transform ValueScreenshot: https://wpmanageninja.com/wp-content/uploads/2024/08/attributes-with-image.webp
Hide the columns you don’t need to show and customize further.
Please try this and if you encounter any problem, contact our support team or reach out to: [email protected]
-






Leave a Reply
You must be logged in to post a comment.