
How to Start a Nonprofit Organization and Accept Donations Online

Starting a nonprofit is not just about having a good cause. It is about turning that cause into a trusted organization people can support. In the U.S. alone, there are more than 1.93 million registered nonprofits, and charitable giving reached $592.50 billion in 2024. That means people are still willing to give, but they need clarity, trust, and a simple way to donate.
This guide walks you through how to start a nonprofit step by step. You will learn how to define your mission, form your organization, handle the basic legal steps, build a website, add a donation form, and launch your first campaign.
If you are planning to build your nonprofit website with WordPress, you can also use a donation plugin like Paymattic to collect one-time and recurring donations without creating a custom donation system from scratch.
TL;DR: How to Start a Nonprofit
To start a nonprofit, follow these steps:
- Choose a cause and validate the need
- Write your mission statement
- Choose a nonprofit name
- Create a basic nonprofit plan
- Build your founding board
- Write your bylaws
- Incorporate your nonprofit
- Get an EIN
- Apply for tax-exempt status
- Register for fundraising requirements
- Build your nonprofit website
- Add a donation form with Paymattic
- Launch your first fundraising campaign
- Send donation receipts and thank-you messages
- Stay compliant after launch
Now let’s go through each step.
Step 1: Choose a Cause and Validate the Need
Start with the problem you want to solve.
A nonprofit should not exist only because the idea sounds meaningful. It should solve a real problem for a real group of people.
Before you file anything, ask yourself:
- Who are you trying to help?
- What exact problem are they facing?
- Is anyone already solving this problem?
- What gap will your nonprofit fill?
- Can you partner with an existing organization first?
- Can you test the idea with a small project?
This step helps you avoid building an organization around a vague idea. It also helps you explain your purpose clearly to donors, volunteers, board members, and partners.
The National Council of Nonprofits recommends identifying the clear need, startup costs, business plan, and other key factors before starting a new nonprofit.
Step 2: Write a Clear Mission Statement
Your mission statement explains what your nonprofit does, who it serves, and why it exists.
Use this simple formula:
We help [audience] achieve [outcome] through [program or service].
Example:
We help low-income students access digital learning through free workshops, mentorship, and device donation programs.
A strong mission statement should be short, specific, and easy to repeat. If people cannot understand your mission in one sentence, donors may struggle to understand why they should support you.
Do not try to sound too big in the beginning. Start with a focused mission. You can expand your programs later.
Step 3: Choose a Name for Your Nonprofit
Your nonprofit name should be simple, memorable, and connected to your cause.
Before choosing the name, check:
- State business name availability
- Domain name availability
- Social media handles
- Similar nonprofit names
- Trademark conflicts, if needed
Also think about the future. A very narrow name may limit your growth later.
For example, Books for Nairobi Kids is clear, but it may feel limited if you later want to support children in other cities. A name like Learning Access Foundation gives you more room to grow.
Your name should make people feel the mission, but it should also work well on a website, donation page, email campaign, and social media profile.
Step 4: Create a Basic Nonprofit Plan
Before you start the legal process, create a simple plan.
This does not need to be a 50-page business document. A 3 to 5-page plan is enough for the beginning.
Your nonprofit plan should include:
- Mission
- Target audience
- Main problem
- Programs or services
- Startup budget
- Funding sources
- Founding team
- Website plan
- Donation strategy
- First 90-day action plan
This plan gives your nonprofit direction. It also helps you talk confidently with early supporters.
For example, instead of saying, “We want to help children,” you can say, “In the first 90 days, we want to raise $5,000 to provide school supplies for 300 students.”
That is clearer, stronger, and easier to support.
Step 5: Build Your Founding Board
A nonprofit needs responsible people behind it.
Your founding board helps with decision-making, governance, fundraising, financial oversight, and accountability. These people should care about the mission and have the time to support the organization.
Look for people with skills in:
- Finance
- Legal support
- Fundraising
- Marketing
- Community work
- Operations
- Program management
- Donor relationships
Do not choose board members only because they are friends. Choose people who can contribute, ask hard questions, and protect the organization’s purpose.
A strong board also builds trust. Donors want to know that your nonprofit is not just one passionate person with an idea. They want to see structure.
Step 6: Write Your Nonprofit Bylaws
Bylaws are the internal rules of your nonprofit.
They explain how your organization will make decisions, manage leadership, hold meetings, handle conflicts, and operate responsibly.
Your bylaws usually include:
- Board roles
- Officer roles
- Voting rules
- Meeting rules
- Conflict of interest policy
- Financial responsibilities
- How board members are added
- How board members are removed
- How major decisions are approved
Think of bylaws as your nonprofit’s operating manual.
You may not need to use them every day, but when confusion happens, bylaws keep everyone aligned.
Step 7: Incorporate Your Nonprofit
Now it is time to make your nonprofit official.
In the U.S., this usually means filing articles of incorporation at the state level. The process and requirements vary by state.
Your incorporation document usually includes:
- Nonprofit name
- Purpose
- Registered address
- Registered agent
- Founding directors
- Required legal language
- Dissolution clause
For the IRS to recognize an organization’s federal tax exemption, the organization must have an appropriate legal form, such as a trust, corporation, or association.
This is one of the steps where professional advice can help. Nonprofit rules vary by country, state, and organization type.
Note: This guide is for general information only. Always check your local requirements or consult a qualified legal or tax professional before filing official documents.
Step 8: Get an EIN
An EIN means Employer Identification Number.
Your nonprofit usually needs an EIN to open a bank account, apply for tax-exempt status, file returns, and manage official financial activities.
The IRS says every organization must have an EIN, even if it does not have employees. The IRS also notes that you should not apply for an EIN until your organization is legally formed.
You can apply for an EIN directly through the IRS.
Once you receive it, save the confirmation carefully. You will need it for your bank account, tax-exempt application, donation system, and future filings.
Step 9: Apply for Tax-Exempt Status
If you want your nonprofit to receive federal tax-exempt recognition in the U.S., you will usually need to apply with the IRS.
For many charitable nonprofits, this means applying for 501(c)(3) status.
The IRS says organizations must electronically file Form 1023 to apply for recognition of exemption under section 501(c)(3). Some smaller organizations may be eligible to use Form 1023-EZ, which is the streamlined version.
As of the latest IRS update, the user fee is $600 for Form 1023 and $275 for Form 1023-EZ. These fees are paid through Pay.gov and may change, so always check the IRS page before filing.
Your application may ask for:
- Mission details
- Program descriptions
- Financial information
- Governance documents
- Bylaws
- Conflict of interest policy
- Compensation details
- Fundraising plans
Do not rush this step. A weak application can delay the process.
Step 10: Register for Fundraising Requirements
Before asking for donations publicly, check whether you need charitable solicitation registration.
This matters especially if you plan to collect donations through your website, email campaigns, social media, or public fundraising campaigns.
The National Council of Nonprofits says most nonprofits that solicit donations are likely required to register for fundraising activities in one or more states. It also notes that 40 states require charitable nonprofits to register before soliciting donations from residents.
Check requirements for:
- Your state
- States where you ask for donations
- Online fundraising
- Email fundraising
- Paid fundraising help
- Donation receipts
- Annual fundraising renewals
This step protects your organization and builds donor trust.
Step 11: Build Your Nonprofit Website
Once your basic structure is ready, build your nonprofit website.
Your website should clearly answer six questions:
- Who are you?
- What do you do?
- Who do you help?
- Why should people trust you?
- How can people donate?
- How can people get involved?
At minimum, your nonprofit website should include:
- Homepage
- About page
- Mission page
- Programs page
- Donation page
- Volunteer page
- Contact page
- Blog or updates page
- Privacy policy page
WordPress is a strong choice for many nonprofit websites because it is flexible, affordable, and easy to manage. As of May 2026, W3Techs reports that WordPress is used by 41.9% of all websites and 59.5% of websites with a known CMS.
That means you get access to a large ecosystem of themes, plugins, developers, tutorials, and integrations.
For a nonprofit, that flexibility matters. You can start with a simple website and later add donation forms, volunteer forms, email marketing, event registration, donor updates, and campaign pages.
Step 12: Add a Donation Form with Paymattic
After your website is ready, add a donation system.
This is where many new nonprofits get stuck. They build the website, write the mission, publish a few pages, and then make the donation process harder than it needs to be.
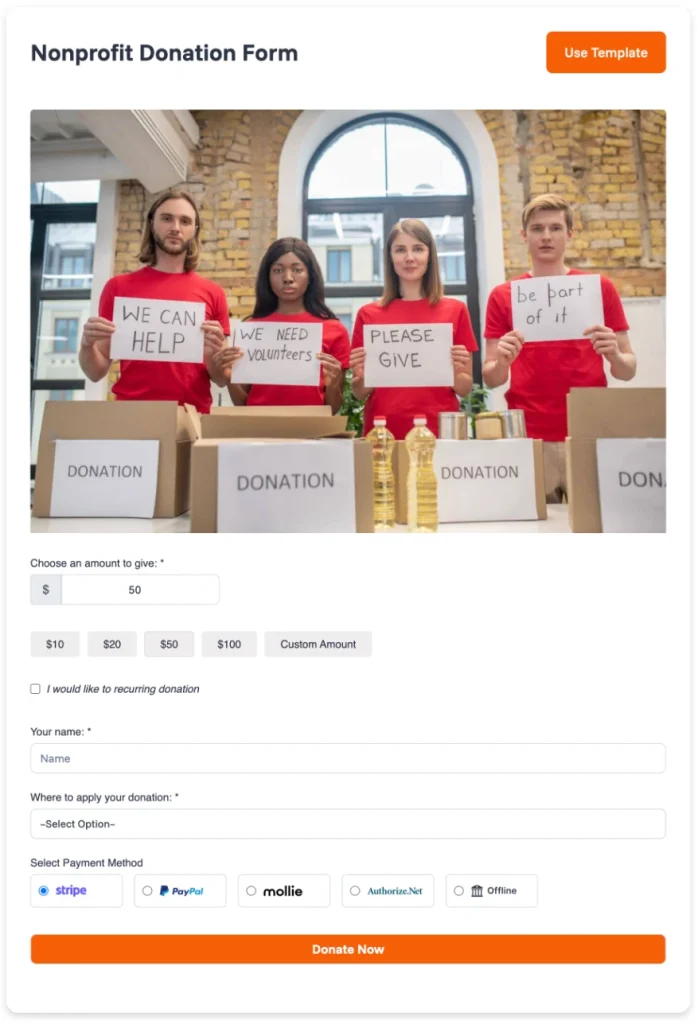
A good donation form should be simple, secure, and easy to complete.
If your nonprofit website runs on WordPress, Paymattic can help you accept donations without building a custom donation system from scratch.
Paymattic supports donation-focused features like donation progress bars, donation goals, 70+ pre-built donation templates, custom donations, recurring and one-time donations, donor profiles, and user dashboards.
That makes it useful for new nonprofits that want to launch quickly and keep the giving process simple.
How to Add a Donation Form with Paymattic
Follow these steps:
- Go to your WordPress dashboard
- Click Plugins
- Click Add New
- Search for Paymattic
- Install and activate the plugin
- Create a new donation form
- Choose a donation template or start from scratch
- Add suggested donation amounts
- Add a custom donation amount field
- Enable recurring donations if needed
- Connect your payment gateway
- Add the form to your donation page
- Test the full donation process
Do not publish the form without testing it first.
Make a small test donation. Check the payment flow, confirmation message, email notification, donor information, and mobile experience.
What Your Donation Form Should Include
A strong nonprofit donation form should include:
- Suggested donation amounts
- Custom donation amount field
- One-time donation option
- Recurring donation option
- Donor name
- Donor email
- Payment method
- Short campaign message
- Clear donation button
- Thank-you message
- Confirmation email
Keep the form short. Every extra field can create friction.
Your donor is already willing to support the cause. Do not slow them down with a long, confusing form.
Step 13: Create a Donation Page
Your donation page should not be just a form.
It should explain why the donation matters.
A good donation page includes:
- A clear headline
- A short mission statement
- The problem you are solving
- How the donation will help
- Suggested donation amounts
- One-time and recurring options
- Trust signals
- Donation form
- Thank-you message
Here is a simple donation page structure:
Headline: Help 300 Students Get School Supplies This Month
Short story: Many students in our community start school without basic supplies. Your donation helps provide notebooks, pens, bags, and learning materials.
Impact examples:
- $10 provides supplies for 1 student
- $50 supports 5 students
- $100 supports 10 students
Donation form: Add your Paymattic form here.
This structure works because it connects the donation to a visible outcome. People do not only give to organizations. They give to outcomes they can understand.
Step 14: Launch Your First Fundraising Campaign
Now launch your first campaign.
Start with one clear goal. Do not try to raise money for everything at once.
Example:
Help us raise $5,000 to provide school supplies for 300 students.
Your campaign should include:
- A clear goal
- A campaign deadline
- A simple story
- A donation page
- Social media posts
- Email updates
- A thank-you email
- A final impact update
This is where donation goals and progress bars can help. When donors see your campaign progress, they understand how close you are to the goal.
Paymattic can support this part by helping you show donation goals and progress on your WordPress donation forms.
That small visual cue can make the campaign feel more active and transparent.
Step 15: Send Donation Receipts and Thank-You Messages
Do not stop after receiving the donation.
The first donation is only the beginning of the donor relationship.
Send a thank-you message immediately. Then follow up later with a campaign update or impact story.
Your donor follow-up flow can include:
- Donation confirmation
- Thank-you email
- Campaign progress update
- Final impact report
- Future campaign invitation
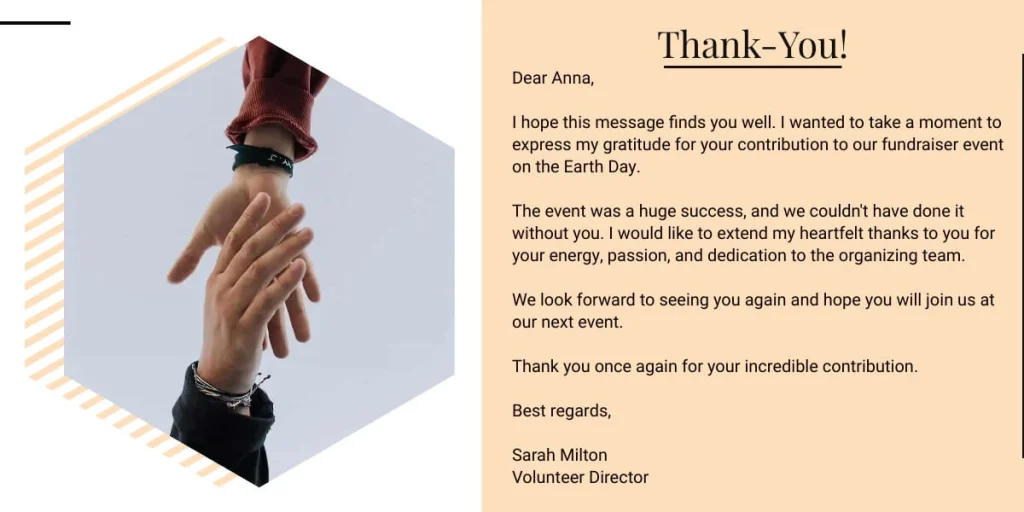
Keep the thank-you message personal and warm.
Example:
Thank you for supporting our school supply campaign. Your donation helps students start the school year with the tools they need. We will send you an update once the campaign is complete.
Donors want to know that their gift mattered. Show them.
Step 16: Create a Simple Content Plan
Your nonprofit should not stay silent after launch.
Use your website, email list, and social media pages to tell people what is happening.
Your content can include:
- Founder story
- Beneficiary stories
- Campaign updates
- Volunteer highlights
- Donor thank-you posts
- Behind-the-scenes updates
- Monthly impact reports
- Educational posts about your cause
You do not need to publish every day. Start with one useful update per week.
For example:
- Week 1: Why we started this nonprofit
- Week 2: The problem we are solving
- Week 3: Our first campaign goal
- Week 4: Progress update and donor thank-you
This builds trust slowly. And trust is everything in nonprofit fundraising.
Step 17: Set Up Basic Donor Management
As donations come in, you need to track donor information.
At the beginning, a spreadsheet may work. But as your nonprofit grows, you need a cleaner system.
Track:
- Donor name
- Email address
- Donation amount
- Donation date
- Campaign name
- One-time or recurring status
- Receipt status
- Follow-up status
This helps you understand who supports your mission and how to keep them engaged.
Do not treat donors like transaction IDs. Treat them like people who chose to believe in your work.
Step 18: Stay Compliant After Launch
Starting a nonprofit is only the beginning.
After launch, you need to maintain records, file required forms, keep board meeting minutes, and follow fundraising rules.
Small tax-exempt organizations may be eligible to file Form 990-N, also called the e-Postcard, if their annual gross receipts are normally $50,000 or less. The IRS says tax-exempt organizations generally have an annual reporting requirement, though exceptions exist.
Your compliance checklist may include:
- Annual IRS filing
- State annual report
- Fundraising registration renewal
- Board meeting minutes
- Financial records
- Donation records
- Conflict of interest updates
- Website privacy updates
- Payment records
- Donor communication records
Create a compliance calendar. Missing filings can create serious problems later.
Common Mistakes to Avoid When Starting a Nonprofit
Starting a nonprofit is exciting, but small mistakes can create big problems.
Avoid these common mistakes:
Starting Without Validating the Need: Do not build an organization before understanding the problem. Talk to the community first. Study existing organizations. Find the real gap. Then build around that gap.
Choosing the Wrong Board Members: A board should not be only symbolic. Choose people who can guide, support, question, and protect the organization.
Ignoring Fundraising Rules: Online fundraising can still trigger state-level requirements. Before collecting donations publicly, check the rules that apply to your location and donor outreach.
Making the Donation Process Too Complicated: A donor should not have to search for the donation button or complete a long form. Keep your donation page simple. Use clear copy, suggested amounts, recurring options, and a smooth payment process.
Forgetting Donor Follow-Up: A thank-you email is not enough. Send updates. Share impact. Tell donors what happened because they gave.
Mixing Personal and Nonprofit Money: Keep nonprofit money separate. Open a nonprofit bank account and track every donation, expense, receipt, and campaign cost.
Nonprofit Website Launch Checklist
Before launching your nonprofit website, check these items:
If your website is built with WordPress, Paymattic can help you handle the donation form, campaign goal, recurring donation option, and donor information without custom development.
Nonprofit Startup Checklist
Use this checklist before launch:
Do not wait for everything to feel perfect. Build the foundation properly, then improve as you grow.
FAQs About Starting a Nonprofit
Can I start a nonprofit by myself?
You can start the idea by yourself, but a nonprofit usually needs a board, governance structure, and legal setup to operate properly. The exact requirements depend on your location and organization type.
Do I need a website for my nonprofit?
Yes. A website helps people understand your mission, trust your work, contact your team, volunteer, and donate online.
Can a nonprofit accept online donations?
Yes. A nonprofit can accept online donations through its website using donation forms, payment gateways, and donation plugins.
Is Paymattic good for nonprofit donations?
Paymattic is a practical option for WordPress-based nonprofits that want to create donation forms, collect one-time or recurring donations, set donation goals, and manage donor activity without custom development.
Can nonprofits collect recurring donations?
Yes. Recurring donations are useful because they give nonprofits more predictable monthly support. This helps with planning programs, managing budgets, and building long-term donor relationships.
What is the first step to starting a nonprofit?
The first step is to validate the need and define your mission. Legal setup should come after you clearly understand the problem, audience, and purpose.
How much does it cost to start a nonprofit?
The cost depends on your location, legal structure, state filing fees, IRS application type, website setup, professional help, and fundraising tools. In the U.S., IRS Form 1023 and Form 1023-EZ also have user fees.
Can a nonprofit make money?
Yes. A nonprofit can earn money through donations, grants, programs, events, and services. The key difference is that extra money should support the mission, not private owners.
Final Thoughts
Starting a nonprofit begins with a mission, but growing it requires structure, trust, and consistency.
You need to validate the need, build the right board, handle the legal setup, create a website, and make donations easy for supporters.
Once your foundation is ready, your donation system becomes one of the most important parts of your nonprofit website. People should be able to understand your cause and support it without confusion.
If you are using WordPress, Paymattic can help you create donation forms, accept one-time and recurring donations, show campaign goals, and launch fundraising campaigns without custom development.
Start with the mission. Build the structure. Make giving simple.
That is how a nonprofit idea turns into real impact.

WordPress, automation, eCommerce and growth marketing specialist, a WordPress Core Contributor and Media Corps member blending storytelling with technology to craft strategies in SEO, email marketing, and beyond.
-

Kanban vs Scrum vs Agile vs Waterfall: What’s the Difference?
Get a clear, no-jargon breakdown of Kanban vs Scrum vs -

Virtual Meeting Etiquette: A Complete Guide to Better Online Meetings
Learn the essential virtual meeting etiquettes for professional virtual meetings. -

How to Create an Event Registration Form on WordPress in Minutes
Discover how you can easily Make An Event Registration Form.
Leave a Reply
You must be logged in to post a comment.