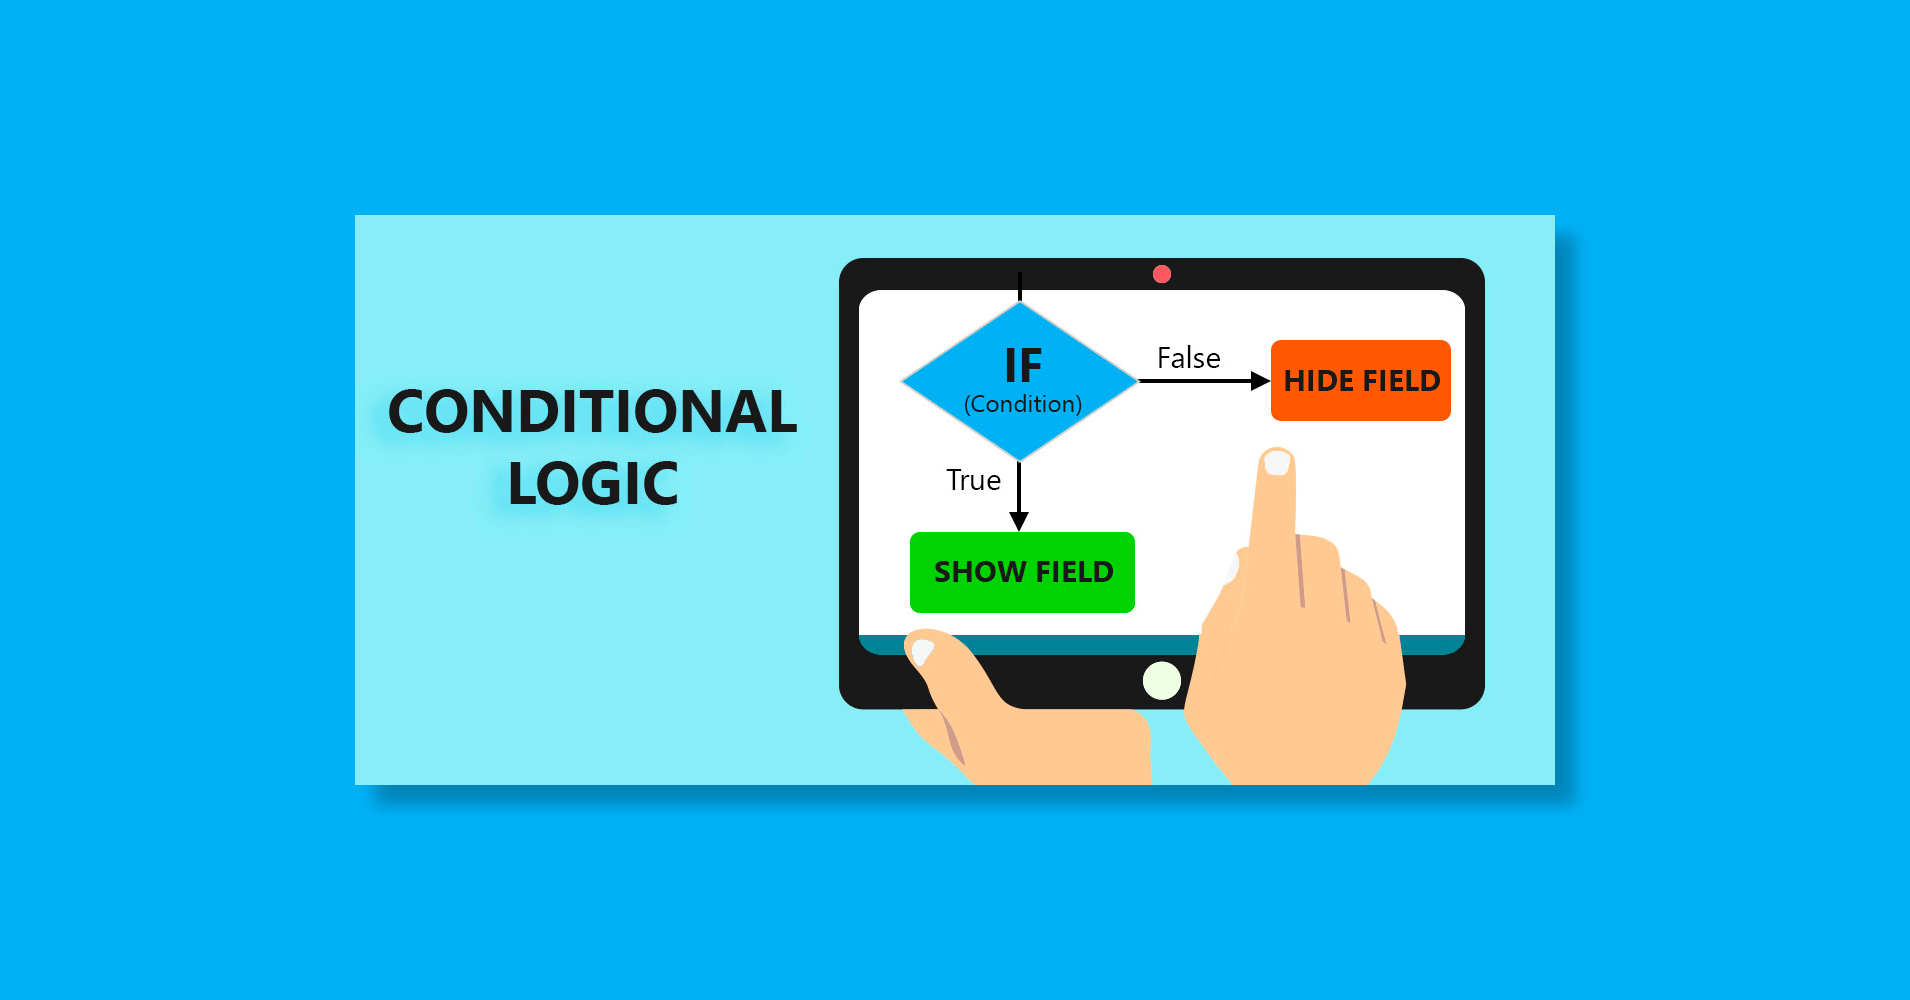
Understanding Conditional Logic Using Fluent Forms
Share :

We will never spam you. We will only send you product updates and tips.
Do you want your web form to behave based on what your users enter into the fields? Do you want to make your form much more interactive based on your user’s needs?
Conditional logic allows you to make this possible and you can change the form based on the users’ input, also you can send out notification emails, and so on. If you are someone who is responsible for maintaining any kind of online form which is used for interacting with your expected users. Then, this article is for you.
This tutorial-based post will go through conditional logic and how to use it.
What is the conditional logic?
Conditional logic is a logical command that makes the form dynamic according to the user’s feedback. It allows you to change your form’s view and behavior. Whether you want to show & hide any particular field or want to make an age restriction while registering the user, this feature will do that to serve your purpose.
There are countless possibilities to make your form look immeasurable and run more proficiently using this dynamic feature. In this post, I want to show how to make this happen using a web form. Let me show you an example of conditional logic for better understanding.
For demonstration purposes, I am using an example of a simple registration process using Fluent Forms and trying to show you how can we use conditional logic in this online registration form.
Fluent Forms Pro
Try Fluent Forms today and see for yourself!
Suppose, you are launching an event and to make this possible, you want the users to go through a registration process. You have only three input fields like the name field for first name and last name, an email field for an email address, and a text area to know why the applicant wants to join.
Here, casually you’re collecting 3 types of data(name, email, text-area for why to join) of all users who want to register but additionally, you want the address details of any particular organization’s members as well.
Along with the three queries (name, address, and why to join), you want to retrieve data about the address of a specific organization’s members like AuthLab using this form.
Apparently, there will be no address field in the form but using conditional logic you can make it visible based on the users’ inputs. It means the scenario will be like when users input their email id and the logic matches with the given input then an address field will automatically reveal in the form.
Let me show you practically how can you apply conditional logic to the form you created.
How to use it?
To implement conditional logic, a dynamic online form could be the best option for you. At first, you have to create a form with some basic fields. For instance, you have taken three fields like Name field(first name, last name), an Email field, and a Text area. See the below screenshot for better understanding –
Now, take a look at the preview of that configuration.
Now change the Element Level of Textarea to Why to Join. This is a pretty simple web form to collect leads that can place as a simple registration form. If you don’t set any conditional logic, this frontend will be displayed as it seems though.
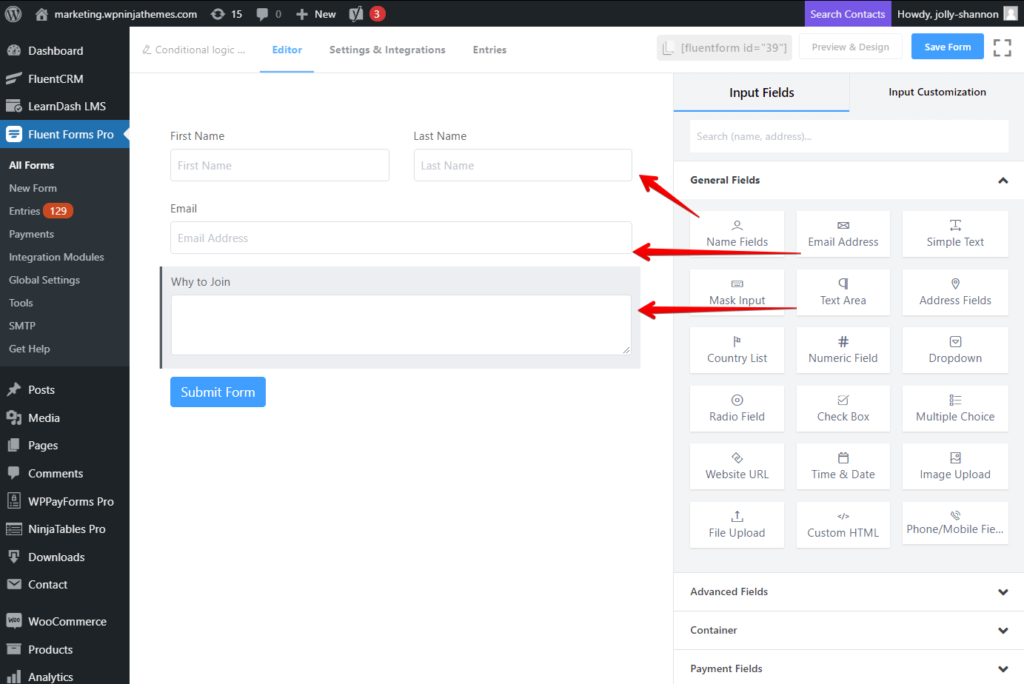
This is ok but you want something dynamic like the full address of specific members of an organization like AuthLab using this form.
Fluent Forms allows you to make it possible by implementing its conditional logic. It’s pretty cool to have such functionality in a form. To do so in the above-created form, you have to add the address field through clicking or drag & dropping as we want this to display at a specific moment.
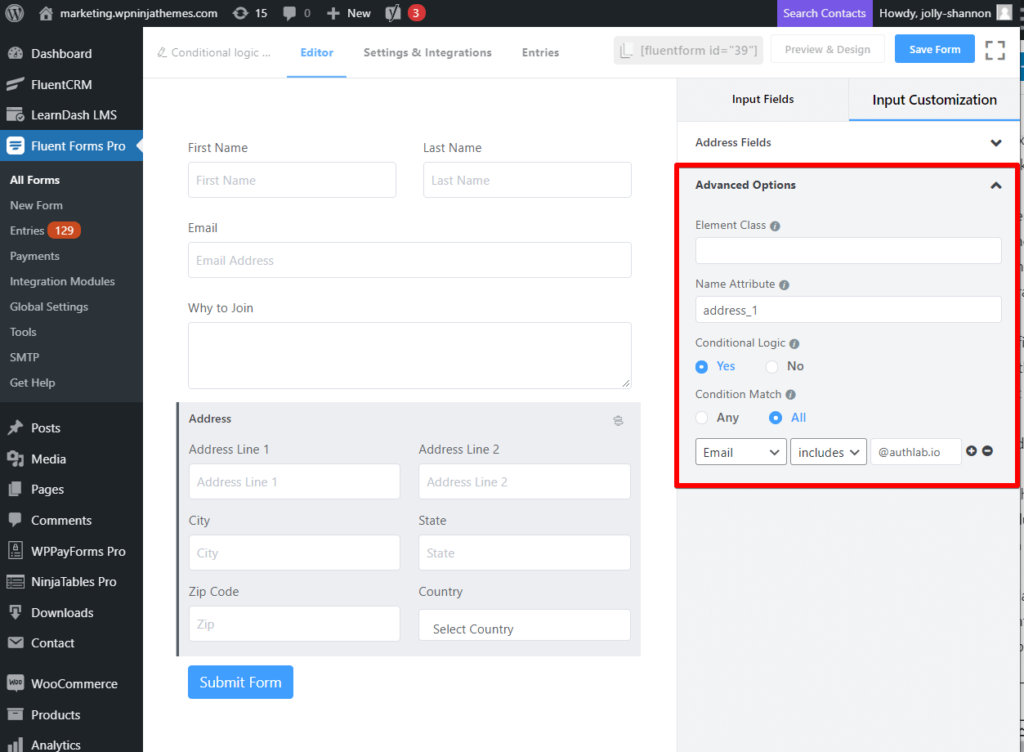
Next, drag and drop an Address field and go to its Input Customization section by clicking the edit icon.
Then go to the Advanced Option portion and click on the Yes button on the conditional logic section and once you click on Yes, this will change your form field’s behavior. You will find two more additional options below. One will appear as a form of radio button and another will appear as multiple dropdown menus.
Define the Condition Match option, by default, Yes will be checked. If you want that all the conditions should match as compulsory, you need to check option All. Set the last three drop-down options and fill up one input type field from the bottom of the Advanced Options section. For the drop-down, you can take a look for a better understanding.
In the first drop-down, click on the Email option, and in the second one, click on the includes option. And in the last input field, fill up with the text @authlab.io. Then you can have a look at the following back-end for better understanding.
At last, you will have a preview of this interface. When the user fills up the email form containing the domain name @authlab.io then dynamically an address input field will appear to collect the additional information.
This is how you can create and use basic conditional logic with the Fluent Forms. Now I am giving an explanation of complex conditional logic.
I think you got it! As per the complex and compound conditional logic.
Simply saying, when basic conditional logic happens over and over again, it becomes a complex conditional logic. It means, in a complex one, multiple conditional logic can be implemented in different input fields. By using Fluent Forms, you can easily manage basic and complex conditional logic simultaneously without facing any hassle.
But that’s not all. There are several other applications of conditional logic in Fluent Forms that will make your WordPress form more dynamic. Here’s 6 of them.
Conclusion
In this tutorial, I wanted to make you understand what is conditional logic and how it works using a practical example. This might help you to use Fluent forms as a whole. If you still need anything to share, feel free to ask in the comment section below. I would love to cooperate with you.
You can watch the video to understand the whole process
If you liked this article, then please subscribe to our YouTube Channel for a WordPress resource guide. You can also find us on Twitter and Facebook.





Leave a Reply
You must be logged in to post a comment.