Optimize Your FluentBooking Free Plan Without Spending a Dime
You’ll be wondering why people are still managing bookings manually after knowing that 70% of customers prefer online booking.
Not only that, no shows drop by 29% when there are auto-reminders with your booking system.
Now the question came into your mind, “How do I start scheduling in WordPress for free?”
That’s where I’m taking you with a better and affordable option.
But first, identify your needs. Are you a small business owner? Do you provide services? You’re a freelancer?
If the answer to all these questions is “yes,” then this article is for you.
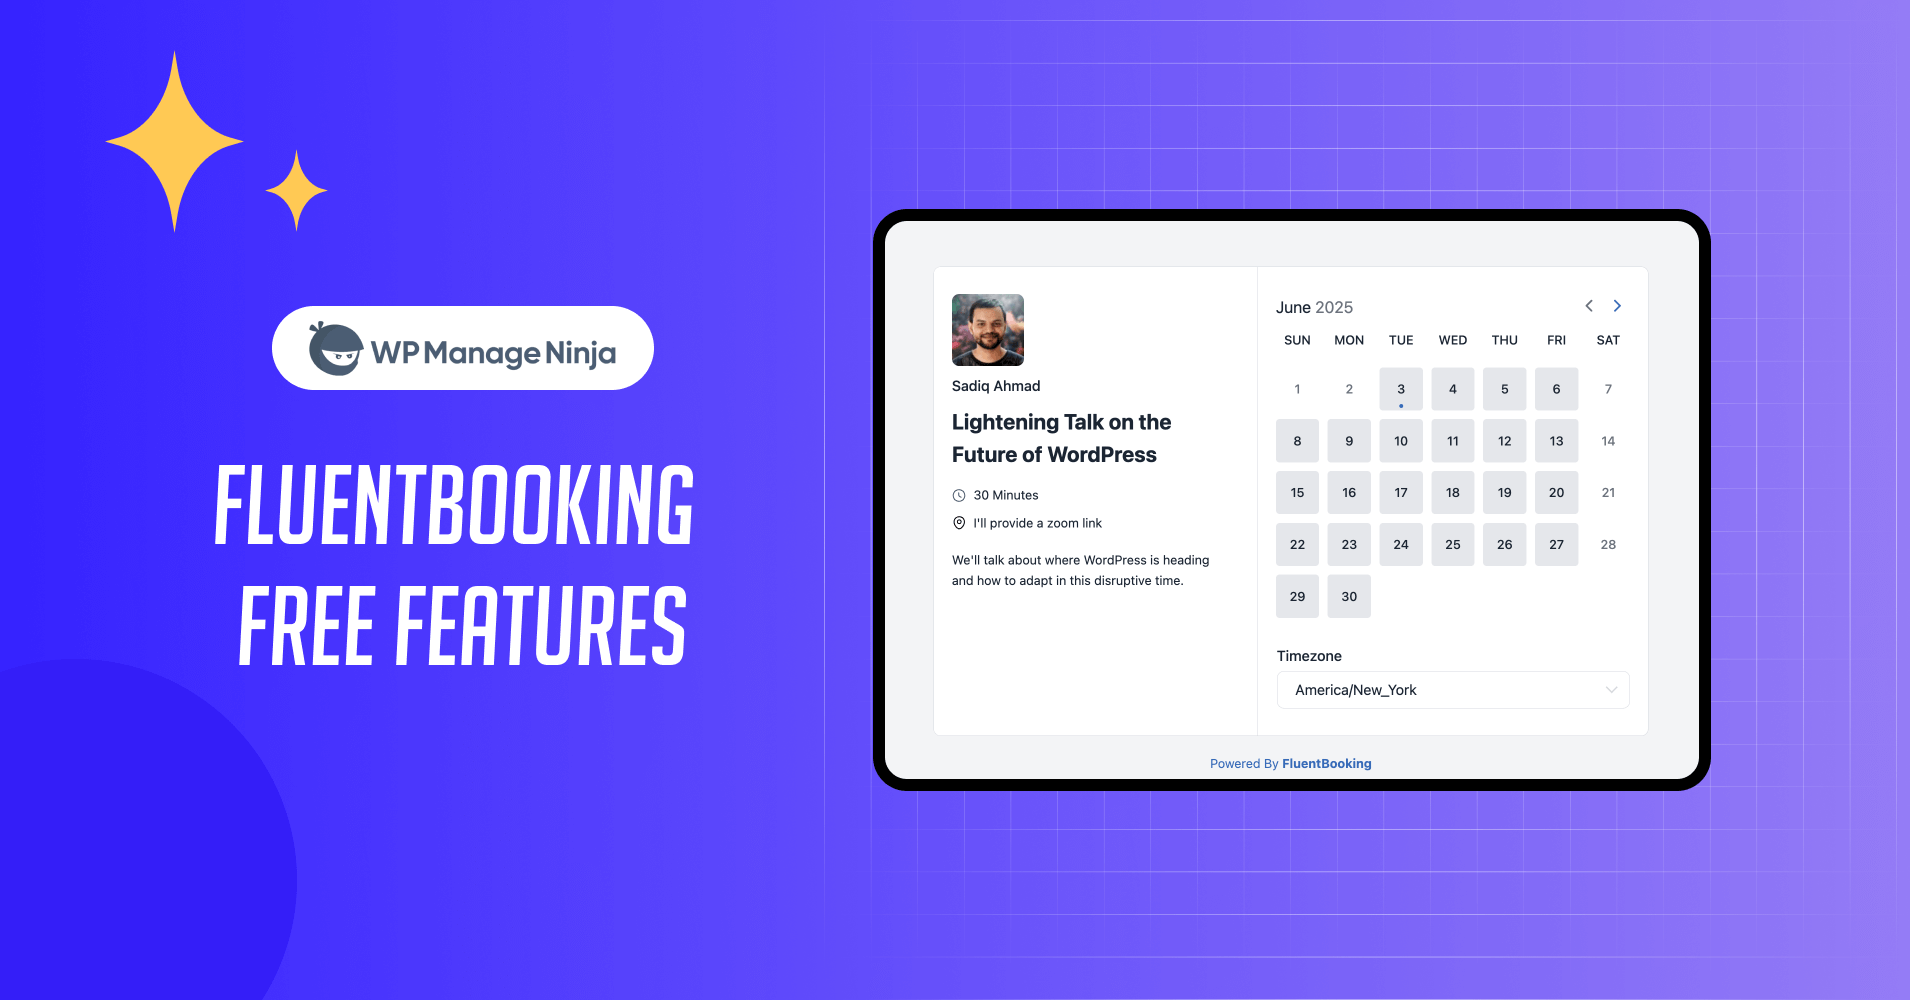
With FluentBooking, a WordPress appointment and scheduling plugin, you can optimize your booking and communicate with your clients with ease and comfort.
You set your preferred timing and allow people to contact you on your schedule, without juggling between scattered routines.
How FluentBooking works
FluentBooking is a WordPress plugin, so everything happens directly with your WordPress website. You don’t need to redirect clients to external booking pages or switch multiple platforms.
Let me show you the simple process of how it works:
- Install the free plugin from the WordPress repository
- Create booking events with custom names and descriptions
- Set up your availability via the integrated calendar
- Add questions you require answers to from your invitees
- Configure notifications for SMS and email
- Share the schedule on your pages or posts
- Let clients book directly through your website
- Receive automatic notifications for all booking activities
No coding skills required. The plugin handles scheduling, sends confirmation emails, and manages your calendar automatically.
You don’t have to be a coding expert to manage all these steps. These are easy to follow and FluentBooking setup wizard will lead you the path.
Who Should Use FluentBooking’s Free Plan?
The free version works perfectly for:
- Small business owners offering services like consulting, coaching, or tutorials
- Freelancers managing client meetings and project kickoffs
- Service providers such as therapists, trainers, or designers
- Event organizers handling workshop registrations and RSVPs
- Solo entrepreneurs starting their booking journey without monthly fees
If you run a WordPress site and need basic booking functionality, the free plan covers your essential needs.
7 ways to maximize FluentBooking’s free features
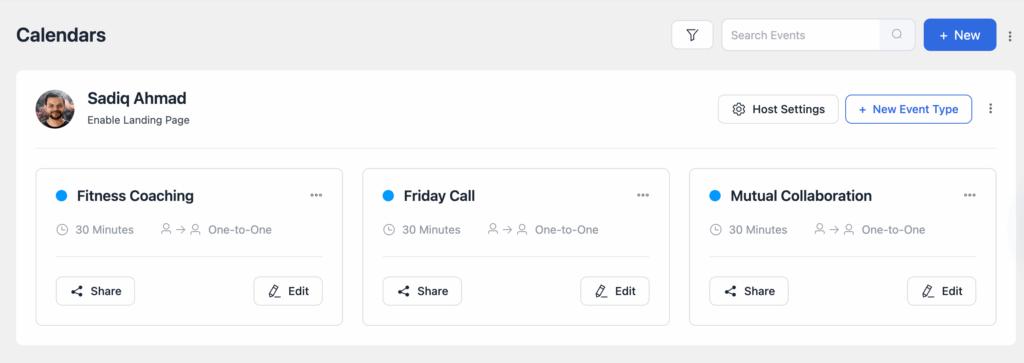
1. Manage multiple hosts and calendars
With free FluentBookings, you can’t integrate a calendar (Google Calendar, Apple Calendar, etc.). But you can use the default calendar and multiple hosts.
This way you can manage your bookings even if you want to use it for your team.
Once you’ve gotten yourself familiar with the environment and have done some bookings, you can upgrade to paid plans which will unlock advanced functionalities for better appointment management.
How to use it:
- Every WordPress user can be added as a host
- You can create multiple events for each host
- Create separate calendars for different services
- Let each host set their own availability
- Avoid scheduling conflicts automatically
Perfect for: Teams, multi-service businesses, or anyone offering different types of appointments.
2. Set flexible availability rules
Control exactly when clients can book appointments with detailed availability settings. From the Availability tab, you can add new schedules.
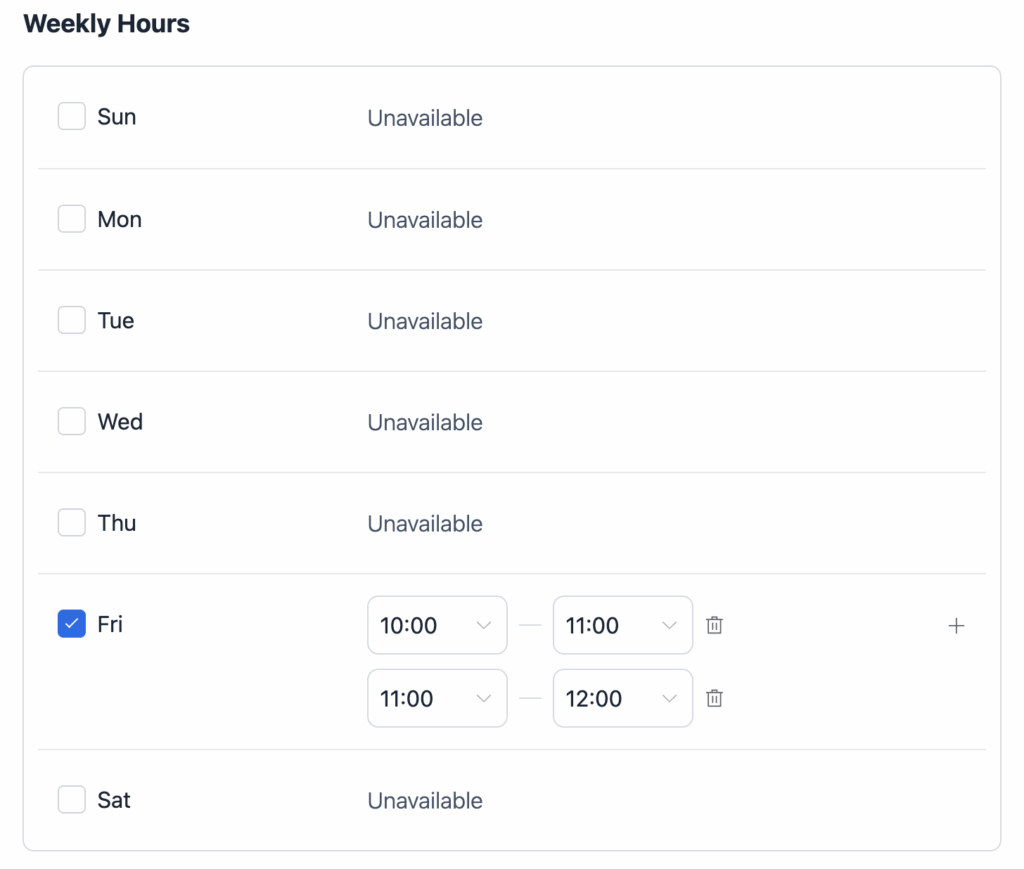
When you create a new event, you can choose your availability from the schedules you’ve created to avoid conflicts.
Users can’t select a schedule unless it’s offered via the calendar. That’s how you can control and manage your meeting time without chaos.
What you can do:
- Set weekly working hours and days
- Block out unavailable periods
- Add date overrides for holidays or special events
- Offer multiple meeting durations (15 min, 30 min, 1 hour, etc.)
- Add buffer time between appointments
- Limit how many bookings per day or week
Perfect for: Maintaining work-life balance and preventing double-bookings.
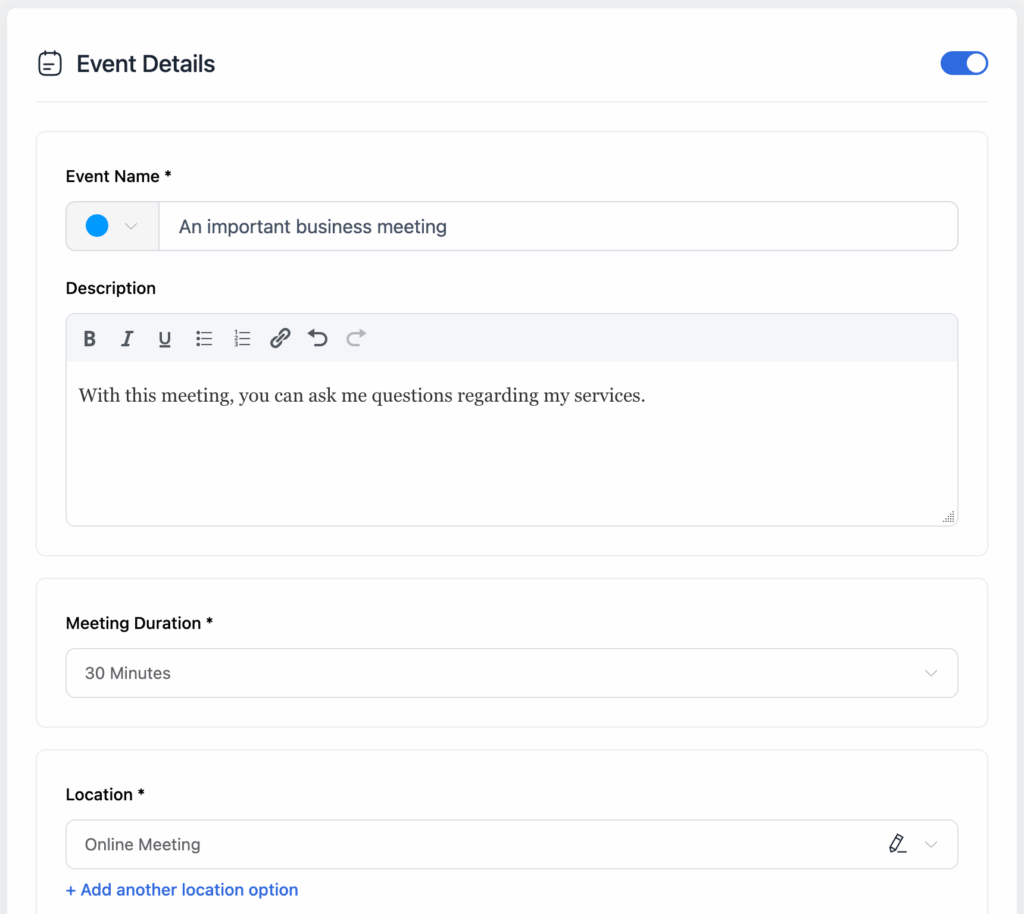
3. Create custom event types
Design different booking experiences for different services. This will help you to provide customized services to particular groups.
As a business owner, you may work across various niches. By offering separate events, you can keep your bookings segmented and streamlined.
For example, if you offer courses, you may create events for different student groups. Or, you can keep separate bookings for each course.
Key features:
- Give each event a clear name and description
- Choose meeting locations (online, in-person, phone, custom)
- Set specific durations for each service type
- Add custom booking questions
- Automatic time zone conversion for international clients
Perfect for: Businesses offering multiple services or working with global clients.
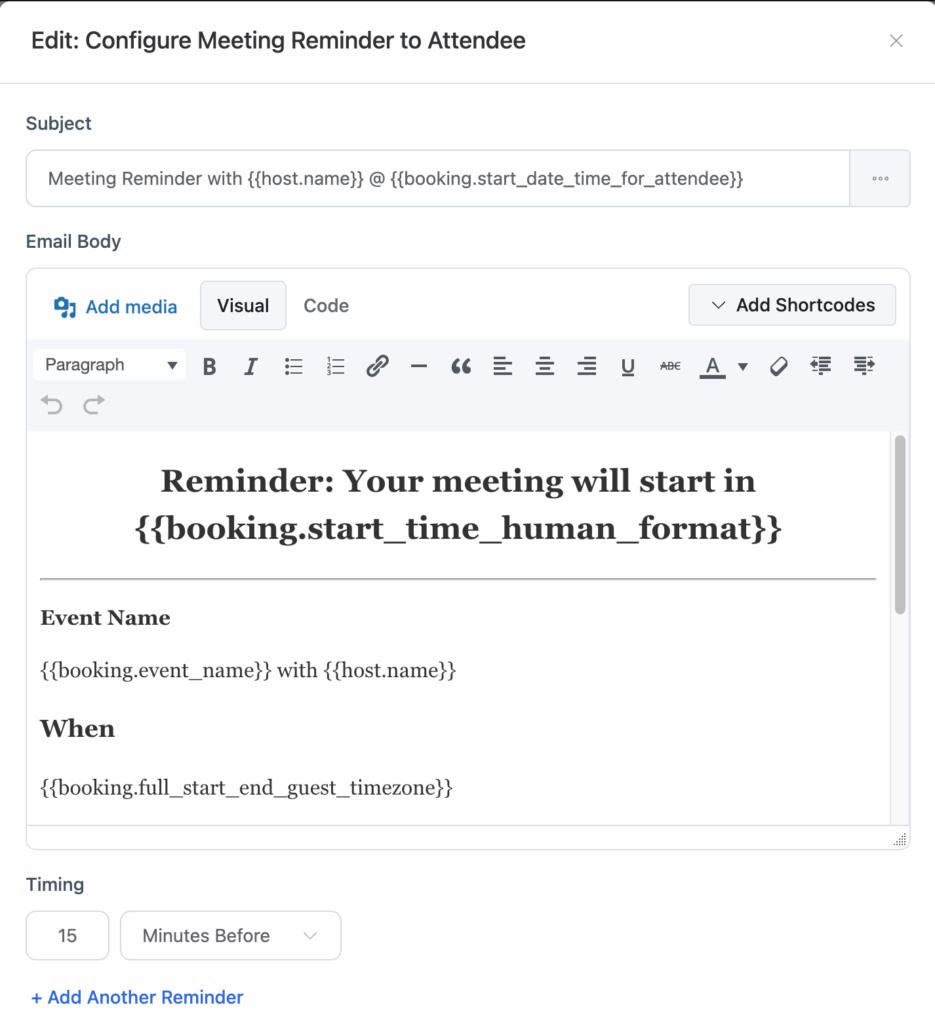
4. Automate email notifications
While SMS notification is a pro feature, you can set email notifications for your attendees.
Never miss an appointment or leave clients wondering about their booking status. This way you can stay up-to-date with your attendees.
From the email notification settings, set up your email with a proper title and message prepared with the right shortcodes.
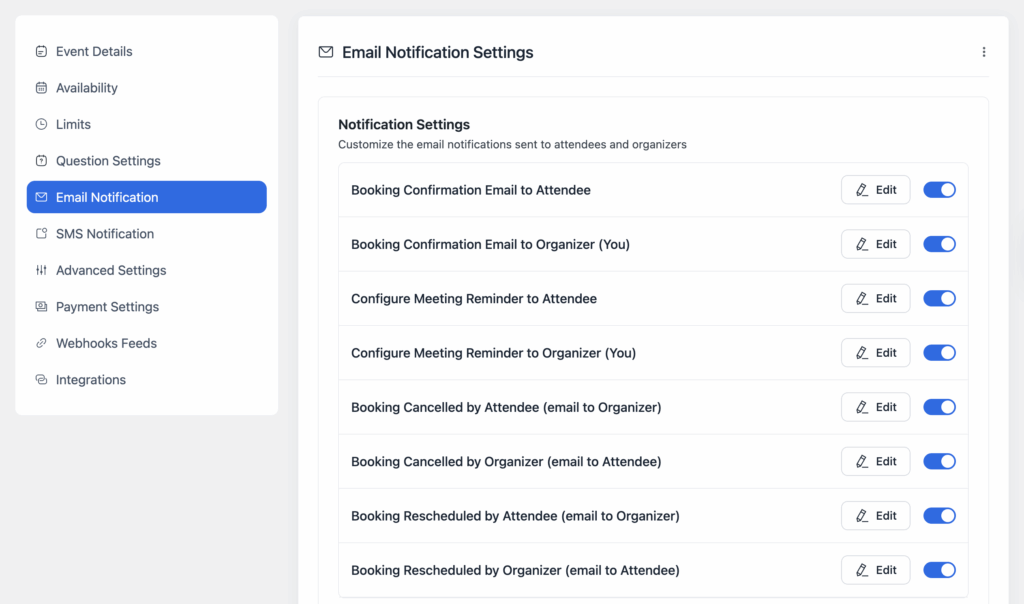
You can even set reminders to inform your participants to avoid any chance of forgetting. They’ll get the email right before the day of appointment (or anytime before you set).
Automatic emails for:
- Booking confirmations
- Reminder for the appointment
- Cancellation notices
- Rescheduling updates
- Approval requests
- Submission confirmations
Perfect for: Professional communication and reducing no-shows.
5. Share your booking details across multiple places
The best way to place your calendar is to embed it on a page. But that may not be the perfect scenario for all. In that case, you can use other amazing options FluentBooking provides.
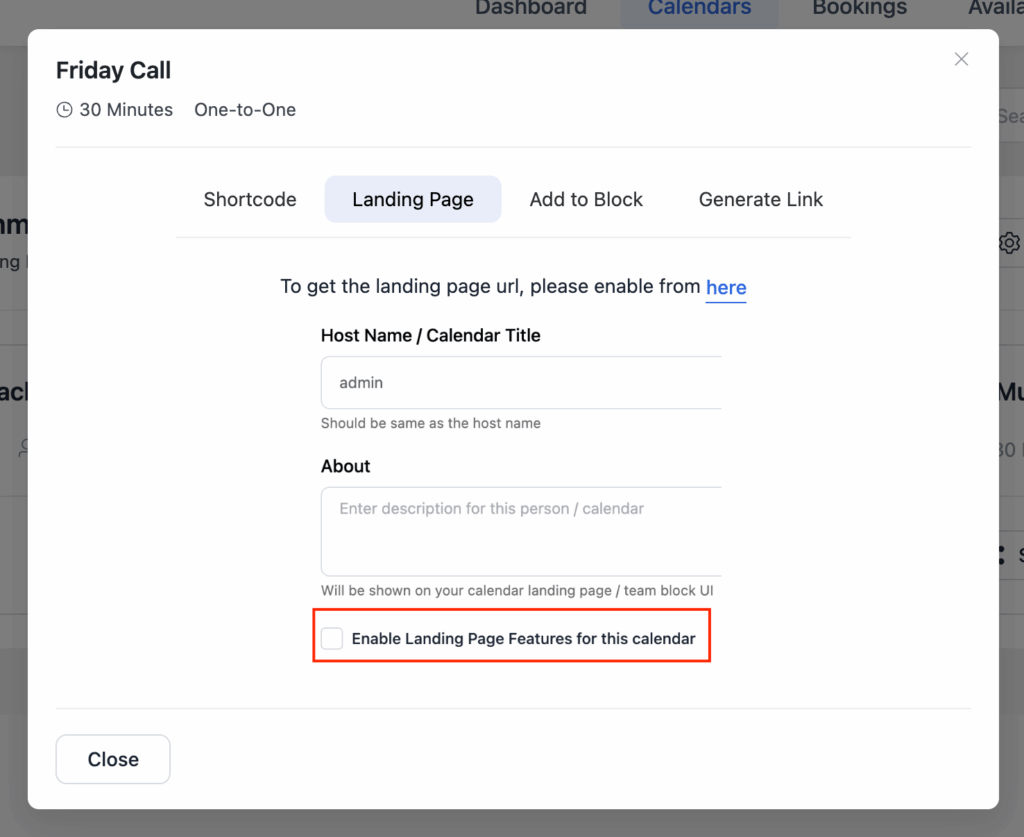
You can either use the Gutenberg block to easily include it with your WordPress editor or use the landing page feature to share the calendar without creating a page or post.
By sharing your calendar, you’re maximizing the opportunity to grab attention from your target audience. Let’s say you can use the link generation option by stating parameters such as date and time.
Where to:
- Pages or posts via shortcode
- Post anywhere with the landing page URL
- Gutenberg block to add easily to the editor
- Generate a link with URL parameters
Perfect for: Sharing the calendar to as many places as possible to ensure a higher visibility.
6. Track your booking performance
The built-in dashboard shows you important metrics without extra tools.
Making critical decisions about your business can now be more informed, as you get a quick overview of your appointment.
FluentBooking displays highlighted information such as total bookings or completed bookings and how many clients you served so far.
Not only the performance on your previous bookings, but you can also see your upcoming and latest booked meetings
What you can monitor:
- Total bookings received
- Completed appointments
- Canceled bookings
- Booking trends over time
- Upcoming meetings at a glance
Perfect for: Understanding your business patterns and making data-driven decisions.
7. Enhance with custom forms
Integration with Fluent Forms unlocks advanced booking experiences.
From the question settings of FluentBooking, you can see that only a limited number of questions can be set with the free version.
But when you integrate Fluent Forms, you unleash more input fields. Use the fields to collect more information that will help you both be prepared for the upcoming discussion.
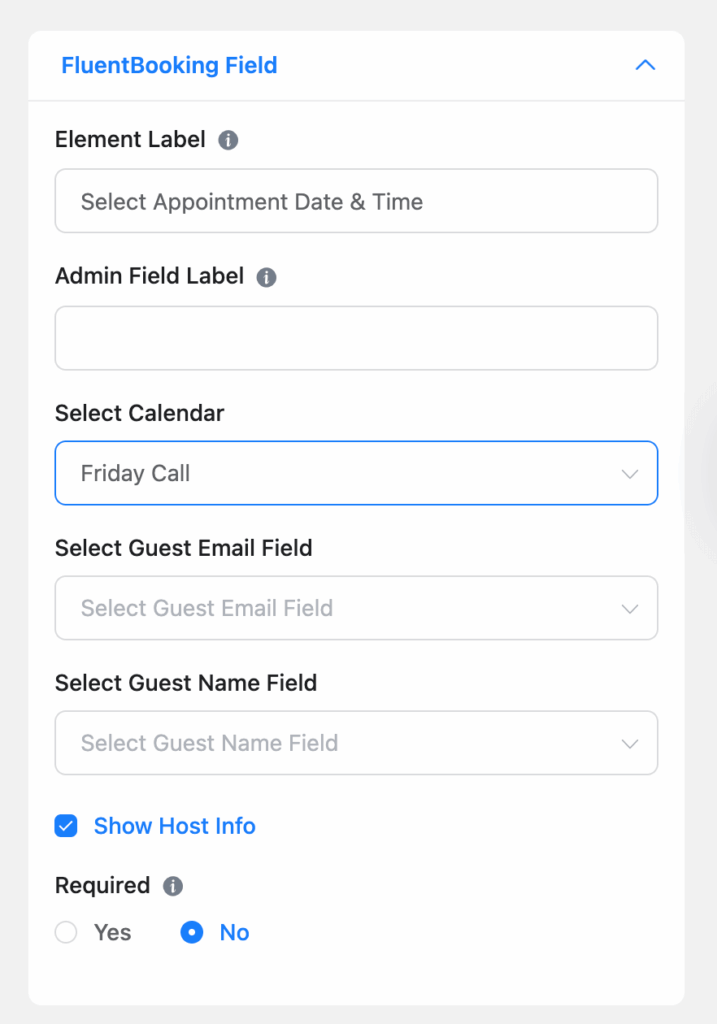
To do that, go to FluentForms, head to the Advanced Fields, and find the FluentBooking field. Alternatively, you can look for it from the search bar.
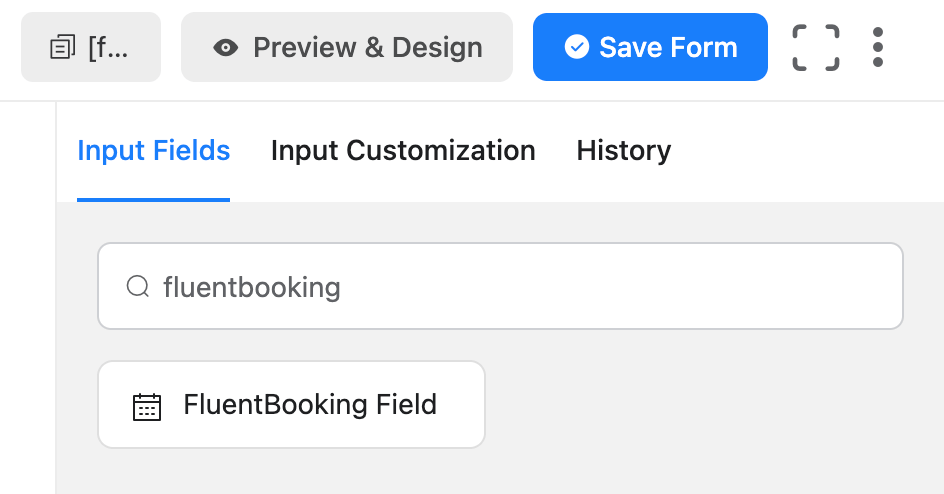
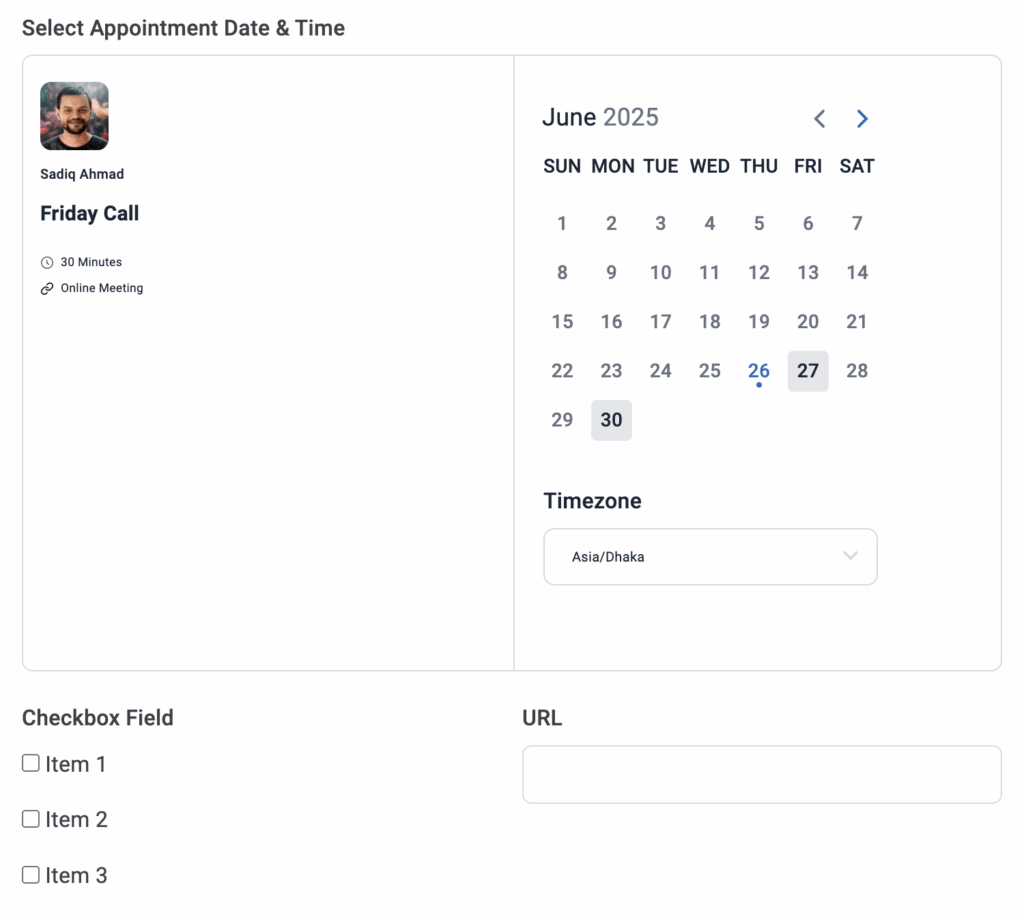
When you add the booking field, it will show you relevant options. The main part is to choose the calendar you want to display.
Under the Select Calendar label, you’ll find all your calendars.
After adding and customizing all fields, save the form and share it across your website. Fluent Forms has the similar options for sharing as FluentBooking.
Advanced features:
- Create branded booking forms
- Add calendar fields to existing forms
- Collect payment information (for processing elsewhere)
- Build multi-step booking processes
- View the form data inside the booking details
Perfect for: Professional websites that need branded, customized booking experiences.
What’s missing from the free plan?
While FluentBooking’s free version is generous, some advanced features require upgrading to Pro:
- Calendar integrations (Google Calendar, Outlook, Apple Calendar, Nextcloud Calendar)
- Payment processing (Stripe, PayPal, and Offline Payment)
- Video conferencing (Zoom, Google Meet, Microsoft Teams)
- SMS notifications via Twilio
- Group meetings and round-robin scheduling
- Advanced integrations with WooCommerce and Zapier
- Team
- One-off events
For most small businesses and freelancers, these limitations won’t matter initially. You can always upgrade later as your needs grow.
Getting Started: Your First FluentBooking Setup
1. Install the plugin
- Go to your WordPress admin dashboard
- Navigate to Plugins > Add New
- Search for “FluentBooking”
- Install and activate the plugin
2. Configure basic settings
- Set your time zone
- Add your business information
- Configure email notification settings
3. Create your first event
- Define the event name (e.g., “30-Minute Consultation”)
- Write a clear description
- Set the duration and location
- Add any booking questions
4. Set your availability
- Choose your working days and hours
- Add buffer time between meetings
- Set any date overrides for holidays
5. Add booking to your site
- Use the FluentBooking block in Gutenberg
- Add shortcodes to pages or posts
- Customize the appearance to match your brand
Tips for Success with FluentBooking
Keep it simple: Start with basic settings and add complexity as needed.
Test everything: Book a test appointment to ensure the process works smoothly.
Write clear descriptions: Help clients understand what they’re booking.
Set realistic availability: Don’t overbook yourself or offer impossible time slots.
Monitor your analytics: Check your dashboard regularly to spot trends.
Prepare for growth: The free plan grows with you, but know when it’s time to upgrade.
FluentBooking vs. Other Free Booking Tools
Unlike Calendly’s free plan (limited to one calendar and basic features), FluentBooking offers:
- Unlimited calendars and hosts
- More customization options
- Direct WordPress integration
- No FluentBooking branding on bookings
- Advanced form integration capabilities
The trade-off is that you need a WordPress site to use FluentBooking, while Calendly works as a standalone service.
When to Consider Upgrading to Pro
Consider FluentBooking Pro when you need:
- Calendar synchronization with Google, Outlook, or Apple calendars
- Payment collection at the time of booking
- Video meeting integration for virtual appointments
- SMS reminders to reduce no-shows
- Team scheduling with round-robin assignments
- Advanced reporting and analytics
For most users, these needs develop after establishing a steady booking flow with the free version.
Conclusion
FluentBooking’s free plan offers everything most small businesses and freelancers need to manage online bookings professionally.
With unlimited calendars, flexible availability settings, automated notifications, and powerful customization options, you can create a booking system that rivals paid alternatives.
The key is starting simple and expanding your setup as your business grows. Install FluentBooking today, configure your first booking event, and start turning website visitors into scheduled appointments.
Ready to get started? Download FluentBooking from the WordPress plugin repository and transform your website into a booking powerhouse – without spending a penny on monthly subscription fees.

Sadiq Ahmad is the Marketing Lead of WPManageNinja. As a WordPress addict, he loves to write all about WordPress: themes, plugins, blogs, and tutorials. Digital marketing and SEO are his other strong suits. And he is not online only when he is exploring new dishes in local restaurants or burning carbs in the gym.
-

How to Sell Videos Online With WordPress (Step by Step) in 2026
Learn how to sell videos online with WordPress using FluentCart -
Introducing FluentCRM 3.0 Beta: Powerful, Flexible, and Ready for the Future
Introducing FluentCart 3.0 Beta. Biggest update awaiting for FluentCRM with -

Top 10 BookingPress Alternatives: WordPress Booking Plugins (2026)
Discover the best BookingPress alternatives for WordPress. Compare features, pricing,
Leave a Reply
You must be logged in to post a comment.