
Mapping Meta Fields with Meta Keys in Fluent Forms
Fluent Forms comes up with a wide range of advanced features & Meta Fields Mapping is one of them. A post meta field is a WordPress object that stores extra data about a post. Fluent Forms lets you map these fields into your form.
Follow this simple guide to learn how to apply this feature in your form.
Meta Fields Mapping with Post Form
- The first step is creating a Custom Post Form or using an existing one. To know more about this feature, simply read this documentation.
- Note that when the Field Group is not Post Type, then meta fields mapping is required. Since the advanced custom fields(ACF) mapping will not work if the meta fields are not mapped for the other field groups.
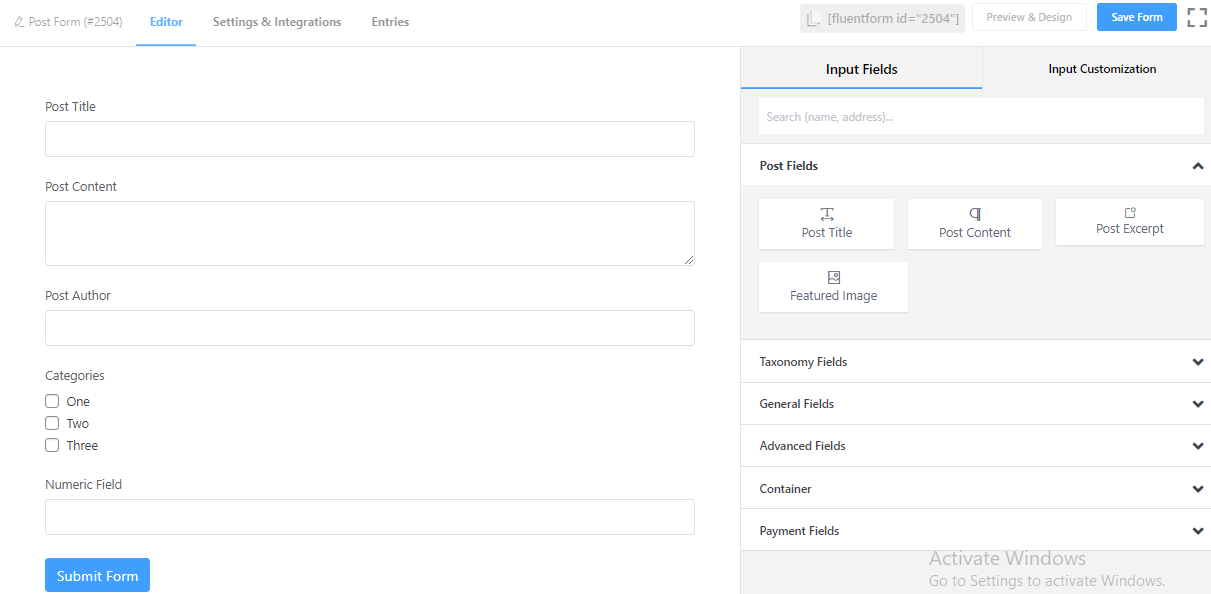
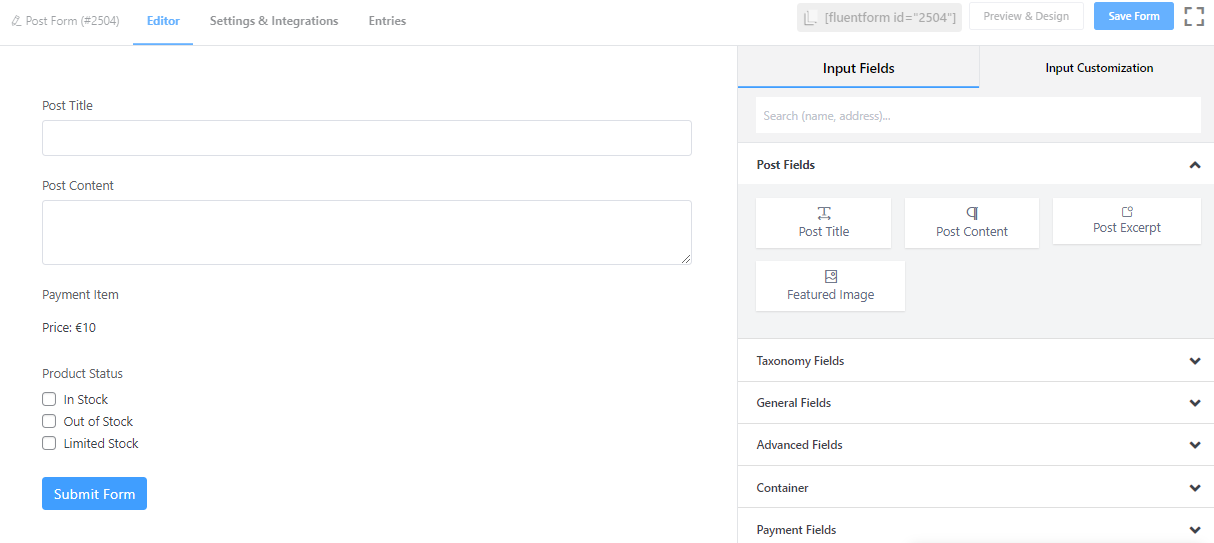
- In this example, the post form has a Post Title, Post Content, Categories, Simple Text & Numeric Field. Like the example given below –
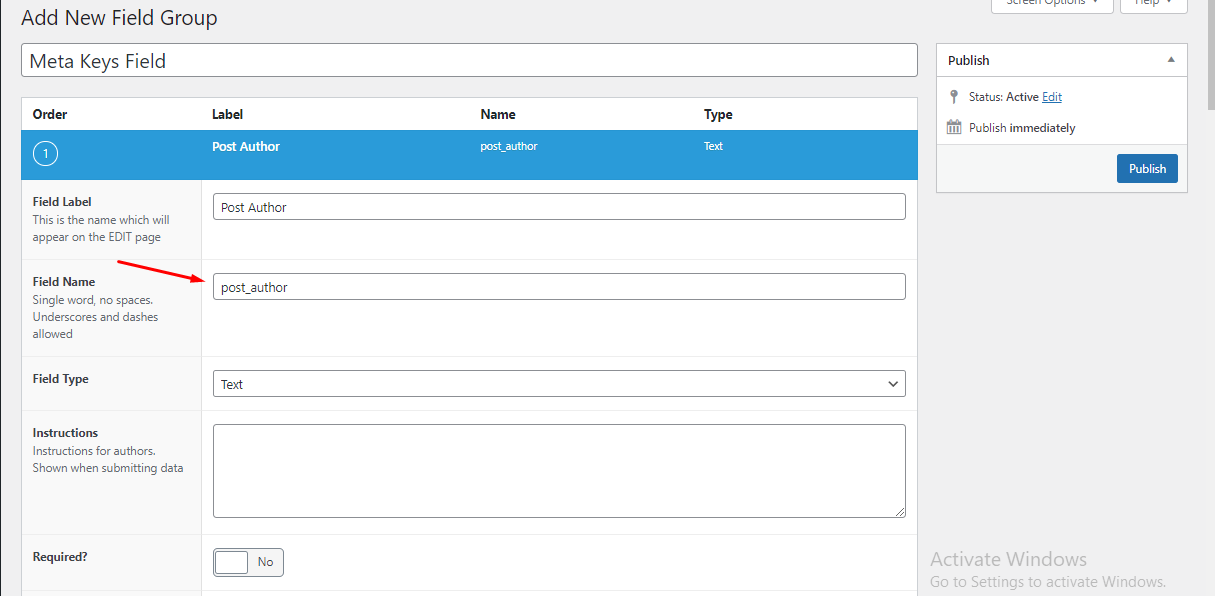
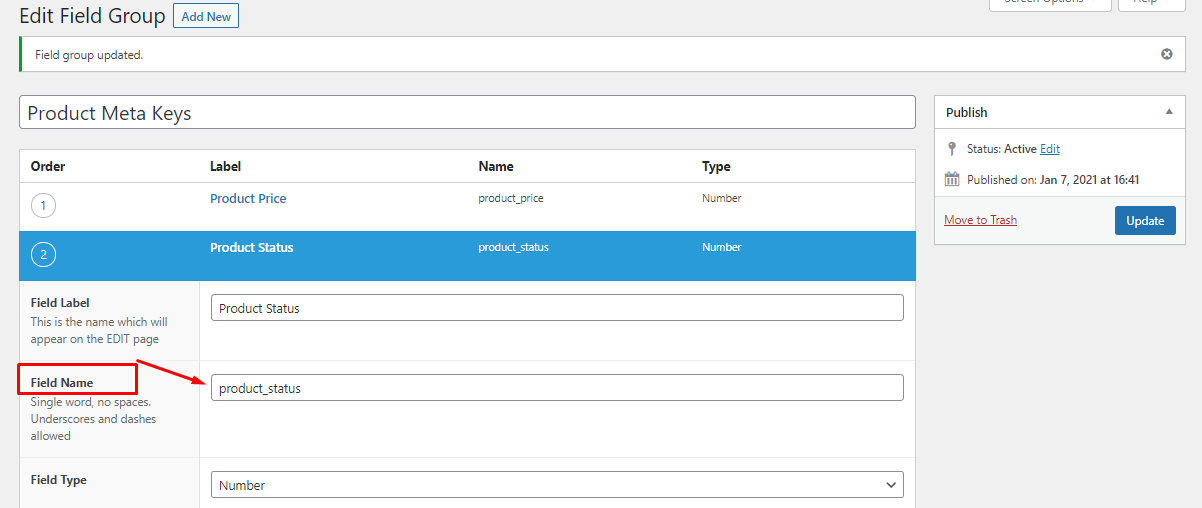
- To get the Meta Keys, you have to copy the Name of the fields from the Field Group added using the Custom Fields plugin.
- And then, paste it on the meta keys field in the Post Creation Feed, by clicking on the Add Meta Field button.
- So, ensure you have the field group added according to the fields in your form.
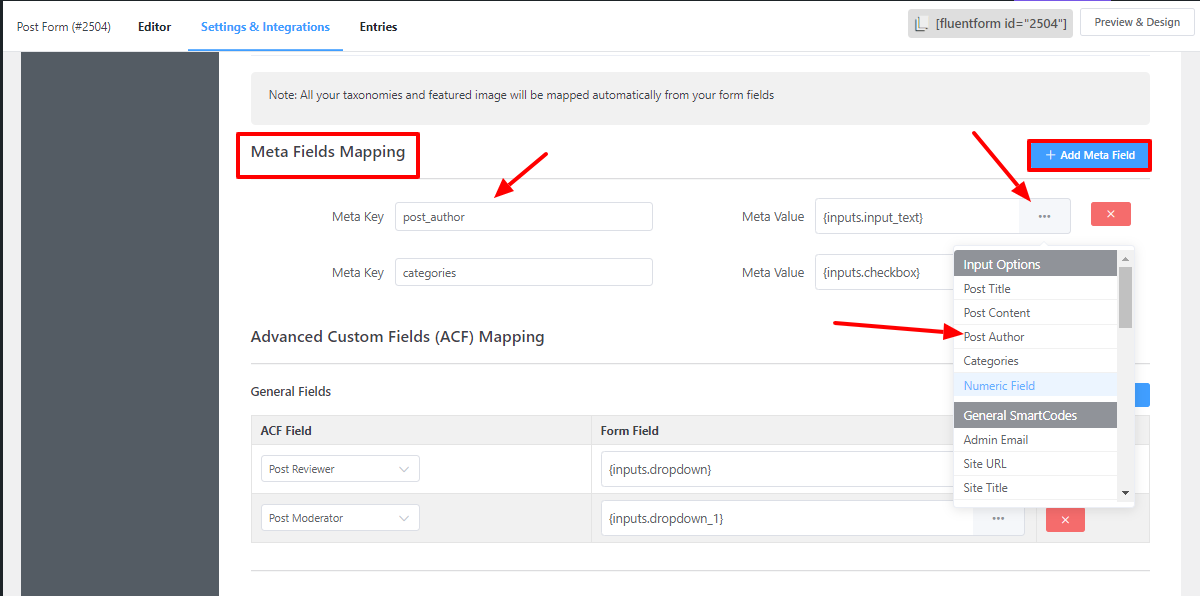
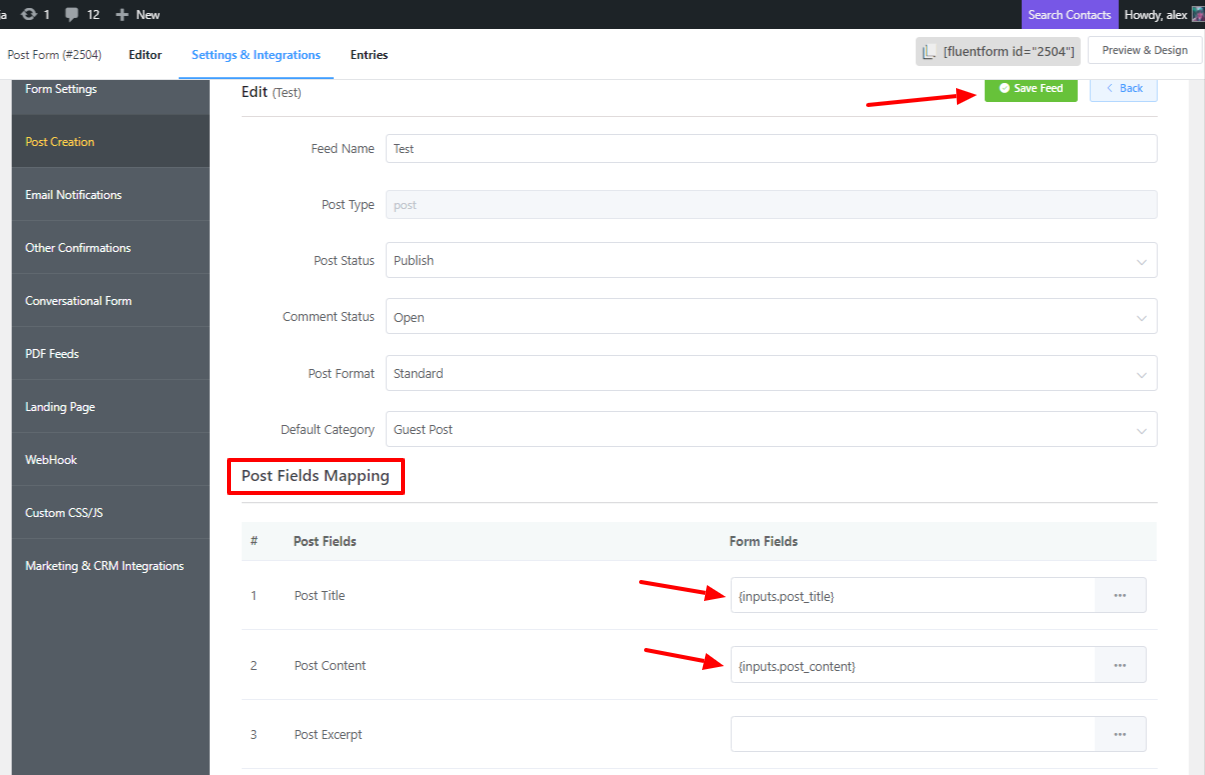
- Keep in mind that you also need to map the Post Fields before mapping the meta fields.
- After you’re done adding these fields, click the Save Feed button. Now fill out the post form and click on Submit.
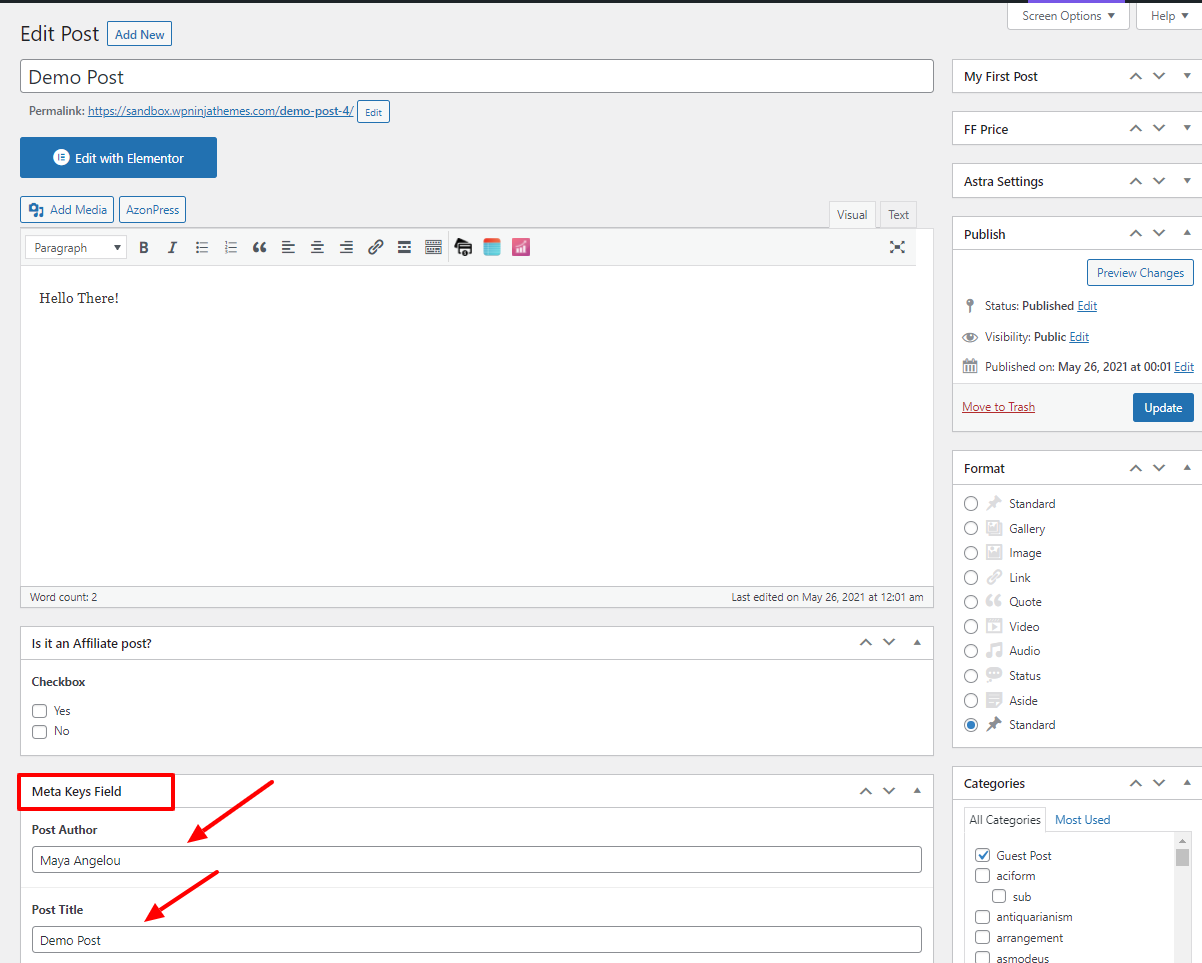
- Next, go to the Posts page to check if the post has been submitted. You will find the ‘Demo Post’ here, then click on this post title.
- Here, the Post Author & Post Title fields appear along with their values.
Meta Fields Mapping with Product Form
- For the product form, you have to create another post form.
- And for demonstration purposes, the form includes Post Title, Post Content, Price & Product Status fields.
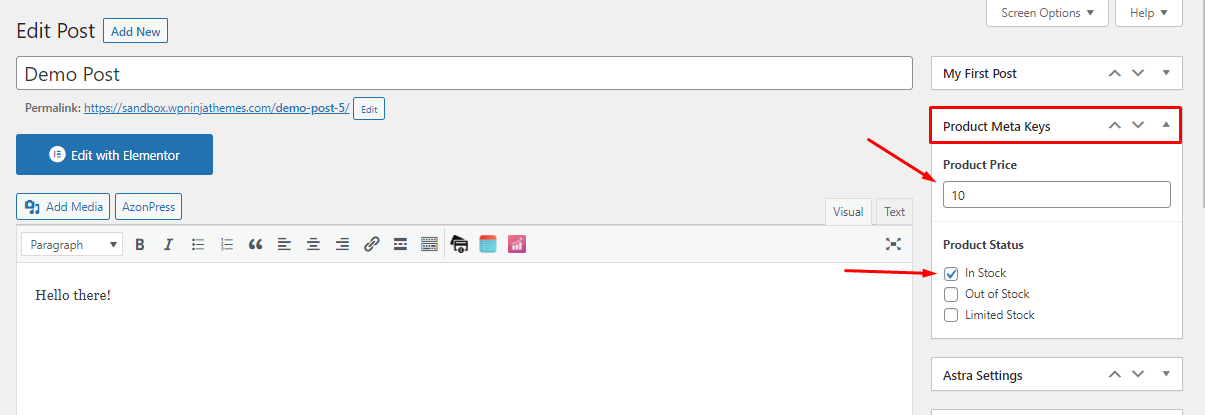
- Now it’s time to add the field group for the Product Price & Product Status fields. That was done in the same way for the post form.
- Then go to the Post Feed of your form, and copy the Name of the fields from the field group. Click on Add Meta Field & paste this into the Meta Key option in the Meta Fields Mapping section.
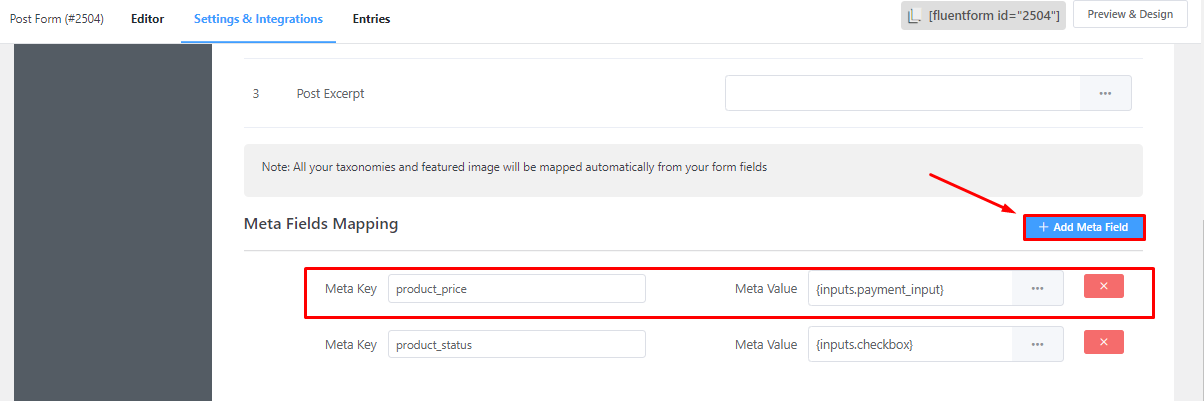
- And don’t forget to click the Save Feed button after including all the meta keys.
- Then go back to your product form to fill it up with some data. Like the example given below-
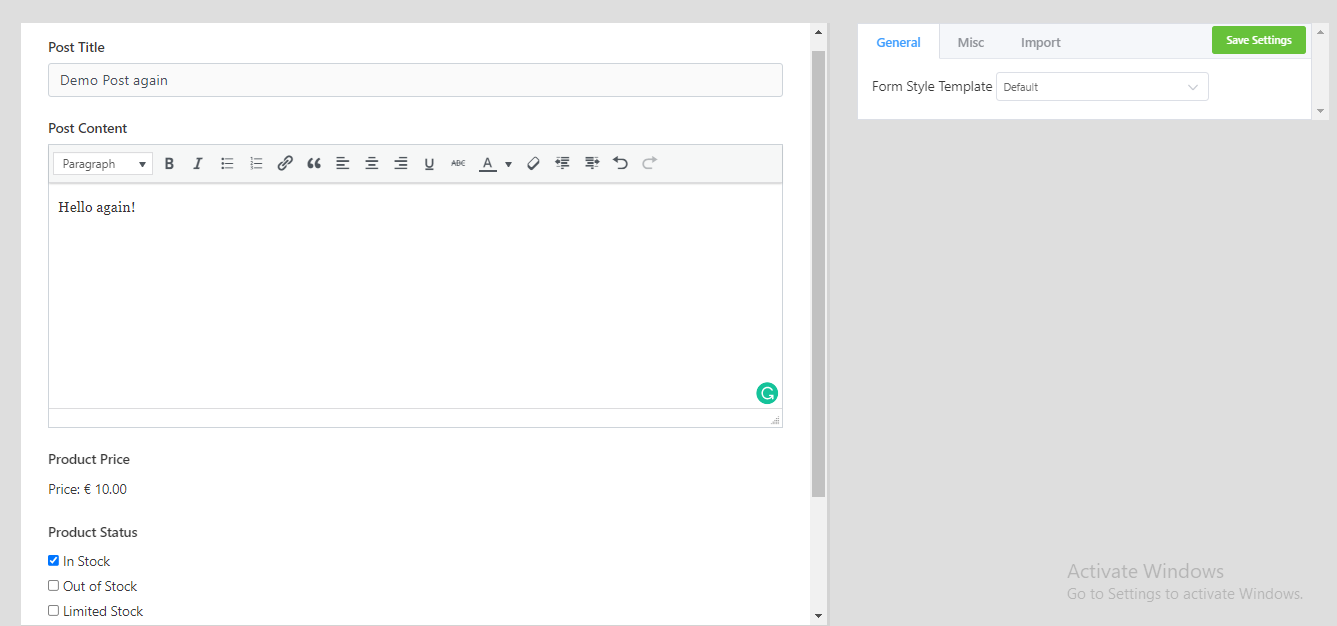
- After that, go to the Posts page to check whether the data has been submitted.
- You will find ‘Demo Post again’ included on the Post Edit page, where you can see the Product Title & Product Status values.
- So, this is how you can map meta fields using meta keys in Fluent Forms!